Summary: This post is about how to edit GoPro videos on Mac with 3 free GoPro editors. Tutorials include both basic edits and advanced GoPro action video editing tips. Regardless of your needs and editing skills, the best tool for GoPro editing on Mac after numerous tests turns out to be VideoProc Vlogger.
The way of video recording has been changed since the birth of GoPro. You can carry this tiny and rugged camera whenever and wherever you go. You just need to enjoy your life to its fullest, and it'll capture every moment for you. But for the same reason, editing GoPro videos gets harder – organizing a story out of a huge amount of clips, modifying the flawed footage...
But don't worry, read the step-by-step guide on GoPro editing on Mac, and you can make cinematic videos with ease.
Preparation: Get your GoPro files ready for editing on Mac.
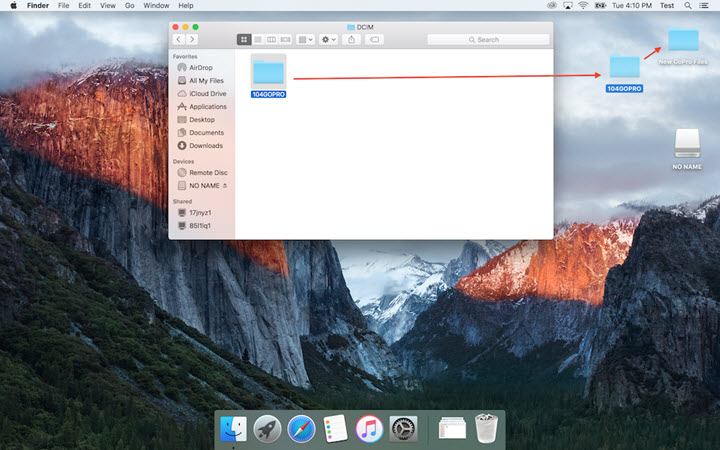
- Connect your GoPro to your MacBook Pro/Air or iMac.
- Copy the GoPro files to the desktop on Mac for editing.
1. How to Edit GoPro Videos on Mac with VideoProc Vlogger
VideoProc Vlogger is a free yet capable video editor targeting GoPro video editing on PC and Mac. The main mission of this software is to help users of all levels to create cinematic videos out of any footage. It features an intuitive UI, streamlined workflow, and a plethora of tools for quick editing (cut, crop, rotate, transition…) and professional audio and color editing.
It's hard to believe but true that all your editing needs for action videos, travel vlogs, GoPro time lapses, and family videos will be fulfilled in the free video editing program.
Highlighted Features for GoPro Editing on Mac
- Run natively on all the latest Apple Silicon M1 M2 Series Intel-based Macs.
- Take full advantage of Apple silicon chips to achieve up to 300% performance.
- Handy presets for GoPro: lens correction, cam movements, speed editing, and color grading.
- Support all files from GoPro: 5.3K 60pfs, 4K 120fps, RAW, image sequences, HEVC, H.264…
- High-quality UHD 4K output without watermarks or any other limits.
- Level-3 hardware acceleration and optimized software acceleration.
Now let's download and install VideoProc Vlogger and start editing your GoPro video on Mac with it.
Step 1. Import GoPro videos from Mac to VideoProc Vlogger.
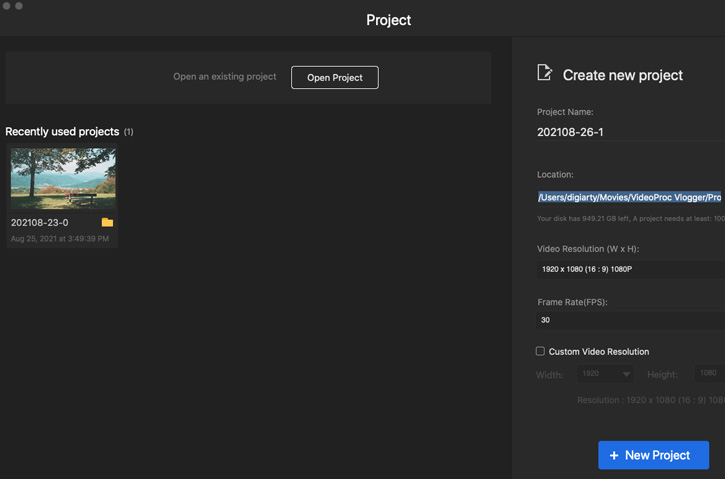
Open VideoProc Vlogger on your Mac. Finish settings of file name, location, resolution, and frame rate to start a new editing project. Hit the plus icon in the media library to load GoPro clips from your Mac to the software.
Step 2. Split and cut GoPro videos.
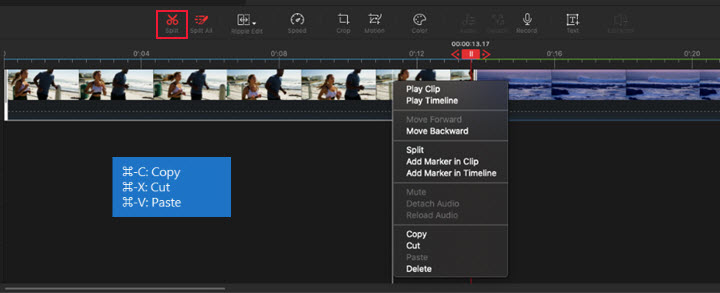
Drag and drop these clips from the media bin to the video track in the timeline to start editing. Browse all the clips in the timeline and move them to change the order. Next, put the playhead where you want to split the video and hit the Split button above the timeline. Alternatively, you can right-click on the clip, and choose Split in the menu.
Step 3. Fix GoPro lens distortion.
If your GoPro footage looks distorted, move to the Inspector panel beside the preview area and open the Lens Distortion Correction option. Tick the box to enable this feature and choose Camera and Camera View, the VideoProc Vlogger would fix fisheye and other issues automatically.
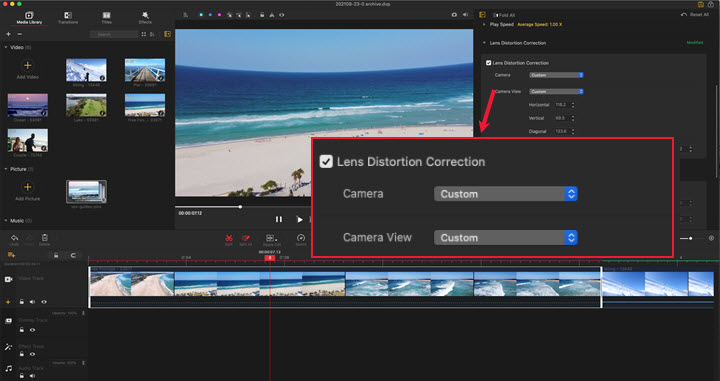
Besides, you can change the scale and rotate the GoPro video in the Transform option in case you shot the footage in the wrong direction.
Step 4. Color correct and color grade the GoPro footage.
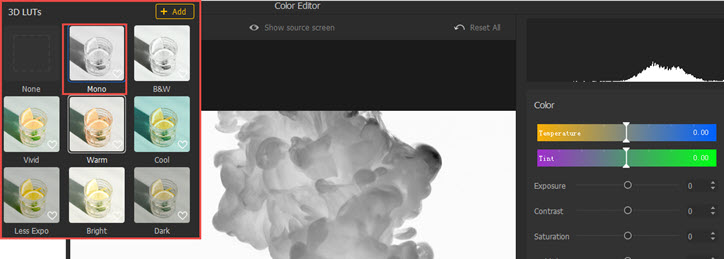
Click Color in the toolbar to open the Color Editor in VideoProc Vlogger in which you can do color correction, color grading, and modify any overexposed, grainy, or dark GoPro videos. Now you have three methods to achieve your color goal.

Now you can apply a preset aesthetic filter in the right column, adjust color manually (temperature, tint, exposure, contrast, saturation, HSL…), or import external 3D Luts. Then click Apply to save the changes and get back to the main workspace.
Step 5. Highlight the best moments with Motion effects.
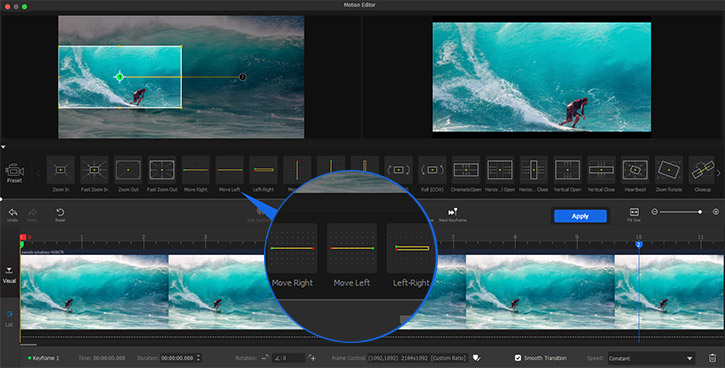
Click Motion in the toolbar to open the Motion Editor, choose a preset effect, and add it to your footage. Then you can adjust the highlighted area, the transform speed, the motion trajectory, etc.
Step 6. Change the speed of GoPro footage.
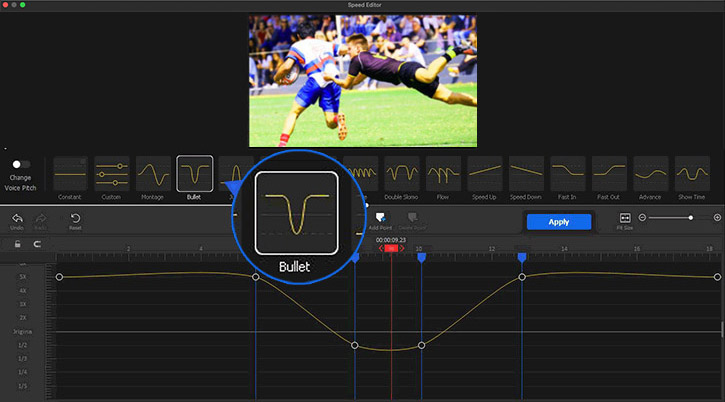
Click Speed in the toolbar to open the Speed Editor where you can speed up or slow the video at a constant or variable rate. It also has 14 speed presets for you to create cinematic videos, e.g. Ease In, Ease Out, Double Slowmo, Wave…
Once you select a preset, you can go on fine-tuning the timing and the speed by dragging the speed points and curves. When it is done, click Apply to close the panel.
Step 7. Add effects, transitions, and titles.
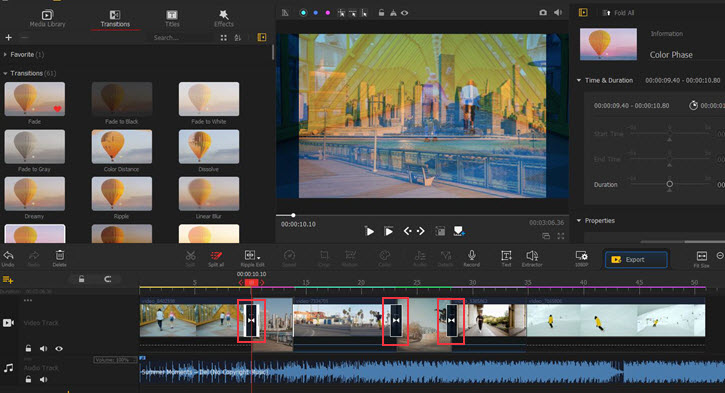
Open panels of Transitions, Titles, and Effects next to the Media Library. You can drag a transition to the space between any two clips, titles to the Subtitle Track, and effects to the Effect Track. Then customize them in the Inspector panel to achieve certain effects.
Step 8. Remove noise and add background music.
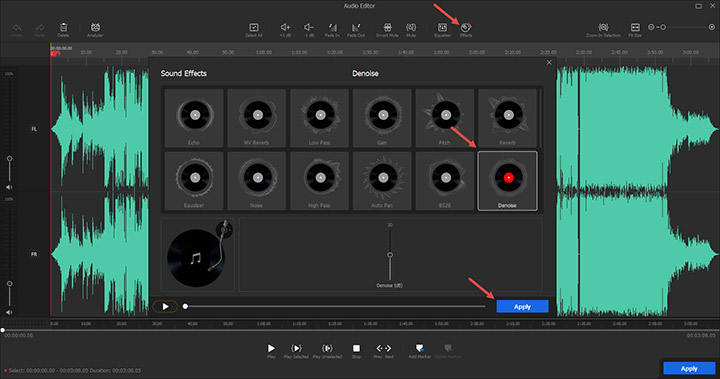
To get rid of the wind noise or crowds chattering, you need, first, to click the video track and click Detach above the time to separate the audio from the video. Then click Audio (toolbar) > Effects > Denoise.
Alternatively, you can add music to the GoPro video to cover or replace the background noise.
Step 9. Export the GoPro video to your Mac.
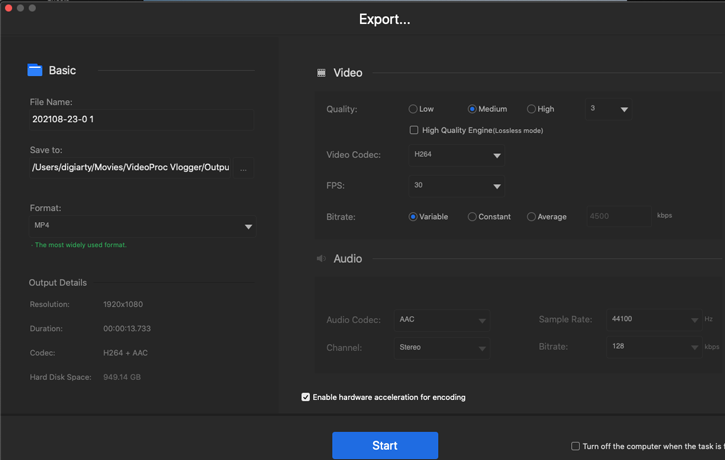
When you finish editing the GoPro videos in VideoProc Vlogger, click the Export button above the timeline, set the video name, file location, video quality (up to 4K 120fps), format, and codec, and activate hardware acceleration. Hit the Start button to export the edited video to your Mac.
2. How to Edit GoPro Videos on Mac with iMovie
Another free GoPro video editor on Mac is iMovie. It's a non-linear video editor featuring cut, trim, transitions, texts, crop, as well as several advanced tools. After importing GoPro videos to your Mac, you can follow the steps below to edit GoPro videos in iMovie.
Step 1. Launch iMovie and create a project in the Movie mode.
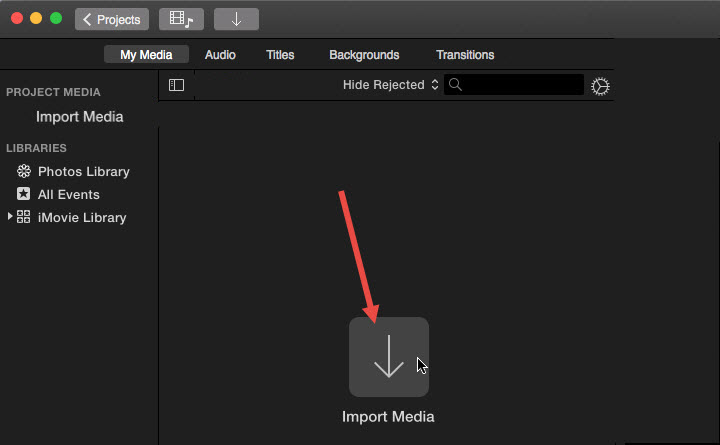
Step 2. Click the import button to load GoPro files from your Mac to it. Then you can see these files in the media library.
Step 3. Drag files from the media library into the timeline. Reorganize these clips by dragging them in the timeline.
Step 4. If you want to add background music to the footage, load a song to the audio track.
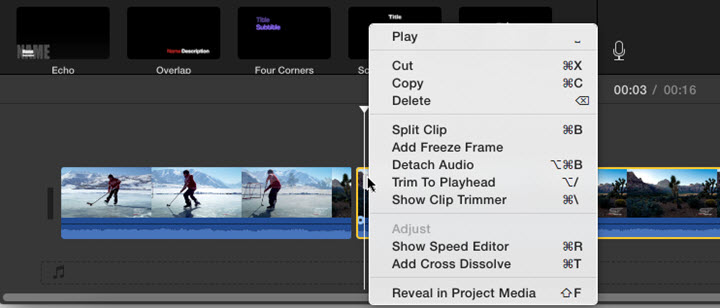
Step 5. Right-click on a clip, then you can split it into smaller parts and delete clips with options in the menu.
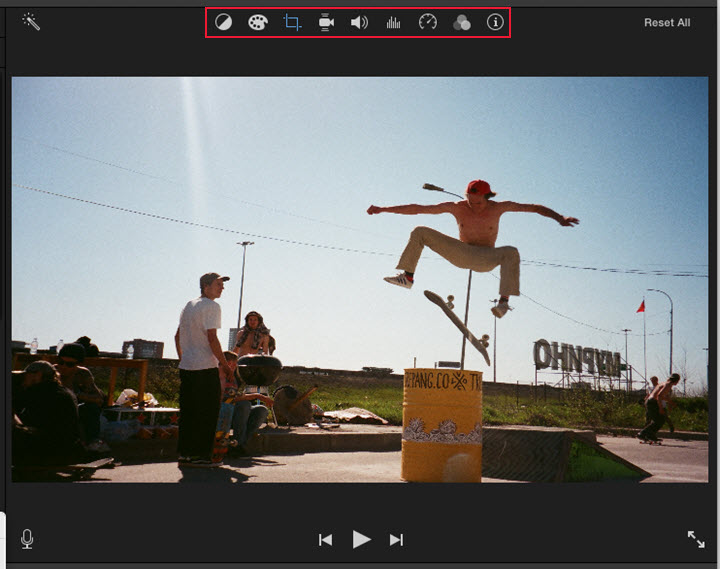
Step 6. Move to the toolbar above the timeline, and you can edit your GoPro videos with advanced tools, like crop, color correction and grading, change video speed, adjust volume, stabilize shaky footage, etc.
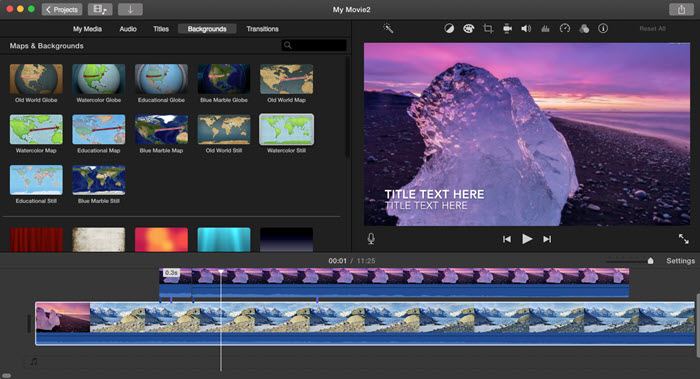
Step 7. Open the titles panel next to the media library, drag a title in the desired style above the video track, and type the text content. Next, move to the transitions panel and drag a transition to the space between any two clips.
Step 8. Preview the entire video and click the output button to export the GoPro video from iMovie. You can save it to your Mac in MP4/MOV format or share it to YouTube and Facebook.
3. How to Edit GoPro Videos on Mac with GoPro Quik
Many GoPro users prefer video editors launched by GoPro, such as GoPro Studio. Unfortunately, it was officially discontinued several years ago. You can download GoPro Studio for Mac somewhere, but it does not perform well on the latest Macs. Now the officially GoPro app for Mac is GoPro Quik. Here's how to use it to edit videos on Mac.
Step 1. Launch GoPro Quik on your Mac. You can import GoPro videos from the local storage if you've already transferred them to your Mac. If not, you can import videos from GoPro via the Quik app wirelessly.
Step 2. Click Media in the main interface and click to select all the clips you need in the editing and open in Create mode in the top bar.
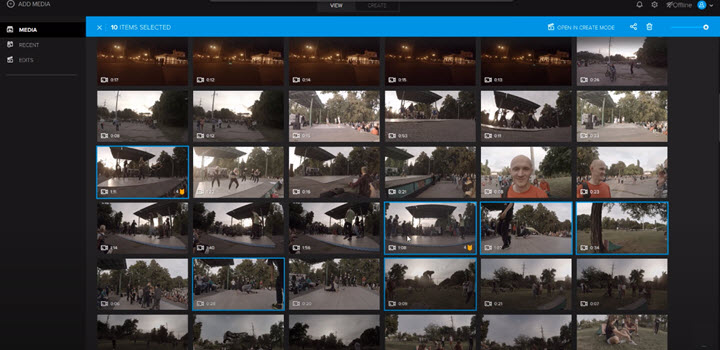
Step 3. Choose your favorite moments in each clip in Media and click to add them to the timeline. Then you can drag the clips in the timeline to re-sequence.
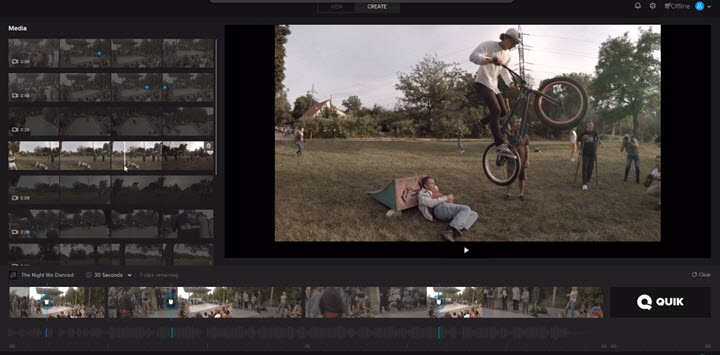
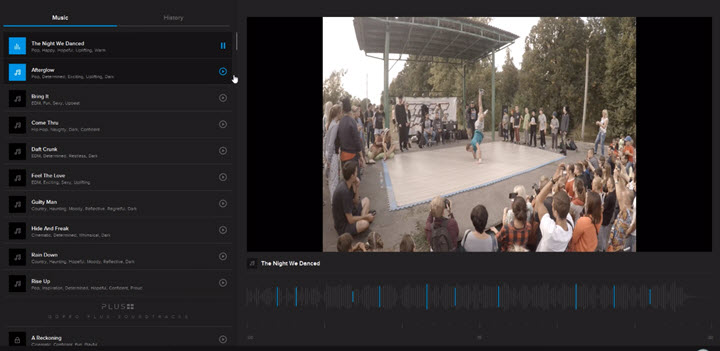
Step 4. Click Change Music at the bottom to open the Music library of GoPro Quik. Click the playback button to preview the songs. Once you decide which one to use, click ADD TO VIDEO in the lower right corner.
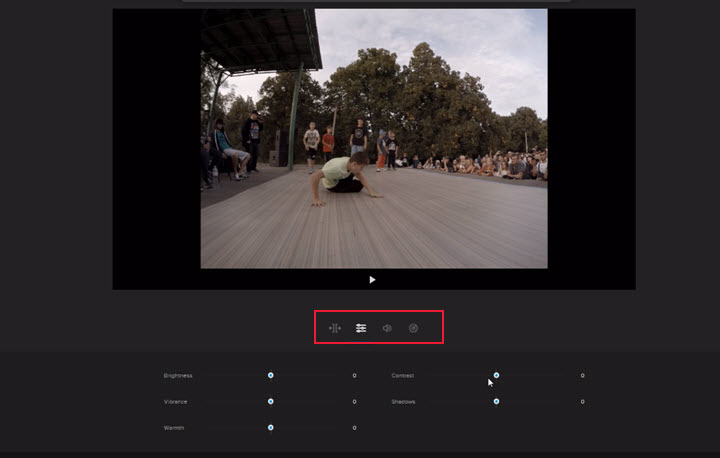
Step 5. Click the pencil icon on the clip to open the editing panel where you can trim, adjust color, adjust the volume of the music and the source audio, and add gauges from the GoPro file.
Step 6. Find the last clip in the timeline, and you can see an outro of Quik, if you don't want it, cancel the outro and save.
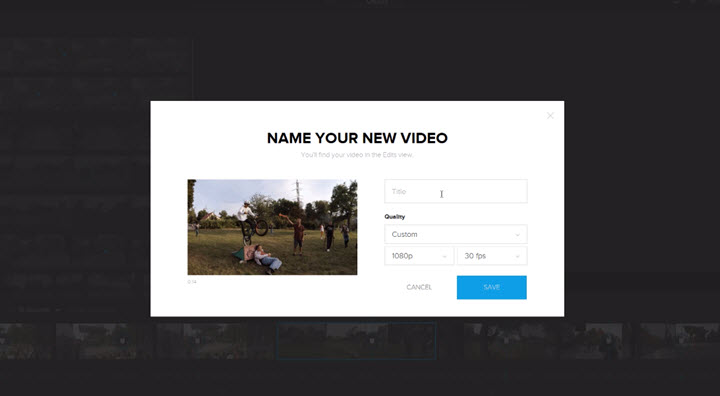
Step 7. Click Save, name the video, choose a resolution and frame rate for the file, then export the GoPro video to your Mac.
Note: GoPro has stopped updating GoPro Quik for desktop, so errors won't be fixed by its developers anymore. If you encounter GoPro Quik not responding/working errors, the best solution is to try the free alternative VideoProc Vlogger.

