Video compression is there for several reasons: it saves storage space on your device, makes sharing or emailing easier, and reduces bandwidth usage for streaming or uploading.
HandBrake is a free, open-source video transcoder available for Windows, Mac, and Linux. It's popular because it allows you to compress large video files into smaller sizes with minimal quality loss by converting them to modern, efficient formats. You can convert almost any video format and fine tune the output quality, resolution, and filesize, all while preserving as much visual quality as possible.

Here in this guide, I'll show you how to use HandBrake to compress a video without losing quality, including detailed steps, best settings, and troubleshooting.
How to Compress a Video in HandBrake
Step 1. Install HandBrake
Download the latest version of HandBrake and install it on your computer. HandBrake is safe to download as long as you download it from the official website.
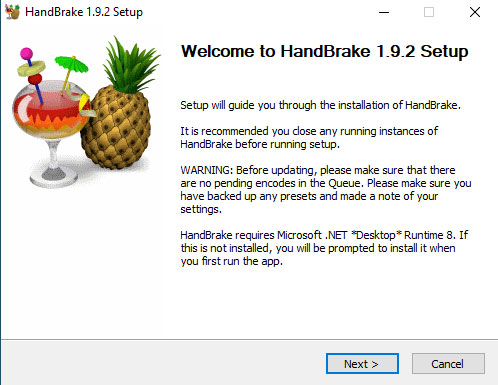
On Windows, HandBrake requires Microsoft .NET Desktop Runtime. If it is not installed, you will be prompted when you first run the program. Just follow the prompts to download and install it.
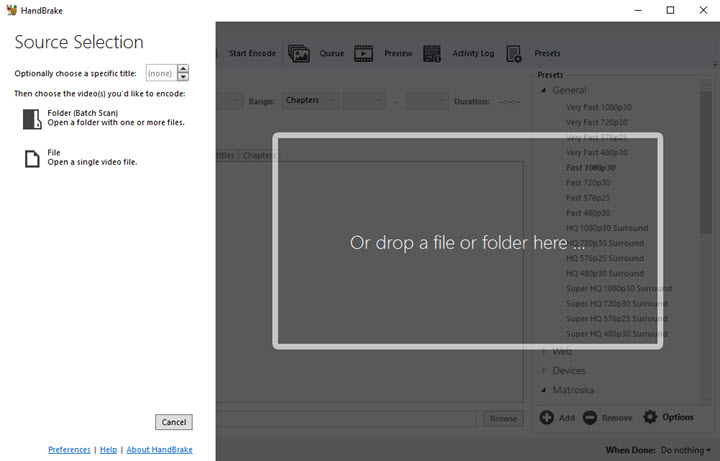
Step 2. Import Your Video
Open HandBrake and load the video you want to compress. You can click the "Open Source" button and browse for your file, or simply drag-and-drop the video into HandBrake's window.
Step 3. Select a Preset
HandBrake provides many built-in presets. These presets pre-configure video settings for a specific resolution, quality level, or device. This way you don't have to tweak things manually to get good results, or at least a usable output video.
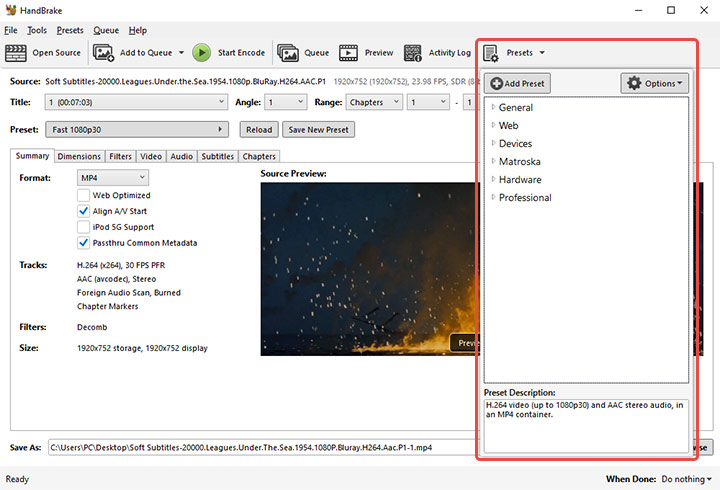
Official presets fall into General, Web, Devices, Matroska, Hardware, and Professional categories. You can choose the preset that matches your needs based on its name and purpose.
- All General and Web presets use the MP4 container for broad compatibility.
- Device presets are for specific devices, mostly using MP4, with some using Matroska for advanced features.
- Matroska presets use the Matroska container to support virtually all video and audio types.
- Hardware presets use your graphics hardware for maximum encoding speed.
- Professional presets are built for professional video editing workflows and are not suitable for video compression.
Here are some recommended common choices:
Scenario |
Recommended Preset |
Notes |
|---|---|---|
Quick, balanced compression |
Fast 720p30 |
Suitable for casual sharing and faster encoding |
High-quality output |
Fast 1080p30 or HQ 1080p30 |
Better quality and larger file size; |
Web or mobile uploads |
Fast 720p30 or Very Fast 720p30 |
Reduces file size significantly; |
If you are just getting started, the default "Fast 1080p30" preset in the General category is a great general-purpose choice. It's fast and widely compatible. But for the purpose of video compression, it may not always be suitable, like when your video is natively lower than 1080p.
 Pro Tip:
HandBrake's preset names indicate their purpose. Fast or Very Fast presets prioritize quicker encoding and smaller size at some cost to quality, whereas HQ and Super HQ presets aim for better video quality with slower encoding and larger files.
For the purpose of video compression, choose a preset with Fast or Very Fast in the name and a resolution equal to or lower than your original video.
Step 4. Further Customize Output Settings (Optional)
This step is optional since presets already choose sensible defaults. But you can still further optimize quality and file size if you understand the settings.
#1. Video Codec
At the most basic level, video codecs apply algorithms to compress video files into a container format. Some codecs compress more efficiently than others do and thereby yield smaller files.
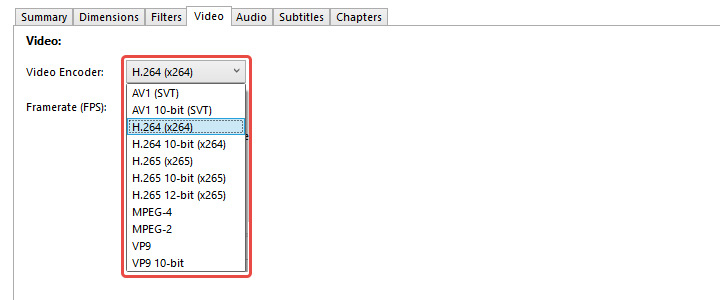
HandBrake supports modern codecs like H.264 (AVC) and H.265 (HEVC), among others. H.264 is a good choice for compatibility and speed. H.265 offers about 50% better compression than H.264, that is, a smaller file for the same quality.
If you believe your target audience or device is compatible, choose H.265 for a smaller video size; otherwise, stick to H.264 for safety.
#2. Quality (Constant Quality vs Avg Bitrate)
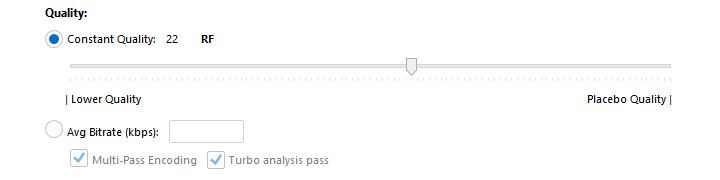
HandBrake supports two modes of encoding video.
- Constant Quality provides smaller file sizes and faster encoding. This is the recommended way to compress because you choose a quality level and HandBrake adjusts the bitrate dynamically to achieve that quality.
- Average Bitrate allows aiming for a target filesize, but gives up control over the video's quality, which is not recommended.
Most official presets of HandBrake use a constant quality encoding mode by default, controlled by the RF (Constant Rate Factor) slider. The RF scale in HandBrake goes from 0 (lossless, huge file) to 51 (worst quality, tiny file). Lower RF means higher quality and larger output file, while higher RF means more compression and smaller size. That's true for most official presets with the x264, x265, or SVT-AV1 encoders.
In summary, the key is to find an RF value that gives you a much smaller file but visually looks almost as good as the source. Here are some recommended settings:
Video Resolution |
RF Range |
Notes |
|---|---|---|
480p/576p SD |
RF 18-22 |
To preserve detail in DVD resolutions |
720p HD |
RF 19-23 |
Produces excellent quality with significant file size reduction |
1080p FHD |
RF 20-24 |
Default Fast 1080p30 with RF 22 is a balanced choice |
4K UHD |
RF 22-28 |
More compression before quality degrades noticeably |
You can try encoding a short clip with different RF values to see how it affects quality and size. Avoid extremely low RF (e.g. 0–5) unless you explicitly want a near-lossless huge file. There's usually no visual benefit for normal viewing, and you may even end up with a larger file than the original.
#3. Resolution & Scaling
Reducing resolution dramatically compresses the file size. For example, a 720p video has only ~44% the pixels of 1080p, but is often enough for viewing on a phone or for YouTube uploads.
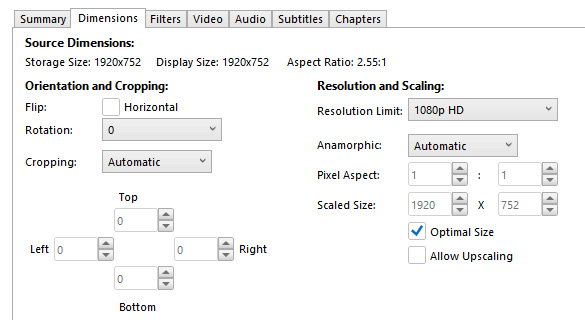
HandBrake offers resolution and scaling settings in the Dimensions tab. You can manually set a smaller resolution to save space. For example, you can choose a 1080p preset for a 4K resource. HandBrake will downscale it to reduce the video size.
However, avoid downscaling if you want to preserve maximum detail; only lower the resolution if the downscaled video can still meet your needs.
#4. Frame Rate
Reducing the video frame rate actually lowers the number of frames in the video. This can indeed cut file size, but you'll also lose the extra smoothness. If you really need to change that, HandBrake also provides this option in the Video tab.
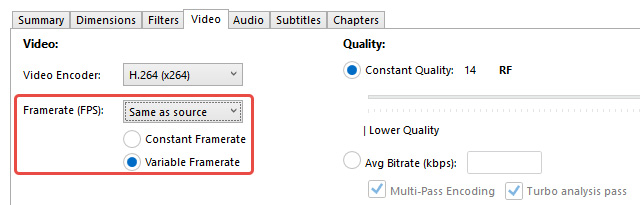
For most cases, you want the output frame rate to match the source so that you can preserve the original motion smoothness. Also, choose Constant Framerate (CFR) to prevent audio sync issues and ensure compatibility, especially if you'll be editing the video later or playing it on picky devices.
Remember, only lower the FPS when you know you can accept choppier motion.
#5. Audio Settings
Each audio track can be tens or hundreds of MB for long videos, so removing the extras can help compress the video. You can reduce video size and save space by compressing or dropping unnecessary audio tracks in HandBrake's Audio tab.
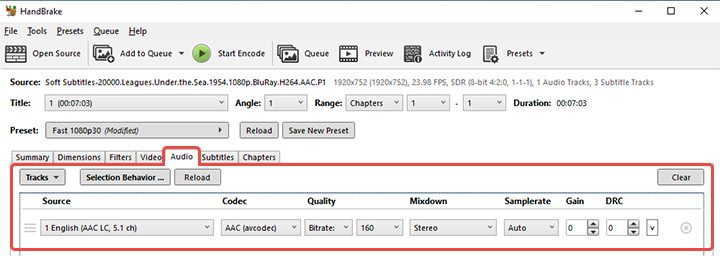
When compressing, using AAC for audio is usually fine. Let's say your source video may have multiple audio tracks, such as different languages or 5.1 or 7.1 audio. Just click the "X" to delete tracks. Also, you can downmix the surround sound to stereo to save space, if you don't need it.
#6. Subtitle Settings
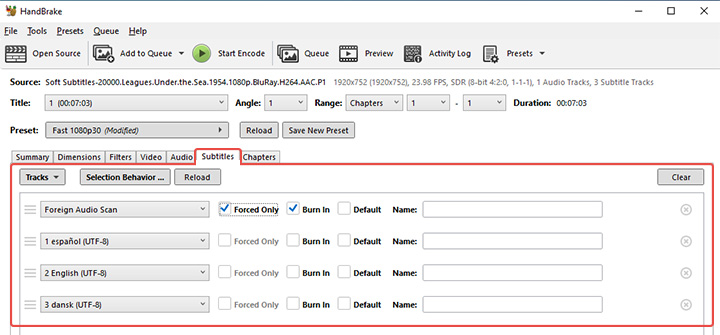
Subtitle tracks have a negligible impact on the video size, but you can use HandBrake to remove unwanted ones or burn subtitles into the video.
Step 5. Select Output Destination and Start Compression
At the bottom of HandBrake, click the "Browse" button or "Save As" field to choose where to save the compressed video file and give it a name.

Use the green "Start Encode" button to start video compression. If you have multiple videos to compress in batch, you can click "Add to Queue" for each and then Start to process the whole queue. HandBrake will display a progress bar and encode the video frame by frame.
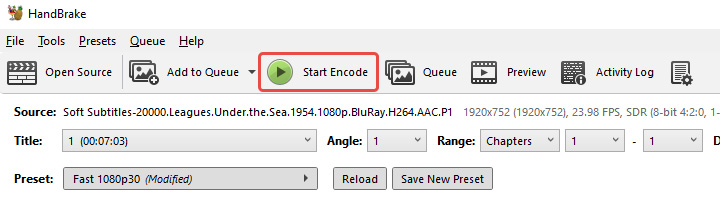
Encoding time will vary widely based on your video's length, the chosen settings, and your computer's speed. HandBrake will use a lot of CPU, but you can still do light tasks.
Best Practices for HandBrake
To get the best results with HandBrake, keep these tips and settings in mind:
- Use Presets as a Starting Point: HandBrake's official presets are tuned for common scenarios and are a great starting baseline. But you can always start with a preset and then adjust individual settings.
- Constant Quality over Average Bitrate: It's generally recommended to use Constant Quality (CQ) mode (the RF slider) instead of specifying a target bitrate or file size.
- Choosing H.264 vs H.265 (and others): If the video is just for your personal use on modern devices, H.265 is great. If you plan to share the video file with others or play it on various devices, H.264 is the safer bet for compatibility.
- Balancing Quality and File Size: Finding the sweet spot between quality and file size requires testing.
- Using Filters and Deinterlacing: When working with older footage or TV recordings, enable deinterlace to remove jagged lines. These advanced tools help you polish ageing videos to professional standards.
Troubleshooting Common Compression Issues
1. Output video file won't play on my device
You finished encoding, but the new video doesn't play on a certain device or software. Often, this is a codec or format compatibility issue.
Use MP4 format for maximum compatibility. The most compatible settings are the MP4 container with H.264 video and AAC audio.
2. Poor video quality or artifacts after compression
If the compressed video looks blocky, blurry, or generally low quality, this indicates the settings were too aggressive.
In this case, you need to re-encode with higher quality settings. Ensure you don't drastically downscale the resolution unless necessary. Also, lower the RF value a few notches to allocate more bitrate and preserve detail.
3. The compressed file turned out larger than the original
This is a surprising but not uncommon issue for new users. There are a few reasons. One, if the original video was already in a very efficient format, and you choose settings in HandBrake that are not as efficient, you can overshoot the size. Two, if you accidentally used near-lossless settings, you might actually increase the size because you removed barely any data or even added overhead. It's also possible the source video was short and already compressed; in such cases, there may not be much size to gain without substantial quality loss.
To solve this, double-check and reset your settings. Make sure you are using a modern codec and stick to recommended RF ranges.
4. Audio is out of sync or missing in the output
A common cause for audio sync issues is using Variable Framerate (VFR) instead of Constant. If the source had a variable framerate and you didn't set HandBrake to CFR, the audio or video can drift out of sync on playback.
Make sure you set Constant Framerate in the Video settings or select a specific fps. This ensures the video timeline in the output is steady and the audio aligns properly. If the audio is completely missing, check that you actually had an audio track selected to encode.
5. HandBrake runs very slowly or crashes during encoding
Video encoding is resource-intensive and large video jobs can use a lot of RAM. If HandBrake is taking too long, ensure you haven't set an extremely slow encoder preset.
To solve this, try close other applications to free up CPU and RAM when running HandBrake. Check to make sure your computer isn't overheating to avoid system throttling or crashing. If HandBrake outright crashes consistently at a certain point, try encoding just that segment or use a HandBrake alternative; it could be a problematic video frame or a bug.
Try A HandBrake Alternative
HandBrake is powerful, but it's not perfect. Many users find themselves spending too much time tweaking settings like RF values, bitrate, and resolution just to get a decent balance between file size and quality. If you are not familiar with video compression jargon, it's easy to feel lost, or worse, end up with a blurry video or a file that's even larger than the original.
This is where VideoProc Converter AI really shines. It's designed to take the complexity out of video compression. You can directly specify a target size, like 8MB for Discord or 25MB for email. With just a few clicks, you can compress your video without diving into technical details.

It also supports hardware acceleration (Intel, NVIDIA, and AMD), making compression up to 47x faster than CPU-bound tools like HandBrake.
VideoProc Converter AI - A Smarter Alternative to HandBrake
- Specify the required video file size with one click
- Customizable parameters, including codec, resolution, bit rate, duration, etc.
- More format support: DVD, GoPro, 4K camera footage, screen recordings…
- 47x Faster speed and less CPU usage with Level-3 hardware acceleration
- All-in-one: AI video upscaler, AI image enhancer, DVD digitalizer, media toolbox


Conclusion
HandBrake is a robust solution for video compression that, when used properly, can significantly shrink your videos while maintaining high quality. With the right settings, quality loss can be negligible to the point that it's hard to tell the compressed video from the original, even though the file size might be a fraction of the original.
If you've ever felt that HandBrake is too technical or too slow, VideoProc Converter AI offers a refreshing alternative. It combines speed, simplicity, and quality in a way that's hard to beat, especially if you want great-looking videos without the steep learning curve.