To split a video file into separate parts is essential in video editing. You don't have to use a very professional tool. Even a basic video editing software application can do this job well.
Here we list 11 options for your PC (Windows, Mac, Linux, online) and mobile devices (iPhone).
How to Split a Video on Windows 11/10/8/7
1. VideoProc Converter AI
VideoProc Converter AI is an easy-to-use video package with a close-to-zero learning curve. One of its favorite features is splitting. It provides flexible ways for users to divide any large or long video into two or more parts regularly and automatically. It also has a 'Cut' and a 'Trim" option that can meet different needs. Follow the two guides below to split a video into parts or remove the unwanted part easily.
How to Split Videos into Parts with VideoProc Converter AI
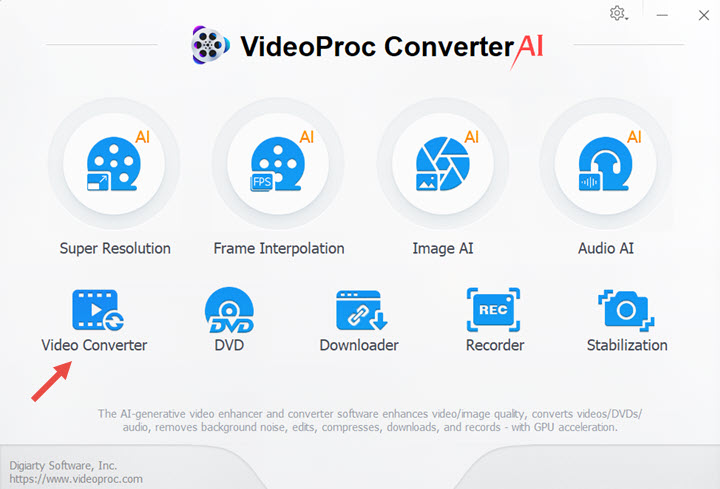
Step 1. Run this application on your computer and then click the Video menu to the next page.
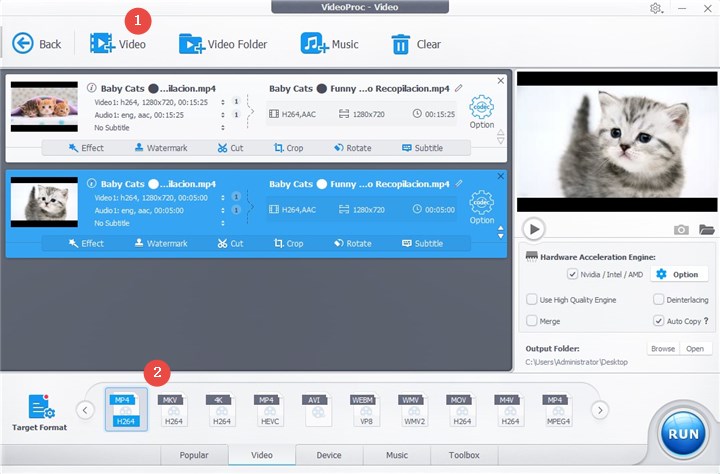
Step 2. Choose the +Video button import the video clip and the output format in the Video column at the bottom.
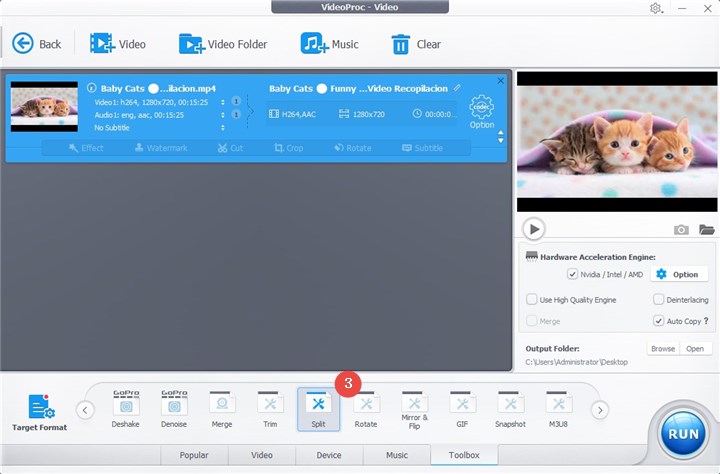
Step 3. Now switch to the Toolbox column. There choose the Split feature.
Double-click on it, and we will go into another page with more features. Firstly, choose which part of this video you would like to split, by moving the green knobs, or setting the start time and end time. Secondly, choose the way how you slice the video. There are two options:
- Split video averagely into [number] segments
- Split video every [number] seconds
For example, if you want to split a video into 10 parts, then you can just select the option Split video averagely into 10 segments by setting the number to 10; If you want each part to be 1 minute long, you can simply choose the Split video every X seconds and change the X to 60.
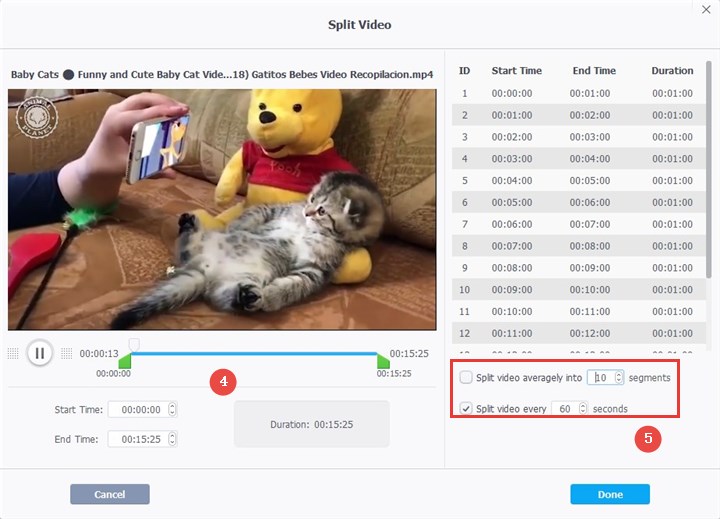
After all things above are done, just click the Done button.
Step 4. Now you are back on the homepage, check the Auto Copy feature for no re-encoding, and lastly, just click the RUN button to let VideoProc Converter AI start doing the rest work.
Tip: You may have noticed that there is a Merge feature in the Toolbox already. This is a tool that can help you combine video segments into a new file. So VideoProc Converter AI is not just a video splitter, but also a video joiner. You can follow this guide of ours to figure out how to merge videos together.
How to Split Video to Remove Unwanted Parts
Step 1. After adding video into VideoProc Converter AI, click the Cut option.
Step 2. Drag the green knobs to the start and end point of the section you want to split, and click the orange Cut button.
Step 3. Repeat step 2 to split and cut more sections.

When you are done, click run to save the video. All the sections marked blue/dark gray will be preserved, while light gray sections will be removed.
Watch the Video Tutorial to Learn More about How to Split a Video
2. Microsoft Photos
Photos is a default and free app on Microsoft Windows Operating System. Through it, you can view and edit your videos and photos. It can trim your movie in an easy way such that you can highlight the best part. You can use the Trim feature to split your video. But you need to do some manual work.
How to Split a Video in Microsoft Photos
Step 1. Add the video into the Photos app, or right-click on the video to open with the Photos app.
Step 2. Click the Create button to start a video editing project.
Step 3. Click the trim option from Edit & Create, and drag the blue knob to the sections you want to keep.

Step 4. Save the video, and then you can repeat step 3 to split more video clips.
3. Windows Movie Maker
Windows Movie Maker is old and discontinued by Microsoft. But similar to Photos, it can still be used as a free video splitter. If you have Movie Maker on your Windows PC, you can use it to split a video.
How to Cut and Split a Video in Windows Movie Maker
Step 1. Add a video into Window Movie Maker.
Step 2. Click on the clips, and tick the Edit tab under Video Tools.
Step 3. Drag the black line to the point you want to split, and hit Split from the bar.

Step 4. Repeat the process, and you can click on an unwanted segment to delete.
Step 5. Click Home > Save movie. You can save it as MP4 or WMV.
As you can see, the splitter in Windows Movie Maker is more of an editing tool to cut and remove unwanted parts. If your aim is to split a long video into multiple files to export, the workaround is to repeat the process for several times, which is tedious than dedicated free video splitters we covered below.
4. Shotcut
Shotcut is an open-source video editor for Windows, Mac and Linux. It is free and easy to use. It can help divide a video into two parts by just drag-and-drop. Although being free, it has no malware, spyware, adware and bundles at all.
How to Split a Video Track in Shotcut
Step 1. Import the file to Shotcut by Open File function.
Step 2. Drag the video clip to the timeline.
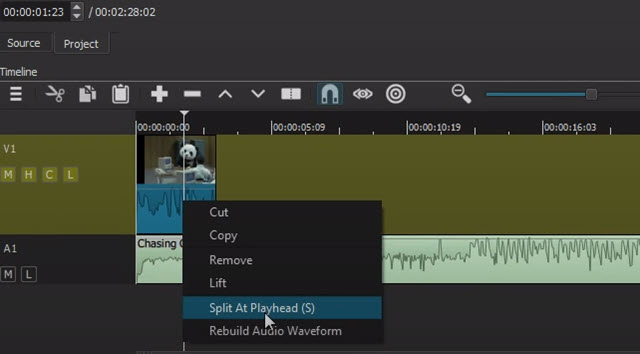
Step 3. Move the play head to the frame where you want to slice, right-click on the timeline, choose Split At Playhead, and you will get the clip into two parts.
How to Split a Video on Mac
1. Final Cut Pro
If you are a Mac user, you surely know Apple Final Cut Pro! It is the Swiss Army Knife of video editing program on macOS. It excels at advanced post-production, including color grading and motion graphics. But it also offers basic editing features like splitting.
How to Split a Video in Final Cut Pro
Step 1. Drag the video file to the timeline.
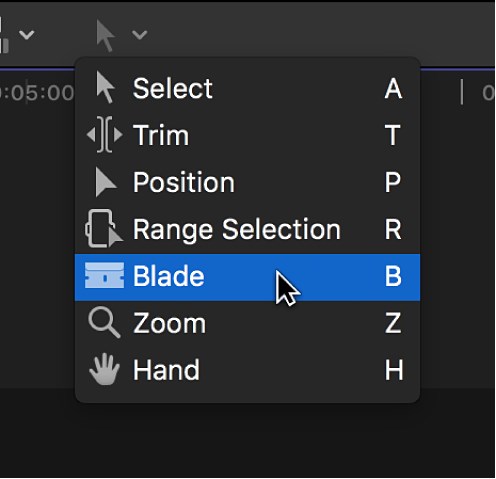
Step 2. Move the play head to the frame where you plan to slice and press Command + B. Or you can also find the Blade feature from the pop-up menu in the top-left corner of the timeline, and click the skimmer when it moves to the right frame.
2. VLC
VLC Media Player is not just as the name says it. Not merely a video/music playing application, it also has many hidden video editing functions. But the principle and operation might be different from other methods in the article. Just follow the steps below.
How to Split a Video File with VLC Media Player
Step 1. Open the video file in VLC.
Step 2. Go to the View menu and check the Advanced Controls feature. Then you will see a new red button.

Step 3. Play the video, at the same time click the red button, and VLC would start recording the video clip. When reaching the frame where you want to split, just click the red button again and VLC would stop recording.
And now you just slice the first section of the clip in VLC. For more segments, just repeat the same operation above. After all done, you can just go to the record directory folder and find them. If you have no idea where exactly they are saved, do as follows in VLC: Tools > Preferences > Input/Codecs > Record directory or filename.
Honestly, we do not recommend you applying this VLC method, because, obviously, it is kind of tedious, not easy to operate, and takes much time if your video clip is very long.
How to Split Videos into Separate Clips on iPhone
iMovie
iMovie is free and beginner-friendly on iOS (as well as on macOS). But many people don't know how to shorten a video by splitting with this free tool. Actually, it is very simple.
How to Split a Video in iMovie on iPhone/iPad/iPod Touch
Step 1. Open iMovie on your iOS device and find the video file that you would like to split.
If there is no existing project having this clip, just choose the Project > Click the + icon > Choose Movie from the pop-up > Select a theme and name this project > Import Media, and then you can just load your clip into iMovie.
Step 2. Tap the video clip in the timeline.
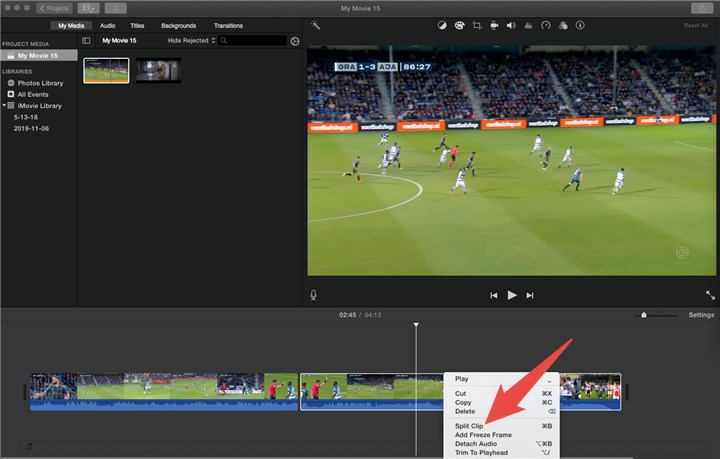
Step 3. Move the play head to the dividing position, right-click on the file, and find the Split option, by which you just split your video clip into two parts. If you want the clip into multiple parts, just repeat the operation.
How to Split a Video File on Linux
1. Avidemux
Avidemux combines video encoding with non-linear video editing. It means you can edit videos regardless of the formats and codecs. Since the developers want it "to do elementary things in a straightforward way", it makes some basic video editing tasks easy.
The Step-by-step Guide for Splitting a Video
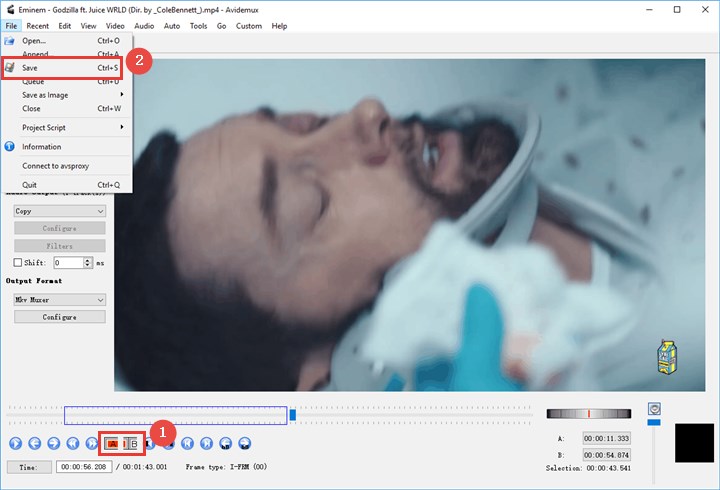
Step 1. Click File > Open to import the video file into Avidemux.
Step 2. It uses the A and B buttons to locate the segment which you want to blade. Move the play head to the start frame and click A; then move the play head to the tail frame and click B. Now you have marked the section.
Step 3. Click File > Save to put this section on your computer. And if you want multiple parts, just repeat the operations above.
Honestly, this tool is not a serious splitter and just can help you finish the job in a similar way. If you are not a big fan of Avidemux, I would sincerely recommend you choose another proper application.
2. VidCutter
Just as the name implies, VidCutter is basically designed for cutting a video. It is simple, fast and straightforward. The latest version even has improved for large video processing. But VidCutter is not born for splitting. It cannot split a video into multiple segments once.

Step 1. Visit Github and download the latest release of VidCutter for Windows, Mac or Linux.
Step 2. Add your video into the app, and hit play button for previewing.
Step 3. Drag the playhead to the point you want to split, and click Start Clip button.
Step 4. Drag the playhead to another point, and click End Clip.
If you click Save Media, the sections from Start to End point will be exported as a new video clip.
If you want to split multiple sections, repeat Step 3 to Step 4 before clicking the Save Media button. Note that those sections will be merged into one video after exporting.
3. GIMP
GIMP, different from other tools listed above, is a popular image editor like Photoshop. Surprisingly, it can also do some video editing like splitting. But quite uniquely, it is to split a video by frames.
How to Split a Video into Frames with GIMP
Step 1. Download and install GAP (Gimp Animation Package) with the following link. Or you will not see the video feature in GIMP.
https://www.deviantart.com/photocomix-resources/art/GAP-2-6-for-Gimp-2-6-Windows-135464357
Step 2. Opened GIMP, go to Video > Split Video Into Frames > Extract Videoframe, and it will lead you to another page.
Step 3. In the new pop-up page, locate the video file at Videofilename.
Step 4. Set To Frame to a number which you prefer. If you have no idea how many frames you want, just click the Video Range button to find more.
Step 5. Set Audio Track to 0.
Step 6. Selected Create only one multilayer image.
Step 7. Make sure the output folder same as the folder that the video file is in.
Step 8. Clicked Okay to start processing.
How to Split a Video into Parts Online
Apowersoft
Apowersoft does not only offer software applications. Its online splitter is a solid choice for you to divide your video file into several clips. But please note that the max file size is just 100 MB. If your source file is larger than 100 MB, you have to download its pro version, or go to other free video splitters we recommended above; if your source file is small in file size, you can try this tool for free.
How to Split a Video Easily with Apowersoft
Step 1. Import files.
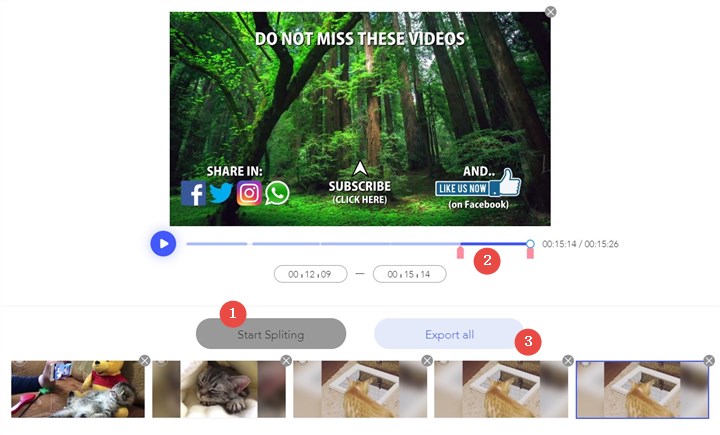
Step 2. Click Start Splitting, move the knobs, and click Start Splitting again to finish the first clip. Then repeat the steps for more parts, but you can only have 5 segments.
Step 3. Click Export All to save the split videos.
