With screen recordings, we can easily explain what's happening on our computers and that's more intuitive than thousands of words. But after updating to Windows 11, many users are wondering if the screen recorder on Windows 10 is still available and don't know how to record screen with audio on the OS with a brand-new look.
In this post, we picked some tools from a long list of best screen recorders in the market and show you how to screen record on Windows 11.
1. Screen Record on Windows 11 with Built-in Screen Recorder
We used to record Windows desktop screen with Xbox Bar which was initially designed for recording gameplay but also captures other activities on Windows 11. Every time Windows updates, the most anticipated feature to be added must be a native screen recorder. And finally, it comes true in Windows 11. The built-in screen recorder in Windows 11 is packed into Snipping Tool.
Step 1. Search Snipping Tool in the Start menu search box.
Step 2. Click the Record button and select New. Drag and drop a rectangle to include the part you want to capture.
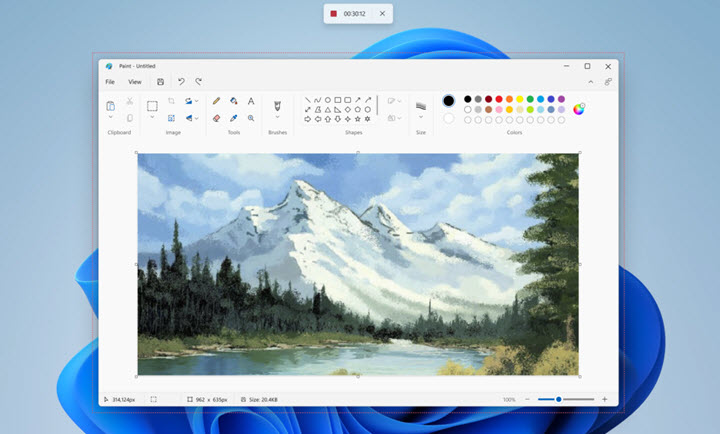
Step 3. Click Start and it will start screen recording on Windows 11 in 3 seconds.
Step 4. Click the Stop button when you want to end. You can find the screen recording in the Video folder by default.
Heads Up
- Snipping Tool cannot record screen with audio on Windows 11.
- It only saves screen recordings in MP4.
- There's no shortcut to activate its built-in screen recorder on Windows 11.
- It does not come with any video editing features to trim and crop the screen recording.
2. Screen Record on Windows 11 with VideoProc Converter AI
VideoProc Converter AI is a multifunctional video processing program built with a fully-fledged 4K and HD screen recorder. It can capture anything on the screen of Windows 11 - desktop, separate tabs, gameplays, webinars, movies, webcam, etc. and deliver 4K screen recording with audio from the system and external devices. Also, it can record screen on Windows 7, 8, 8.1, 10, and Mac.
Compared with other screen recorders on Windows 11, VideoProc Converter AI empowers you to do more than recording. For instance, it can cut out any part where you made mistakes during the recording, merge multiple recordings into one piece, add subtitles to the recording, and convert and compress recordings to make them more playable and shareable.

VideoProc Converter AI - Best Screen Recorder on Windows 11/10
- Support a wide range of recording formats: MP4, MOV, MKV, FLV, and TS.
- Multiple recording options: full/selected area, webcam, PiP, green screen.
- Handy annotation tools to add texts, shapes, lines, and draw on your recording.
- Rich editing features after recording: cut, merge, rotate, crop, compress, etc.
- Convert recordings for YouTube, Facebook, Email, TV, iPhone, iPad in one click.
![]() Excellent
Excellent ![]()
Now free download install VideoProc Converter AI to record screen with audio on Windows 11 easily.
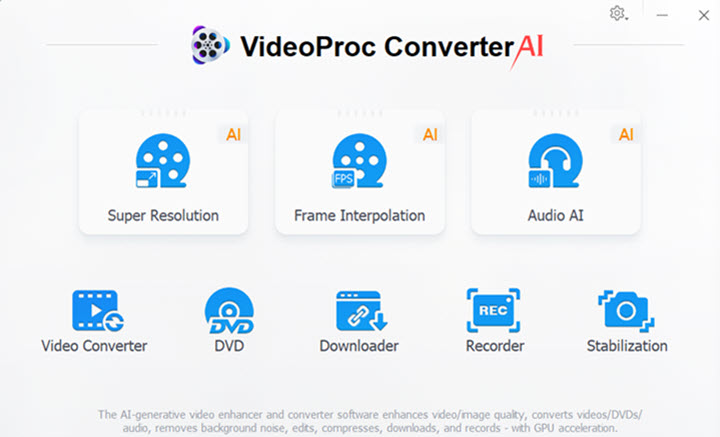
Step 1. Open the built-in screen recorder in VideoProc Converter AI.
Download and install VideoProc Converter AI on Windows 11. Launch it and choose "Recorder" on the main interface.
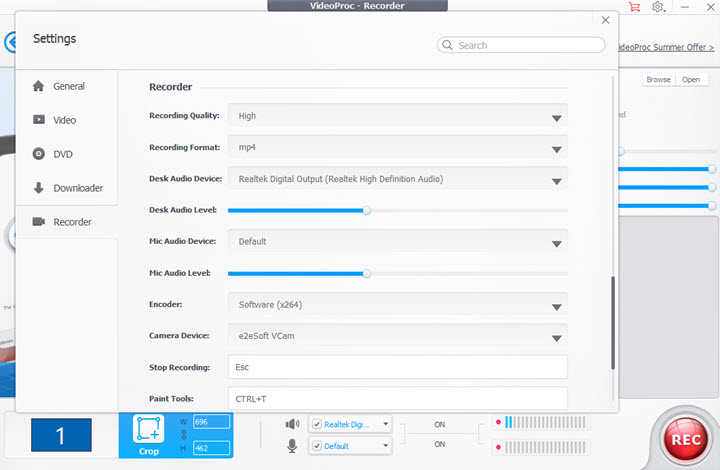
Step 2. Complete simple recording settings.
Click the gear icon on the top right corner. Open recording settings where you can adjust recording quality, output format, and recording hotkeys.
Step 3. Choose recording area and audio source on Windows 11.
Choose a recording mode, "Screen", "Webcam", or "Screen and Webcam".
VideoProc Converter AI captures the full screen with internal and external audio. You can customize the recording area in the "Crop" tool at the bottom and fine-tune recording audio options next to it. Choose an output folder on the right side to save the recording.
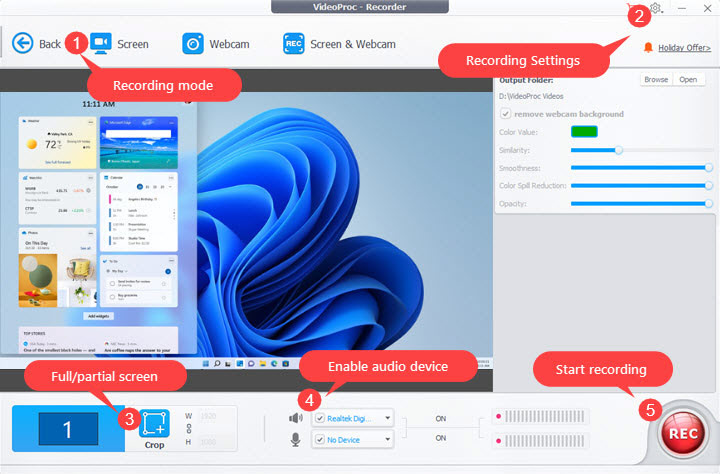
Step 4. Start to screen record on Windows 11 with audio.
Click the "REC" button and you'll see it minimize itself to the taskbar corner and start screen recording in 5 seconds. During the recording, you can activate the recording tool with hotkeys (Ctrl + Alt + Shift + T). When it's complete, end it with hotkeys Ctrl + Alt + Shift + R. You can also find these options by clicking the icon of VideoProc Converter AI in the system tray.
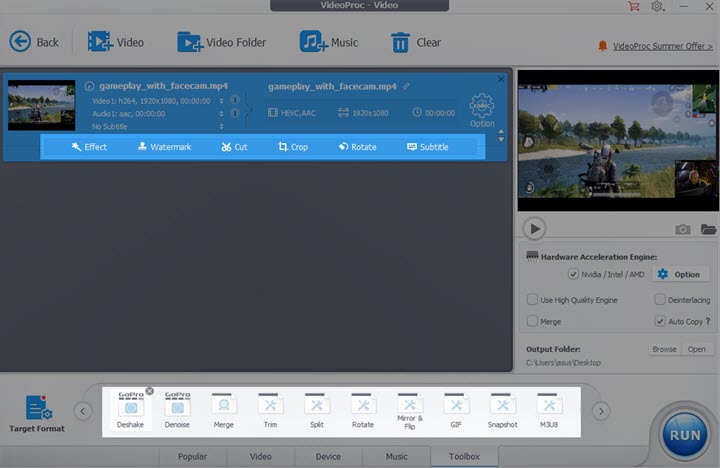
Ultimately, open the file folder, and you can watch the recording. You can end here, or exit from the screen recorder and apply simple edits to it with the "Video" feature in VideoProc Converter AI.
3. Screen Record on Windows 11 with Game Bar
Despite some features being removed after updating to Windows 11, Xbox Game Bar, which came into being in Windows 10, is kept in Windows 11. It was designed for recording epic moments in PC games and chatting with other Xbox players, but it can be activated without playing games. As a result, it becomes the primary tool to capture on-screen videos and images on Windows 11.
In Game Bar, you can control the mouse cursor and adjust the audio source either from the system or your mic. If you want a crisp and smooth result, you are also allowed to record a video on Windows 11 in high quality at 60fps.
Step 1. Start Game Bar on your Windows 11 PC by pressing the Windows logo key and G on the keyboard, or searching it in the Start menu.
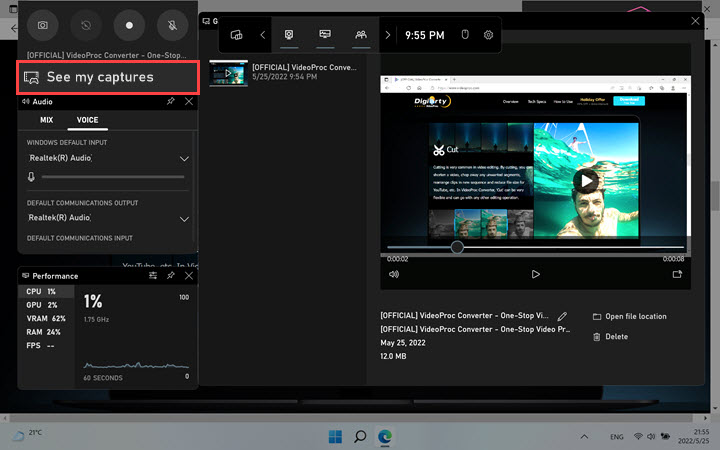
Step 2. Once the free screen recorder is activated, you'll see a widget bar on the top of the screen which includes options for the screen, webcam, microphone, and settings. You can hit the recording button to start right now, or adjust these settings according to your needs.
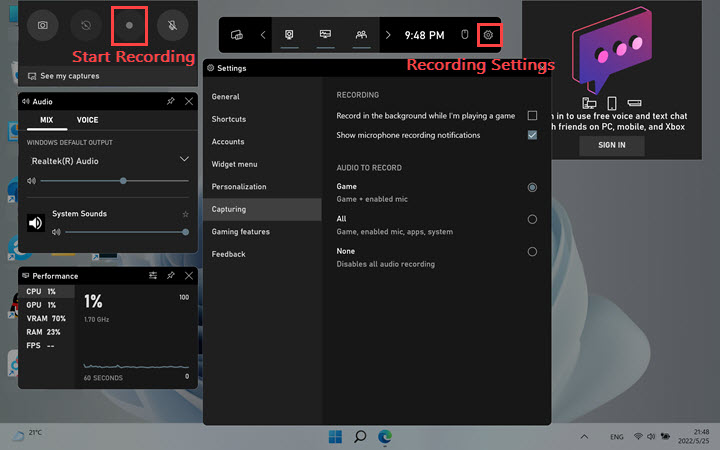
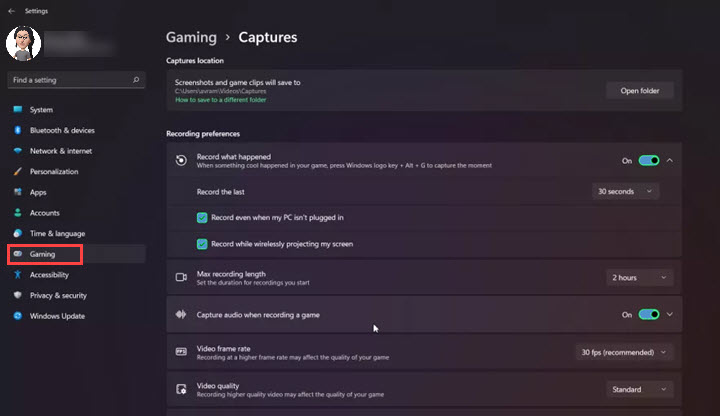
Step 3. To adjust recording quality, frame rate, mouse capturing, and gaming moments capturing, you need to open Control Panel on your PC, and go to "Gaming" > "Capture settings".
Step 4. Click the round button again to stop the recording. Then a message will pop up from the right side to show you the folder containing the video you just recorded. Click it and you can watch the screen recording. To watch all of your videos, click "See my capture" on the upper left widget.
Heads Up
Game Bar is unavailable for capturing Windows 11 desktop and File Explorer, and it can't record multiple program windows at a time.
If you want to show someone on-screen activities that involve the desktop, File Explorer, or jumping between different windows, the built-in video recorder on Windows 11 might let you down. But don't worry, VideoProc Converter AI will give you perfect screen recording solutions.
4. Screen Record on Windows 11 with PowerPoint
PowerPoint is absolutely a rich source if you take full advantage of it to create multimedia files. In addition to embedding online and offline videos to the slides, it lets you record the screen and save the video as a new file on your Windows PC. Different from Game Bar, PowerPoint enables you to record anything on the screen and select any part to record to your liking.
Step 1. Create a new project for Microsoft PowerPoint. Open it and press "Enter" to add new slides.
Step 2. Open the "Insert" tab and select "Screen Reordering". Alternatively, you can find it by inputting screen recording the top search bar.
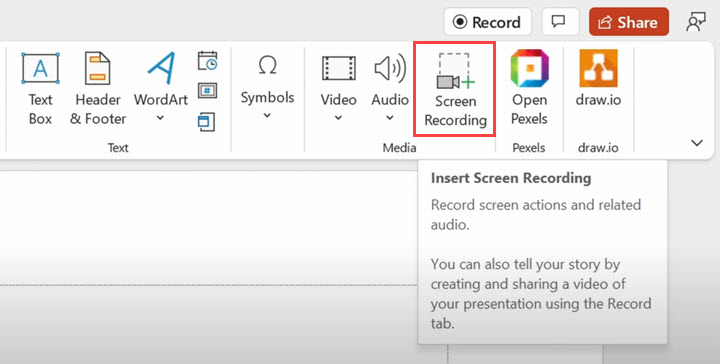
Step 3. Next, a recording toolbar will appear on the top of your Windows 11 screen. It allows selecting the recording area, toggling on or off the audio, and showing mouse or not.
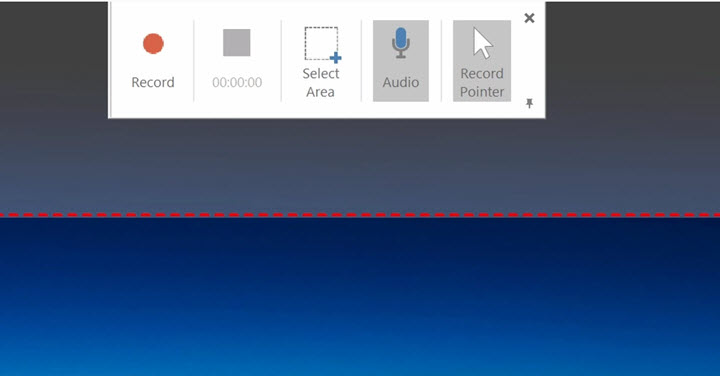
Step 4. Hit the record button and it will start recording in 3 seconds. When you finish, hit the stop button.
Step 5. The screen recording will be embedded in the slide. Click to select the video and open the "Playback" option which has some basic editing tools. You can trim redundant parts at the beginning or end. Click "OK" to save the new clip.

Step 6.Right-click on the video and select "Save Media As". Choose a folder and fill in the "Filename" box to save the screen recording as an MP4 video on your Windows 11.
Heads Up
1. The screen record feature is only available in PowerPoint 2013, PowerPoint 2016, PowerPoint 2019, PowerPoint 2021, and PowerPoint of Microsoft 365.
2. The performance of PowerPoint gets unstable after updating to Windows 11. If you have any trouble running PowerPoint, capture the screen on Windows 11 with other recorders because it might take you much time to fix it.
FAQ
How do you screen record on Windows 11 Chrome?
Use Chrome screen recording extensions, such as Screencastify, Screencast-O-Matic, Awesome Screenshot & Screen Recorder. Once installed, you can activate the screen recorder by clicking its icon in Extensions on Windows 11 Chrome. Alternatively, you can activate the online screen recorder on its official website.
How do I record screen with sound on Windows 11?
Open a tab that you want to record. Press the Windows logo key and G to enable Xbox Game Bar, unmute the audio recorder, and start recording. But note that, Game Bar is not recording when you switch to another tab, or its recording button grays out when you stay on Windows 11 desktop or File Explorer.
How do I record my screen on Windows 11 for free?
Windows 11 has free and built-in screen recording tools for you – Xbox Game Bar and Snipping Tool. If you think they are not versatile, try VideoProc Converter AI, which records Windows 11 for free without time limits.
That's all for how to record a video on Windows 11 using Game Bar and PowerPoint. If they are too basic to feature plentiful recording and editing options, give VideoProc Converter AI a shot for it is simple yet powerful to record games, live streams, screencasts, webinars, and beyond.

