Windows updates with more built-in features to record the desktop screen, like Xbox Game bar in Windows 10 and Snipping Tool in Windows 11. However, quite a few PCs still stay in Windows 7 with no free in-house screen recorder. What's worse, many apps developed and updated these days cancel support for Windows 7 or 8, and so do screen recording apps.
If you don't know the best screen recorders still working perfectly on Windows 7, you are on the right page. In the following part, we'll reveal the five best screen recorders and walk you through how to screen record on Windows 7. Just read on.
1. Record Screen on Windows 7 with VideoProc Converter AI
Compatible OS: Windows 7 or later (32-bit and 64-bit); macOS 10.13 or later.
VideoProc Converter AI is an all-in-one video processing program containing a screen recorder, video editor, converter, compressor, downloader, and DVD ripper. The quality screen recorder in it lets you capture the desktop screen, webcam, specific program tab, live streaming, gameplays, presentations, and various content you want. Besides, it allows 4K screen recording in MP4, MOV, MKV, TS, and any format you want. After recording, you can reload the video to it, then trim, crop, merge, resize, and do more simple edits to it.

VideoProc Converter AI - Best Screen Recorder for Windows 7
- Record screen in 4K/HD/60fps without time limits on Widows 7/8/10/11.
- Record full/partial screen, webcam, picture-in-picture, and multiple screens.
- Handy shortkeys to enable/end recording and add annotations.
- Fast and smooth performance backed by Level-3 Hardware Acceleration.
- Edit, compress, convert, upscale, fix, and download videos in one stop.
![]() Excellent
Excellent ![]()
Download VideoProc Converter AI and record the screen on Windows 7 with Ease!
Step 1. Launch VideoProc Converter AI and open "Recorder".
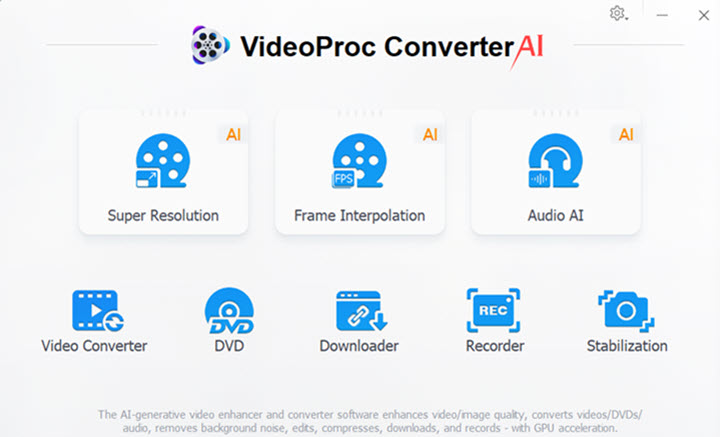
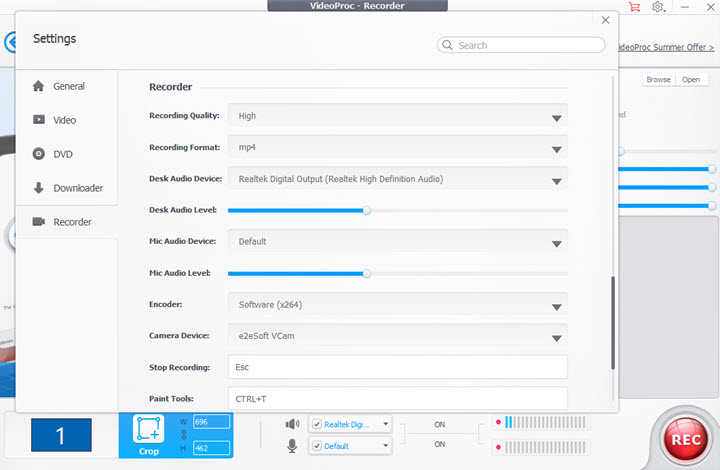
Step 2. Configure recording settings, including recording quality, format, audio device, hotkeys, mouse clicks, and so on.
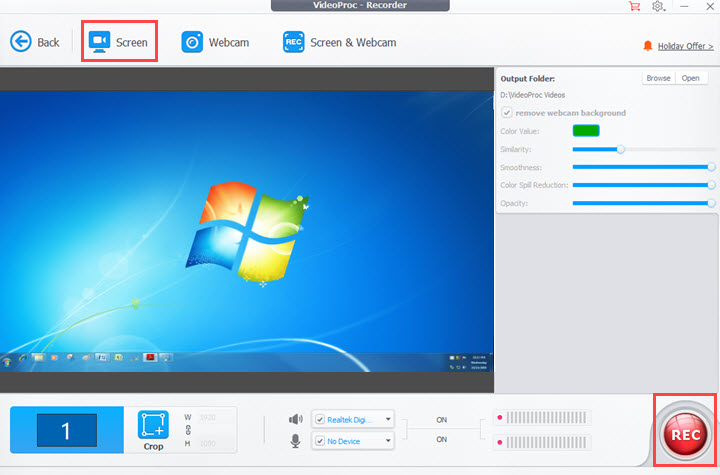
Step 3. Select "Screen" mode. If necessary, click "Crop" to resize the recording area.
Step 4. Click REC to start recording. During the process, you can activate the annotation toolkit to draw on the screen and add texts, shapes, or arrows.
Step 5. End recording via the Stop button. It shows the saved recording in the right column. Now you can double-click on it to watch in VideoProc Converter AI or click the file folder icon to open it in the specific path.
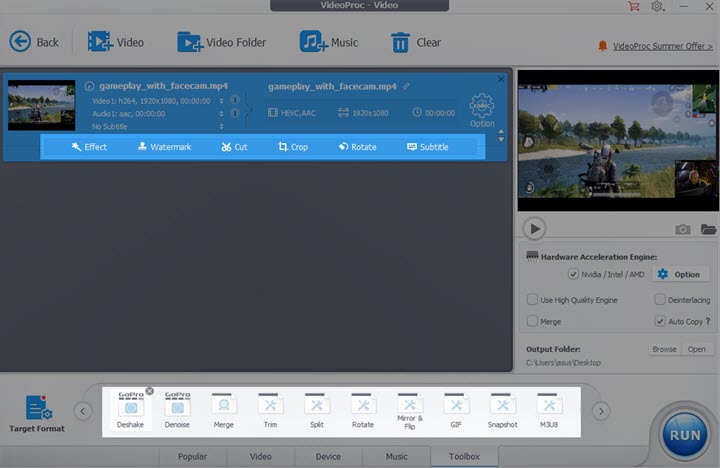
Tips: Exit from the Recorder, and open Video on its main interface. Import the recording, and now you can cut, split, merge, adjust speed, add a logo, compress, convert it for various platforms, and so on.
2. Record Screen on Windows 7 with Expression Encoder 4
Compatible OS: Windows 7/8/10/XP 32-bit/64-bit
Expression Encoder 4 from Microsoft is a transcoding and video editing program for PC. It's also compacted with a screen recorder. If your PC is running on Windows 7 or older versions, this is a good place to go. Its free version can capture the screen in SD and HD for up to 10 minutes.
However, Microsoft canceled support for it over a decade ago, which means that you cannot download it from the official app store. Now search your Windows. If it has installed this app, follow the steps below to screen the recorder on Windows 7 without downloading other software.
Step 1. After installing Expression Encoder on Windows 7, you'll see a utility called Expression Screen Capture in the same path. Double-click on it to start it.
Step 2. Then a toolbar pops up from which you can change the recording settings of resolution, webcam, and microphone.
Step 3. When everything is set properly, click the red dot to start screen recording on Windows 7.
Step 4. End the recording whenever you want. Then you can find the video with a .xesc extension in the list of recordings. Now you can play it with Windows Media Player.
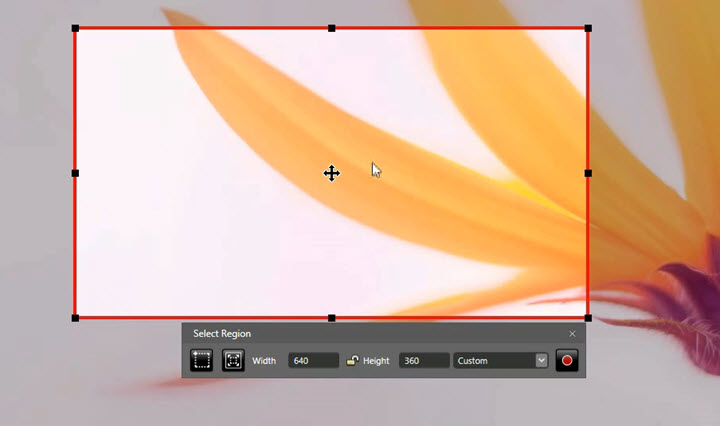
Note:
- Microsoft Expression Encoder 4 saves recordings in XESC, an Expression-exclusive format. You need a video converter to convert XESC to MP4 for devices and OS outside of Windows.
- Microsoft Expression Encoder allows only 10 minutes per free recording.
3. Record Screen on Windows 7 with Problem Steps Recorder
Compatible OS: Windows 7 and later versions
Problems Step Recorder was not initially designed as a screen recorder for Windows 7. But you can take it as a built-in screen recorder when you don't want to install any third-party software.
Before you use it, please note that Problems Step Recorder does not contain recordings in MP4 or other common video formats. It saves the recording as an HTML file to send to the Microsoft support team effortlessly.
Anyway, it's a workaround when you're looking for a free screen recorder for Windows 7 PC.
Step 1. Click Start on Windows 7. Go to Accessories and double-click on Problem Steps Recorder to open it.
Step 2. Click the recording button to let it on your desktop screen. Click Add Comment during the recording, and you can highlight any part of the screen with text.

Step 3. Click Stop Record. The recording will end and be stored in a .zip file. Now you can unzip and view it with Edge, Explorer, Chrome, and any other web browser.
4. Record Screen on Windows 7 with PowerPoint
Compatible OS: Windows 7/8//10/11 32-bit and 64-bit
Whether you are running on a recent or old version of Windows OS, you have a free and in-house screen recording in PowerPoint. It was originally built for recording presentations when it was a feature called Rehearse Timings. Later on, it has been modified into a screen recorder to capture everything on the Windows screen.
Make sure you've upgraded it to PowerPoint 2013 or later. Now let's see how to screen record on Windows 7 via PowerPoint.
Step 1. Create a new Microsoft PowerPoint file on your PC and open it.
Step 2. Add a new slide. Open the "Insert" tab and click "Screen Recording".
Step 3. From the control dock, you can set up the recording area, audio source, and record pointer. Then click Record to start.
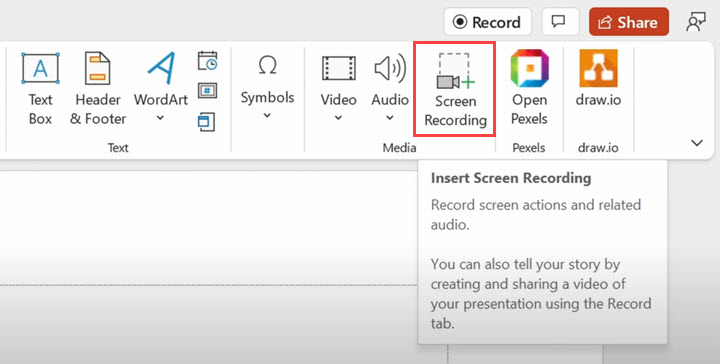
Step 4. During the recording, you can pause or end the recording by clicking on the button in the control dock.
Step 5. When you complete a recording, it will be embedded on the slide. Right-click on it and select "Save Media as", now you can name it and set the location for the recording on your PC.
5. Record Screen on Windows 7 with VLC
Compatible OS: From Windows XP SP3 to the lastest version of Windows 11
VLC is a free and open-source tool well-known for its various features ranging from video playback to converting. Even for today's topic, it surprisingly comes with an option to record your PC screen. Unlike other decent screen recorders, VLC hides this feature in advanced controls. Just be prepared, and let's see how to use VLC to record the screen on Windows 7.
Step 1. Open "View" and select "Advanced Controls".
Step 2. Go to "Media" > "Convert/Save". Then open the "Capture Device" tab.
Step 3. Select "Desktop" in capture mode, and enter the frame rate recording frame rate. Click "Convert/Save" at the bottom.
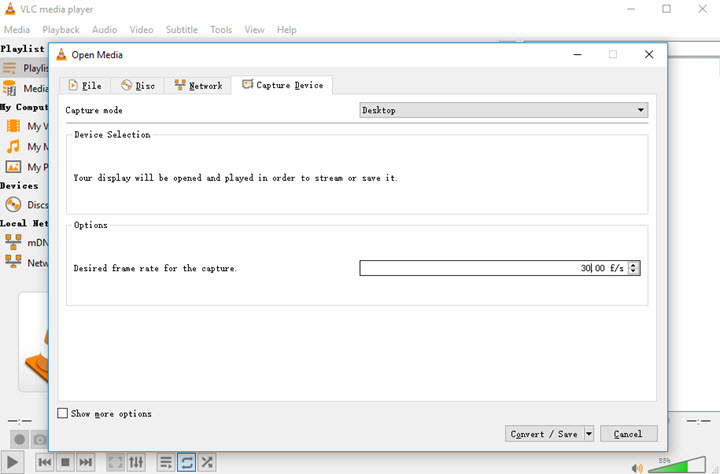
Step 4. Set the recording format H.264 + MP3 (MP4). Choose an output folder and name the recording.
Step 5. Click "Save" and "Start".
Note: VLC does not let you resize the recording area or add annotations during the recording.
FAQ
How do I record my screen on Windows 7 with audio for free?
VideoProc Converter AI can come to your help if you want to record a screen with audio for free. It lets you record the in-app audio as well as external audio via a microphone. Besides, it runs on Windows 7 smoothly and puts no time limits.
Does OBS still work on Windows 7?
OBS 28.x and onwards are no longer available for Windows 7. To get the previous version that works on Windows 7, you can download the pack from OBS official site on GitHub.
How do I record gameplay on Windows 7?
Get your Windows 7 a smooth and lightweight screen Recorder, VideoProc Converter AI, which won't interfere with your gameplay while delivering high-quality recordings. Moreover, it lets you decide on the recording area and audio source. After recording, you can use it to apply quick edits in one go.

