Don't know which one to post after taking too many photos during a travel or a party? Turn pictures into a video, and then you can share every moment with your friends and families. What's more, video is one of the most engaging content forms on social media that receives 38% more views, likes, and comments than photos.
Now follow the guides below to make pictures into a video with the best free video editors on computer, iPhone, and online.
1. Turn Pictures into Video on Computer
VideoProc Vlogger is the next-generation video editing software that empowers everyone to create videos with a fertile imagination. With its intuitive UI, you can make slideshows, time-lapse videos, and any picture videos in your style for archiving or sharing on TikTok and YouTube in a quick workflow. Moreover, you can spice it up with more features like resize, crop, background music, filter, transitions, effects, titles and texts, color grading, etc.
Unique Features to Turn Pictures into a Stunning Video
- Motion effects (zoom in/out, pan, roll, etc.) to introduce more energies to still pictures
- Auto beat detection to create beat-sync slideshows with ease
- Frame-by-frame view to edit images in Video Track more precisely
- Unique hardware acceleration tech to speed up pictures to video conversion
- High Quality Render Engine to render videos without quality loss
- Support all common image formats: JPG, PNG, GIF, DNG, Apple ProRaw, HEIC/HEIF…
Step 1. Load pictures and music to VideoProc Vlogger.
Create a new project in VideoProc Vlogger and import images and background music to its Media Library by either dragging and dropping or clicking the + icon.
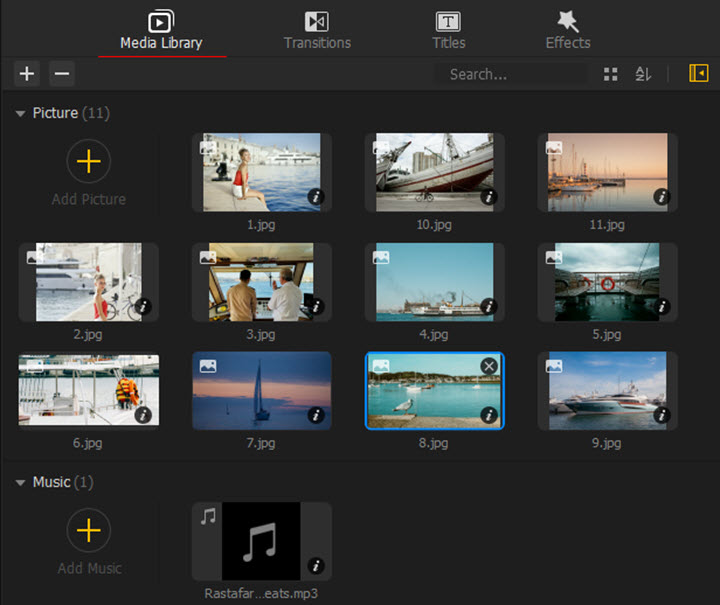
Step 2. Rearrange pictures in the timeline.
Drag your pictures to the video track from the media library. The default duration of each image is 5 seconds. You can drag the edges to shorten or extend them. Then click and drag images on the timeline to organize them into a proper sequence.

Pro Tips: You can make a beat-sync slideshow by beat markers detected by VideoProc Vlogger Audio Analyzer.
Step 3 (Optional). Edit pictures in the timeline.
Click a photo on the timeline and go to the Inspector panel where you can adjust opacity, color & filter, rotate & flip, and blur pictures.
To make the picture video more engaging, you can add effects, transitions, and titles preset in VideoProc Vlogger which are next to Media Library.
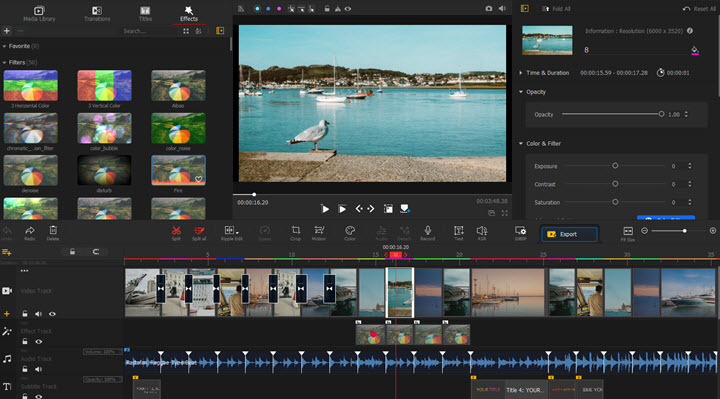
Step 4. Export the video from VideoProc.
When you finish adding and editing pictures to the background music, hit the Export button above the timeline. You can keep the default export settings or customize it according to your specific needs, then hit Start to export the video made with pictures.
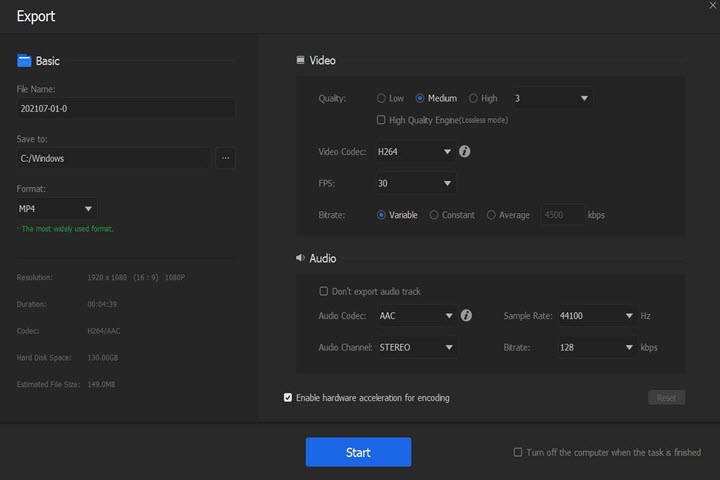
2. Turn Pictures into Video on iPhone
iMovie is a free app to turn pictures into video for iPhone users. It allows you to create videos from still images with music and its templates for different themes (travel, family, and sports).
Step 1. Open iMovie on your iPhone and create a new project.
Step 2. Add pictures from the media library on your phone and get to the editing interface. While you are editing, you can delete or add more photos by hitting the + icon.
Step 3. Tap on each picture, and you can edit them individually by changing the duration, adding filters and texts, and select transitions.
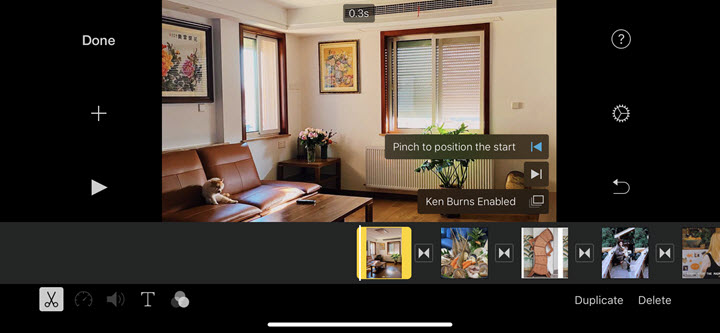
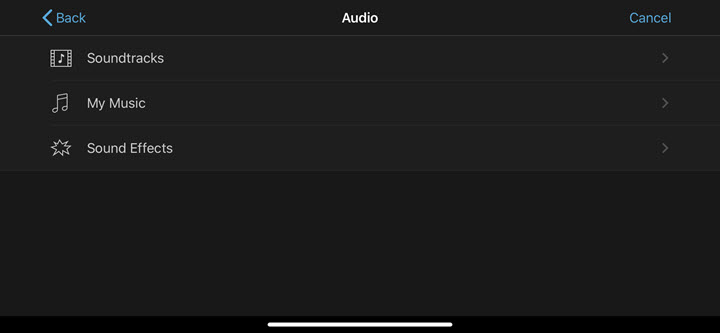
Step 4. Tap the + icon on the left side to import an audio file from your iPhone. It could be a song on your iPhone, a preset soundtrack, or a sound effect.
Step 5. Tap the Done button to save the project. Now you can save the video to your Photos album or share it via YouTube, Instagram, Facebook, Twitter, TikTok, AirDrop, etc.
Disadvantages of This Method
- The duration of each picture cannot be shorter than 3 seconds.
- You cannot change the order of pictures after loading them to the project.
- You cannot turn photos into vertical videos because iMovie only edits and exports horizontal videos at 16:9.
3. Turn Picture into Video Online
If you want to turn pictures into videos online, you can try Kapwing, an online video editor that works on browsers. Here's how to use it.
Step 1. Go to the website of Kapwing and find Video Maker in its Tools.
Step 2. Start a project and load pictures from the local storage, Google Drive, or Google Photos.
Step 3. Wait for it to upload these pictures to the media library. Then add them to the timeline.
Step 4. Drag to reorganize these pictures. Add filters, animations, texts, and background music.
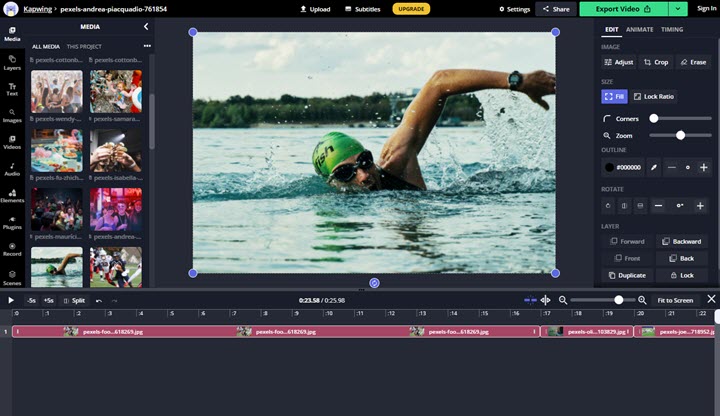
Step 5. Click Export. Then Kapwing starts to make these pictures in a video. When it finishes, download the video to your device.
Disadvantages of This Method
- No transitions preset for pictures.
- Output video quality is visually degraded.
- It lags when you upload too many pictures.
- Your video will be watermarked.
That's all for how to turn pictures into a video on different devices. Now get your photos ready, make them into a video, and share your moments with us.

