

"I am trying to make a design for a lifting belt, and I made an initial design that looks nice, but is very pixelated when scaled up." – asked by a Reddit user.
Struggling with a pixelated image? You're not alone! Whether it's a cherished family photo gone blurry, a downloaded graphic that's too small, or a stunning sunset ruined by pixelation, it's a common frustration. But don't worry – fixing a pixelated picture is easier than you think.
In this guide, we'll show you how to unpixelate images and restore their clarity using 4 simple methods. From powerful AI-driven tools to classic techniques in Photoshop, you'll learn how to depixelate images and rescue your favorite visuals.
- What is pixelation?
- What causes image pixelation?
- 4 easy ways to unpixelate a picture using AI tools and Photoshop.
- Use VideoProc Converter AI (AI-driven)
- Use Photoshop
- Use Fotor (AI-driven)
- Use Let's Enhance (AI-driven)
- Which tool you should use to unpixelate images?
What Is Pixelation
Pixelation is the visual distortion of a digital image when it is enlarged beyond its native resolution, causing individual pixel squares to become visible which makes the image appear blurry, jagged, and blocky.
Why Image Pixelation Happens
Understanding why images become pixelated is crucial for both preventing it and choosing the right method to fix it. Essentially, pixelation occurs when a digital image lacks sufficient pixel density to maintain clarity at a given display size, causing those individual pixel squares to become visible. This 'stretching' of pixels results in the familiar blurry, jagged, and blocky appearance. Here are the most common reasons why your images might be pixelate:
- Enlarging Low-Resolution Images: When a small, low-quality image is scaled up beyond its original dimensions, there simply aren't enough pixels to fill the larger space. This forces the existing pixels to stretch, becoming visible and creating that blocky, pixelated look.
- Excessive Image Compression: Compression, especially "lossy" formats like JPEG, works by discarding some image data to reduce file size. High compression ratios mean more data is thrown away, leading to a noticeable loss of detail and the introduction of pixelation artifacts.
- Cropping into an Image: Cropping essentially zooms in on a specific section of an image. If the original image wasn't high-resolution enough for that zoomed-in view, the pixels within the cropped area become magnified and visible, even if they weren't apparent in the full image.
- Displaying on High-Resolution Screens: A mismatch between a low-resolution image and a high-resolution display (like a 4K monitor or Retina screen) can cause pixelation. The screen tries to "upscale" the image to fill its many pixels, resulting in a blurred, blocky appearance.
- Editing Web/Social Media Downloads: Images downloaded from websites or social media platforms are often heavily optimized for fast loading. This means they're typically small in file size and resolution. When you try to open and edit these already compressed, low-res images, they quickly become pixelated.
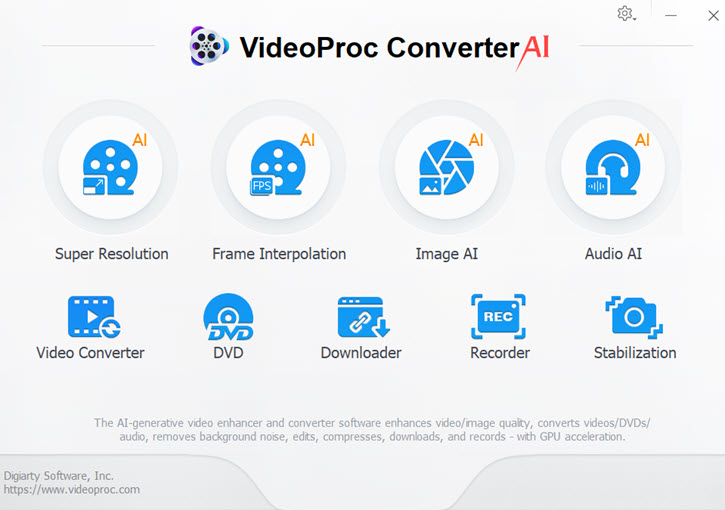
How to Fix Pixelated Images Using VideoProc Converter AI
Looking for the 1-click solution to unpixelate images? Need crystal clear image without noise, over sharpen, or other artifacts? VideoProc Converter AI is your best pick.
This robuest image upscaler and enhancer harnesses the power of deep machine learning AI, trained on a massive dataset of photos and videos, to deliver best-in-class unpixelating results. It intelligently analyzes existing pixels to reconstruct the original image, restoring lifelike details and clarity without introducing noise, artifacts, or other quality issues.
Better still, VideoProc Converter AI can convert low-resolution images into high resolution like 2K, 4K, 8K, and even 10K, ensuring they remain perfectly sharp and detailed when viewed on large screens, printed, or used in high-resolution projects.
 Highlight Features:
- AI-powered bulk unpixelating, restoring lifelike details and clarity.
- Upscale low-resolution images to stunning 8K/10K, preserving every intricate detail.
- Automatically eliminate noise, pixel blocks, and artifacts for pristine image quality.
- Rich AI features: upscale and enhance videos/images, colorize faded photos, etc.
- Unpixelate photos in diverse formats: JPG, PNG, RAW, HEIC, TIFF, BMP, and more.
- Intuitive interface with real-time preview and side-by-side comparison for effortless use.
- Also a full-featured video toolkit: convert, compress, edit, record, and download videos.

Step 1. Download, install, and run VideoProc Converter AI on your computer. Click Super Resolution.
Step 2. Import your pixelated image(s) to it by dragging and dropping them into the program.
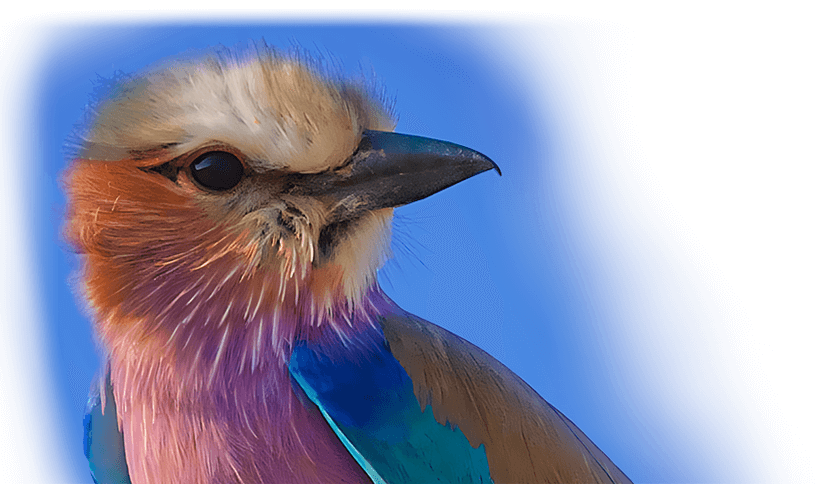
Step 3. Select the AI model. For optimal depixelation results, we recommend Gen Detail v3 and Real Smooth v3. Gen Detail v3 is particularly effective for images with fine details, such as fur and hair.
Step 4. Choose the desired output resolution. For example,
• To simply fix pixelation without changing the image size: Select 1x (Enhance).
• To upscale your image for larger screens, printing, or high-resolution editing (and fix pixelation simultaneously): Choose 2x, 3x, or 4x. This will increase the resolution to 200%, 300%, or 400% of the original, respectively.
Tips:
You can adjust other images using the same steps. Alternatively, you can click the current image at the bottom and apply the changes to all images.
The degree of pixelation and the specific causes of it differ across images. As a result, the ability of mainstream image restoration tools to fix pixelated photos can vary quite a bit depending on the image.
Step 5. Click RUN to start unpixelating your images and exporting them.
How to Fix a Pixelated Image Using Photoshop
Photoshop by Adobe is the leading program for image editing and graphic design. Its robust toolkit enables professionals to manipulate images with precise control. However, beginners may feel it's too overwhelming. The interface contains many specialized features, filters, and adjustments that demand a practiced hand. Photoshop provides powerful techniques to clarify even heavily pixelated images. You can add pixels to increase resolution, use sharpening filters to bring out lost details and reduce noise and artifacts. The latest Neural Filters harness the power of Sensei AI to intelligently generate new pixels based on the surrounding image context. This makes the once laborious task of unpixelating an image as simple as a single click.
Step 1. Start by purchasing Photoshop, which costs $22.99 per month. Download and install it on your Windows or Mac computer. Keep in mind that running Photoshop properly requires robust hardware. Make sure to check the minimum system requirements before purchasing to ensure compatibility.
Step 2. Once Photoshop is installed, open the program, hit Open, and select the original pixelated image.
Step 3. Go to the top menu bar, and hit Images > Image Size. Increase the image resolution to 300PPI or higher, as this is considered high resolution.
Step 4. Choose Preserve Details 2.0 as the resample mode. Slightly move the slider of Reduce Noise toward the left. Hit OK to proceed.
Step 5. Duplicate the image by pressing Ctrl + J (Windows) or Command + J (Mac). Right-click on the duplicate layer and select Convert to Smart Object. This will allow for non-destructive editing.
Step 6. Go to Filters and choose Noise, then select Despeckle. This filter will remove grain noise, excluding edges. Repeat this step if necessary.
Step 7. Smooth the edges by clicking Filters, Blur, then Gaussian Blur. Choose a radius amount, being careful not to over-blur the image. Hit OK to confirm.
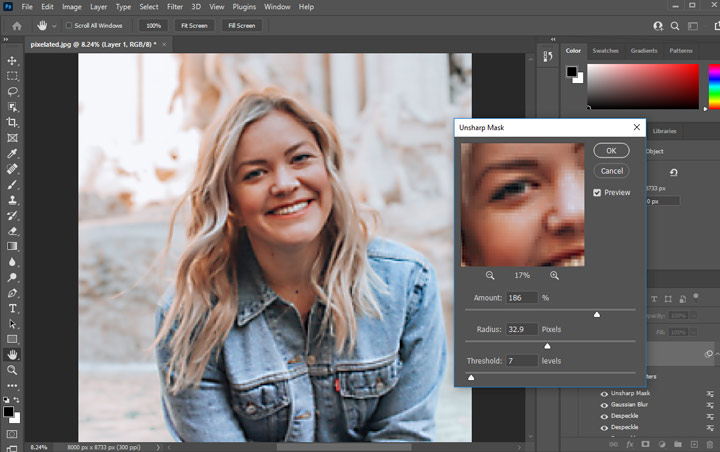
Step 8. The image may now appear slightly blurry, so enhance the contrast by clicking on Filters, then Sharp, and select Unsharp Mask. Adjust the values for Amount, Radius, and Threshold until you achieve the desired result. Click OK when finished.
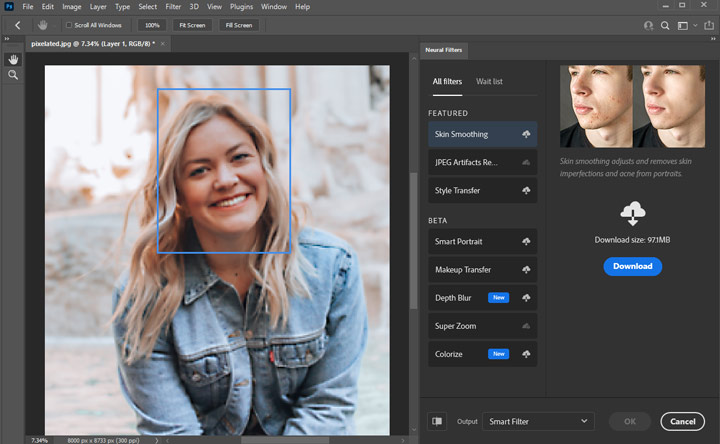
Step 9. If you are still unsatisfied with the outcome and would like to further enhance your image with AI, click on Filters, choose Neural Filters, and download the desired smart filters to make your pixelated image clear.
How to Fix a Pixelated Image Using Fotor
Fotor is one of the most popular photo editing apps, offering a wealth of features that enable users to enhance their images quickly and effortlessly. It's also the ideal choice for beginners who want to unpixelate an image without the need for extra plugins. Powered by cutting-edge artificial intelligence, it excels at detecting and unpixelating images, enhancing sharpness and upscaling images, as well as removing blur to boost image quality automatically. Moreover, this AI-driven graphic design and image editing app offers unique features like transforming text prompts into artwork, background removal, and object elimination.
Step 1. Go to Fotor's official webpage through your browser. Click on Unpixelate Image Now to navigate to the page to make a pixelated image clear.
Step 2. Hit Open Image and select the source image you wish to unpixelate for loading your image.
Step 3. Click 1-Tap Enhance to enable the online image depixelate app to make your pixelate image clear instantly.
Step 4. If the image still appears pixelated, fear not. Fotor provides additional AI features, such as the AI Enlarger and Face Unblur, to further refine and clarify your pixelated image.
Step 5. Once you have achieved the desired level of clarity, click on Download to export the generated clear image directly to your computer.
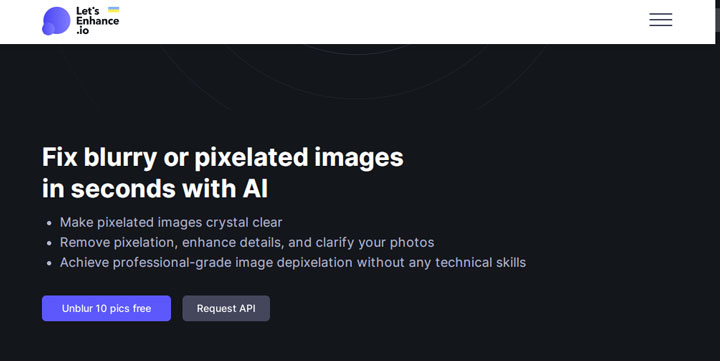
How to Fix a Pixelated Image Using Let's Enhance
Let's Enhance is an innovative online platform for image enhancement and generation that utilizes advanced artificial intelligence and machine learning technology. It enables users to transform low-quality, pixelated images into crisp, clear high-resolution versions ready for sharing, printing, etc. You can upscale low-resolution images up to 18 times the original size to achieve HD, 4K, 8K resolutions, and beyond - all while preserving important fine details. The platform also allows for batch image processing at faster speeds. What's more? This feature-rich depixelate image app provides creative image generation capabilities, allowing you to turn text prompts into unique digital artwork and assets.
Step 1. Click Unblur 10pcs free. Create a new account by entering your email and setting the password. Alternatively, click Continue with Google, and sign in with your Google Account.
Step 2. Click Browser and choose the original image that looks pixelated for loading to this app.
Step 3. Click Start processing to enable this online depixelate image app to analyze and depixelate your image.
Step 4. Click the download button to have the generated depixelate image exported to your computer.
Which Is Your Best Pick to Unpixelate a Picture
Now that we've explored 4 different methods for unpixelating images, let's take a closer look at how they stack up against each other. The following table summarizes the key features, pros, and cons of each approach, helping you decide which one is best suited for your specific needs and skill level.
| Tool | Natural Detail | Artifact Removal | Pricing | Extra Features | Rating |
|---|---|---|---|---|---|
|
|
$39.95/year or $65.95/lifetime |
|
||
Photoshop |
|
|
$20.99/month |
|
|
Fotor |
|
|
$59.99/Year |
|
|
Let's Enhance |
|
|
$34/month |
|
|