Nowadays, there are so many DeepFake-generated video and audio, artificial intelligence generated text, poems and lyrics, fake websites and fake news into people's world. Will people's lives still be real?
What is Deepfake? Many people may be very unfamiliar with deepfake. In fact, it is simpler to say that it is to change the face. This technology is a person image synthesis technology based on artificial intelligence. We can use this technology to superimpose some existing images, videos, etc., onto previous videos or images, and finally give you the illusion that it seems that there is another one in this kind of video.
There are several apps like DeepFaceLab, FaceSwap, Zao, Reface, and more can help you make a DeepFake video. Let's take DeepFaceLab as example and check the steps to make a DeepFake video.

Part 1. How to Make a DeepFake Video with DeepFaceLab
1. Condition recommendations:
- It is recommended to use an NVIDIA or AMD video card with 2GB or greater RAM.
- Higher performance GPU and larger RAM can produce higher quality video.
2. There are three types of DeepFaceLab:
- DeepFaceLabCUDA9.2SSE - NVIDIA GTX series video card for GTX 1080 Ti
- DeepFaceLabCUDA10.1AVX - for NVIDIA RTX series video cards and AVX compatible CPU
- DeepFaceLabOpenCLSSE - for AMD or Intel 64-bit CPU
3. Install CUDA 9.2
When using DeepFaceLab with NVIDIA GTX series video cards, CUDA9.2 must be installed.
If any software other than CUDA9.2 is installed, please uninstall and install CUDA9.2.
Download the installer from the following NVIDIA website and install it.
https://developer.nvidia.com/cuda-92-download-archive
4. Download DeepFaceLab
It can be downloaded from "DOWNLOAD HERE" on this page, but if you are not registered and logged in, the download link will not be displayed; if you have not registered, please register and log in from "Register".
https://mrdeepfakes.com/forums/thread-deepfacelab-explained-and-usage-tutorial
5. Processes of Creating a DeepFake Video
- Prepare materials
- Export footage video as a full frame image
- Extract only the face
- Delete wrongly detected images
- Training
- Export facial transplant image
1. Prepare materials
The best length of the video to be used as material is 1-3 minutes. Two types of materials are needed here: transplanted face and target face.
data_src – "Transplant face"
data_dst – "target face"
For example, in the case of "transplanting Ronaldo's face to Trump", Ronaldo's video is data_src, and Trump's video is data_dst.
As shown in the example above, rename the prepared materials to data_src and data_dst and place them in the workspace folder.
There are multiple faces in the video
In the following process, only the face of a person is exported as an image, but the content recognized as all faces in the video will be exported. Therefore, please make sure that only one person's face appears in the video.Shooting faces in a large enough size
The video used as material (especially data_src) needs to show human faces to some extent. Specifically, the image of the face is a square of 256 x 256 pixels, so the size of the face in the video is expected to be at this size. (The maximum resolution during training is 128 x 128 pixels, so this level may be good)
Therefore, when using a movie as a material, it is only necessary to extract the face of the person to be photographed to capture a fragment of a certain size, and connect it to a single video. In addition, if the face of another person is reflected on the same screen, processing such as applying mosaic is also required to make it not recognized as a face.
2. Export footage video as a full frame image
Extract the image from the video data_dst FULL FPS.bat" and export the data_dst video containing the full frame image. Because this is the face of face transplantation, all frames are needed when the face is finally transplanted into the movie, so it will be written out automatically All frames.
During this process, you will be asked to choose the option to export to PNG with Alpha channel (transparency). There is a transparent part in the data_dst video. When you use the video editing software to synthesize the video created by DeepFaceLab, please set it to y. Usually n is also possible.
Each exported image will be exported to the "data_src" and "data_dst" folders in the workspace folder.
3. Extract only the face
Extract only the face part from the image exported in the previous process and export it as an image.
data_src extract face S3FD best GPU.bat", only extract the face from the data_src image.
data_dst extract face S3FD best GPU.bat" to extract only the face part from the data_dst image.
The exported image will be exported to a folder named "aligned" in the "data_src" and "data_dst" folders.
4. Delete the wrongly detected images
Although only the face part was extracted in the previous process, unfortunately there are always some false detection. If these contents are entered during the learning process, they will be adversely affected, and they should be deleted. Usually, unexpected faces such as "ears", "hands in a stupid state" or "furniture patterns" are recognized as faces.
When data_src sorted by similar histogram.bat", the aligned images in the data_src folder are sorted by histogram. We will not explain the histogram here (check this guide for more details), but doing so will sort by similar images, making it easier to find false positives Images. After sorting, open the folder and delete the wrongly detected images.
Similarly, sort data_dst by sorting similar histograms, and delete falsely detected facial images after sorting.
5. Training
This is basic machine learning. Use "train H64.bat" and "train H128.bat" to learn.
train H64.bat
Learn with 64 x 64 pixels. This is sufficient for scenes with faces facing forward. It is recommended to use vRAM2GB or higher.
train H128.bat
Learn with 128 x 128 pixels. Naturally, this is of higher quality than "train H64.bat", so it is of higher quality, but the learning time is longer. This seems to be more suitable for Asians who are more tolerant than Westerners. It is recommended to use RAM 3GB or higher.
Start training
After selecting the above options, the "tain preview" window will appear and the tain will start. When you select the "Training Preview" window, you can perform the following operations.
P key-refresh the preview and refresh the preview. Even if you don't press any buttons, the preview will automatically update every 15 minutes.
S key-Press the S key to save the tain. Even if you don't press any buttons, it will be automatically saved every 15 minutes.
Enter key-save tain and exit. If you want to restart Train later, please execute "6) train H64.bat" or "6) train H128.bat, and Train will automatically restart from the last saved location.
Depending on the specifications and materials of the machine, it may take several hours to dozens of hours.
6. Export facial transplant image
After completing the training, we will use the learned model to transplant the face into the data_dst video.
For the model trained with "Train H64.bat", please use "convert H64.bat"; for the model trained with "Train H128.bat", please use "convert H128.bat".
Now you can use DeepFaceLab to make DeepFake videos.
Part 2. How to Make DeepFake Videos with Other DeepFake Apps
There are also some other great apps that can help you make a DeepFake video. Here we collected some popular DeepFake apps and websites to help you out.
1. DeepFakesWeb
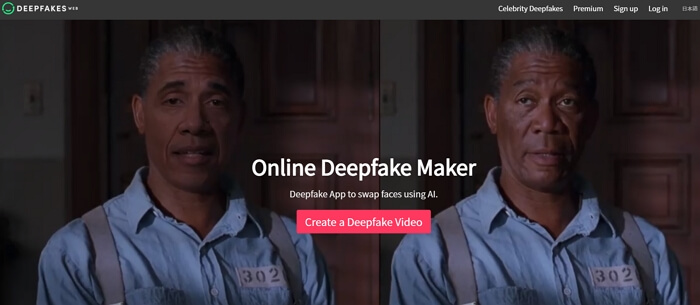
DeepFakesWeb is an online DeepFake video maker that lets you create a DeepFake video within simple steps. Every deepfake generated on this tool has a clear and visible watermark indicated that the video is a deepfake. You just need to upload your source and target video, let the AI learn and render your videos, and then download or watch the created DeepFake video.

2. Zao
Zao is an amazing Chinese app that lets you make a DeepFake video easily. It's works on iPhone, Android, iPad, Windows Phone, Samsung, HTC, XIAOMI, LG, and more devices.

3. Reface
Reface is also an awesome app to make a DeepFake video. You just need to upload a picture of your face and choose a GIF or meme from app's gallery. It's free and works on both Android and iOS.

The Bottom Line
That's how to DeepFake a video and some recommended apps. If you are concerning about the risk of DeepFake videos, you can add a Deepfake watermark to your videos. If you want to make a DeepFake video using someone else's photos, please make sure you get the permission to use their photos.

 VideoProc Converter


