As a content creator, it's essential to make your YouTube videos as accessible and engaging as possible. You add special effects and transitions, enhance audio quality, and write compelling video descriptions. But many YouTubers often overlook one important area: they don't add subtitles to video content.
Adding subtitles to your YouTube videos is a great way to reach a wider audience and ensure that viewers from all walks of life can watch and appreciate your content. Here's an article to help you understand how to add subtitles to YouTube videos quickly and easily.
Why You Should Add Subtitles to YouTube Videos
Improved Comprehension
Adding subtitles to a video helps you reach a wider audience and ensure that viewers from all walks of life can watch and appreciate your content. Viewers can better understand your content, especially when dealing with complex or technical topics or having difficulties understanding accents or dialects.
Furthermore, studies prove that even people with strong reading skills are better able to understand spoken language when it's accompanied by text.
Accessibility for People with Hearing Difficulties
Text on the screen provides an essential means of communication for people who are deaf or hard of hearing. Adding subtitles to your videos lets them enjoy the content, which is especially important when it comes to educational or informative videos.
Subtitles also enable viewers to watch your content in environments where audio is not appropriate, such as public transportation or a quiet library.
Better SEO and Increased Engagement
You can use subtitles to add keywords and metadata for better SEO. This helps viewers find your videos more easily on YouTube and increases the likelihood that they will watch it until the end.
Subtitles are also helpful for those who want to consume content quickly without having to listen closely; they can skim through the text or pause playback at any point. Moreover, subtitles can add an extra layer of engagement to your videos, which increases the chances that viewers will come back for more.
How to Add Subtitles to Other People's YouTube Videos
If you come across a YouTube video without subtitles and want to contribute, you can use YouTube's built-in subtitle feature. This way users can submit subtitle contributions for videos they don't own.
- Log in to your YouTube account.
- Open the YouTube video you want to add subtitles to.
- Click on the gear 'Settings' icon in the lower-right corner of the video player.
- Select 'Subtitles/CC' from the menu.
- Click on 'Add subtitles/CC' and choose the language.
- Follow the on-screen instructions to create and submit subtitles.
- Wait for the video owner to review and accept your subtitle variation.
Note: You can only contribute subtitles on YouTube videos whose owners have allowed contributions. For other YouTube videos, you can try to save the YouTube videos to your computer using VideoProc Converter AI and add subtitles to the YouTube videos for offline purposes.
5 Ways to Add Subtitles to YouTube Videos
There are several tools available for creating subtitles for your YouTube videos. We'll discuss five popular options below, along with step-by-step instructions for each.
1. VideoProc Vlogger
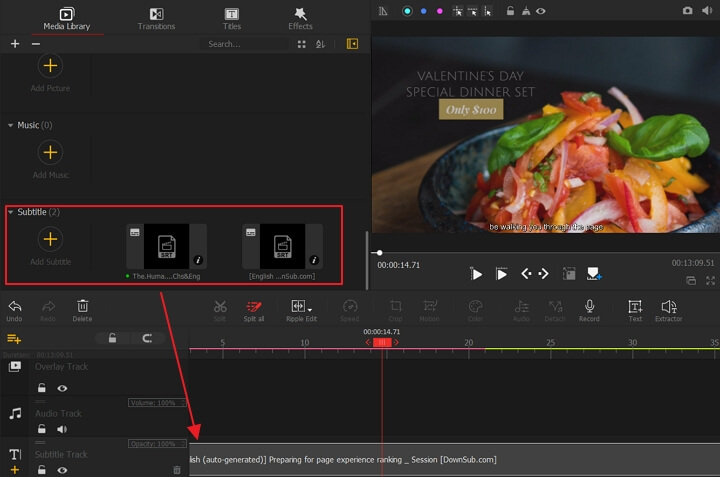
VideoProc Vlogger is a drag-and-drop SRT subtitle editor that boasts comprehensive video editing capabilities for subtitle management. You can insert subtitles automatically just by uploading an SRT file or do it manually.
To add subtitles using VideoProc Vlogger:
- Download and install VideoProc Vlogger on your PC.
- Launch the software and click 'New Project'.
- Import your video file by clicking "Import" and selecting your video from your computer.
- Drag your video to the timeline.
- You can import subtitle files, add text or add titles to your YouTube video.
- Double-click the subtitle in the timeline to edit the text and adjust the settings.
- Repeat this process for each subtitle you want to add.
- Save and export your video with subtitles.
2. Movavi Video Editor
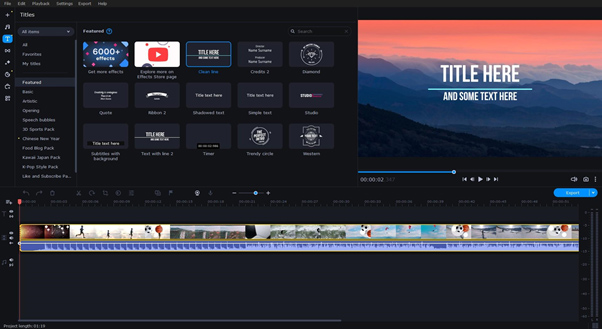
Movavi Video Editor may look pretty basic at first glance but it does offer plenty of features for creating high-quality videos with subtitles. The subtitle video editor has an extensive library of fonts, colors, and sizes to choose from, as well as pre-made stylish titles with different effects and animation. Here's how to add subtitles in Movavi Video Editor:
- Download the software from the official website and launch it.
- Import the video you want to add subtitles to.
- Go to the 'Titles' tab and choose between different subtitle styles.
- Type the text in the text field.
- Align to the desired position and adjust the font style, color, and other parameters if necessary.
- Trim the length of the subtitle clip.
- Once you're done, you can upload the resulting video directly to YouTube right from the video editor.
3. Nova A.I.
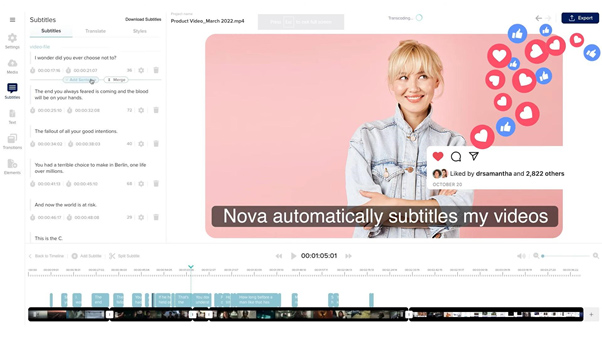
The video editor Nova A.I. has an AI-powered subtitle generator that uses natural language processing to transcribe subtitles for your videos. You can generate and edit each subtitle card word-by-word, style your subtitles the way you want, and translate them into more than 75 different languages. You can export your subtitles hardcoded onto your video or download them as a subtitle or text file (.SRT, .VTT, or .TXT). To add subtitles to YouTube videos with NOVA A.I. follow these few steps:
- Visit the Nova A.I. website and click 'Try it - Free!' to sign up.
- Click 'Create Project' and upload a video from your library or with a YouTube link.
- Enter the subtitle tab and select the spoken language or let the software auto-detect it for you. Then select 'Generate Subtitles'.
- Review subtitles and make any necessary corrections and translations.
- Export your video with subtitles or download the subtitle file separately as .SRT, .VTT or .TXT.
- Upload the video to your YouTube channel or upload an SRT file to your YouTube video through YouTube Studio.
4. Kapwing
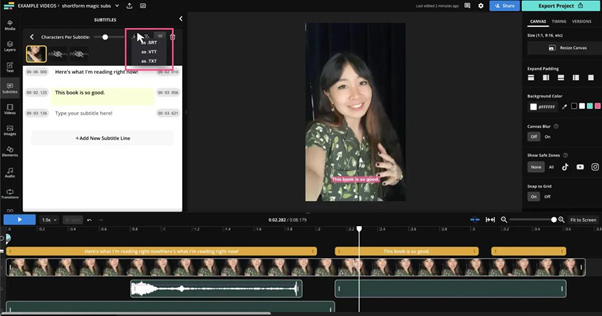
Kapwing is an online video editing tool that enables you to create and edit video captions quickly and easily. The best thing is that you don't need to download any software as all you have to do is upload your video, add subtitles and save the result. Here's how to add subtitles to a video using Kapwing:
- Go to the Kapwing's website and click 'Get Started'.
- Click 'Upload' to import your video or paste the URL of a YouTube video.
- Select the 'Subtitles' tab and click 'Add Subtitle'.
- Type your subtitle text and adjust the timing using the timeline.
- Review and export the video.
5. AmberScript
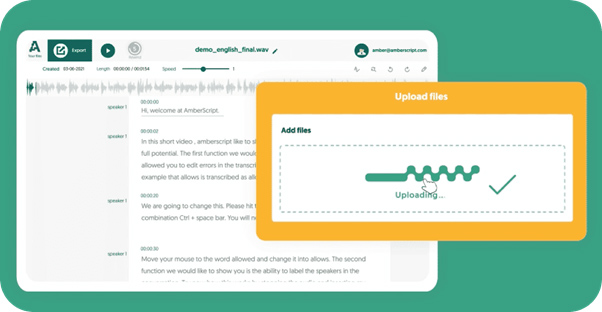
AmberScript is an online transcription service that uses AI technology to help you automatically create high-quality transcripts. The tool also supports multiple languages and allows you to export the subtitles in .VTT, .SRT, EBU-STL, and other popular formats. To create subtitles with AmberScript, follow these simple steps:
- Visit the AmberScript website and sign up for an account.
- Click 'Upload' and select your video file.
- Choose the language spoken in the video as well as customize your subtitle style.
- Click 'Export' to download your video with subtitles as an SRT file.
- Upload the SRT file to your YouTube video through YouTube Studio.
Wrapping up
Understanding how to add subtitles to YouTube videos is an essential practice for improving accessibility, comprehension, and engagement. With various tools available, you can choose the method that best suits your needs and workflow. Whether you're adding subtitles to your own video or contributing to someone else's, following this guide will help you make your YouTube content better for all viewers.


