Add Image Overlay in VideoProc Vlogger
VideoProc Vlogger supports 999 tracks, or more precisely, unlimited numbers of tracks as your computer resource permits. With this multi-track video editor, you can add images above the main video, as an overlay.
Free download VideoProc Vlogger and explore creative ways the image overlay can bring about.
Watch video tutorial on how to add image overlay in VideoProc Vlogger, or read text instructions below.
1. How to Add Image Overlay
Assuming you have already created a new project in VideoProc Vlogger, follow the steps below:
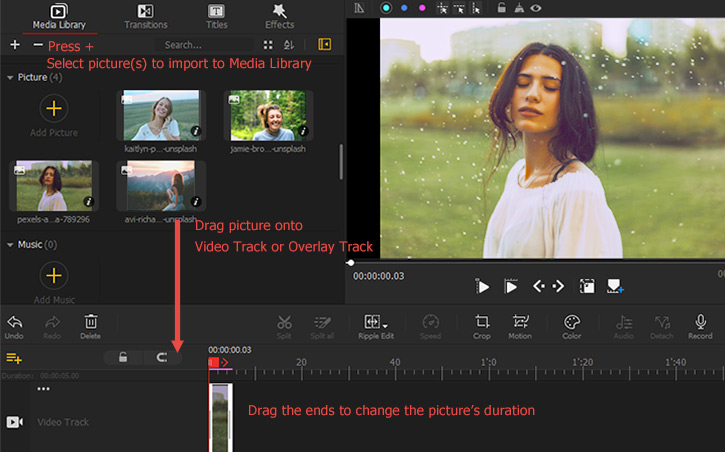
Step 1 Import images and videos to the media library.
You can click the plus button to batch add videos and images into the media library. Alternatively, you can also drag and drop the media files into the library.
Step 2 Add video to the timeline.
Drag the main video to the Video Track.
Step 3 Add image overlay.
- Drag the playhead to the point you want the image to occur, and drag the picture to the Overlay Track, right at the playhead.
- Or you can drag the image to the Overlay Track, and move the playhead around and stop at the place that you think it's good timing, then click on the image clip and drag it to snap to the playhead.
2. Add Multiple Overlay Tracks
If you want multiple pictures to occur at the same time in the preview window, you need to place each picture into an overlay track.
By default, there is only one Overlay Track on the timeline.
Follow these steps to add multiple Overlay Tracks for images to appear simultaneously:
Step 1 Click the+ icon on Overlay Track to add another Overlay Track.
Alternatively, you can click the + icon at the left corner of the timeline, and hit Add New Overly Track.
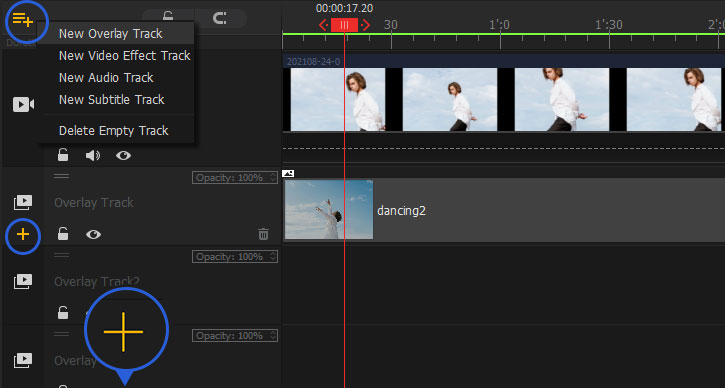
Step 2 Drag an image to the first overlay track, and drag another image to the second overlay track.
Repeat the process to add images to multiple overlay tracks.
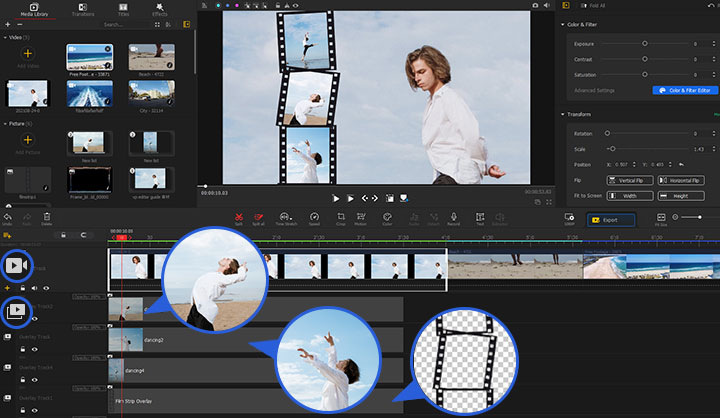
Step 3 Move the images on each track to the point you want them to appear in the video.
Step 4 Resize or crop images according to your specific needs.
- You can double-click on the image to show the boundary box, and drag the corner to resize it.
- If the shape doesn't fit, you can click the Crop icon from toolbar, and crop the image.
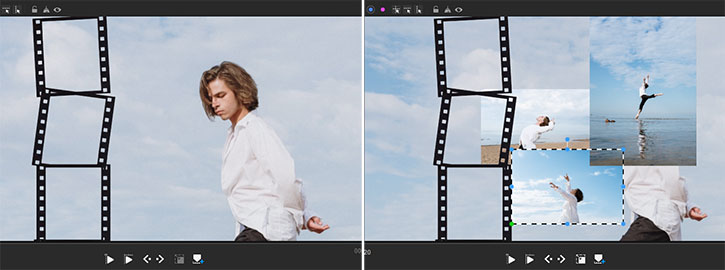
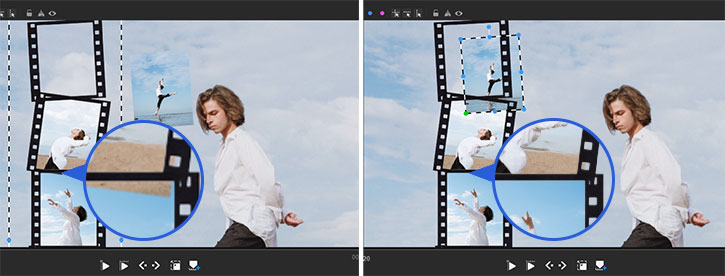
Step 5 Adjust the images' layers.
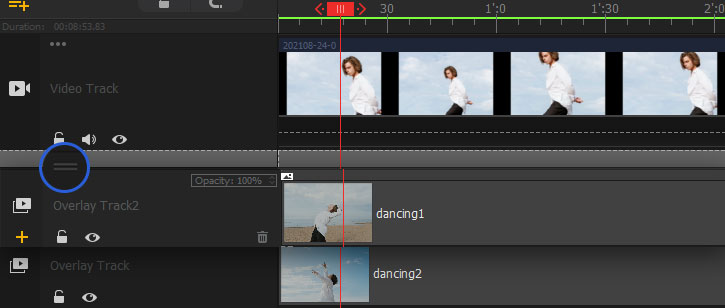
If the image stays on top of another, while you want the other way around, you can drag the overlay tracks to adjust their orders.
Press on the double-line icon and drag the mouse to move the overlay track up or down.
3. Get Creative with Image Overlay
Multi-track video editor as VideoProc Vlogger gives us utmost flexibility. Here are some editing ideas using image overlay to get creative.
1. Camera Snapshot Effect
Step 1 Add a video clip to the video track.
Step 2 Decide the timing.
Scrub though the timeline or play the video, and stop at the point where you want to add the camera snapshot effect.
Step 3 Create a freeze frame.
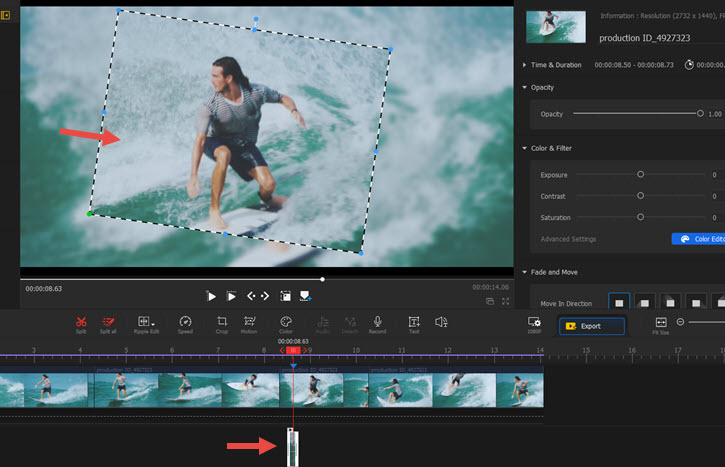
- Click the camera icon at the top right of the Preview Window, it will save the current frame as a picture.
- Import this picture into the media library, and drag it to the timeline at the position of the playhead.
Step 4 Add a white photo frame.
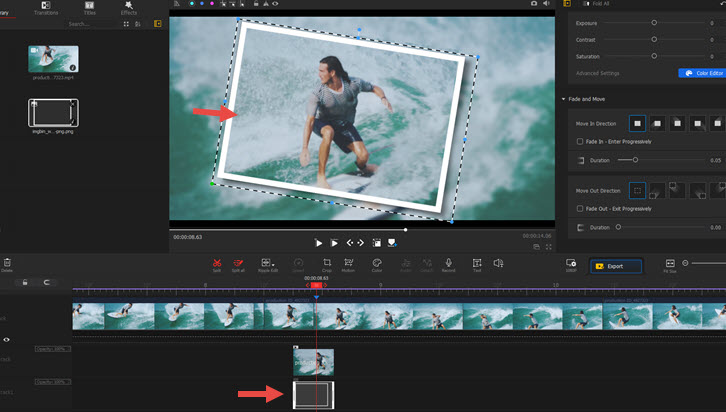
- Search for white photo frame png online, and you can find tons of free resources, download the PNG picture and import it into your project.
- Drag the white photo frame to the playhead.
- Make sure it starts and ends at the same time as the freeze frame.
Step 5 Fine-tune related settings.
- You can crop the freeze frame picture to the shape you like, and adjust the white photo frame accordingly.
- You can rotate the freeze frame picture, and rotate the white frame accordingly.
- Click the eye icon to hide the white frame track, so that you can adjust the picture under it. Once you are done, click the eye icon again to show all the images.
Step 6 Blur the video underneath.
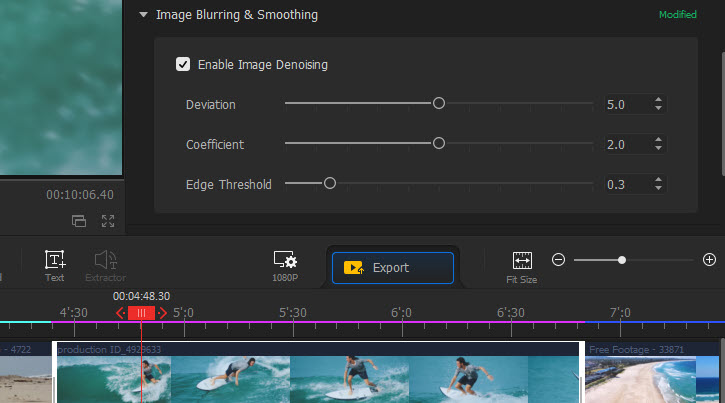
You can also blur the base video (the main video on the Video Track) during the time when the snapshot effect takes place.
Click on the video clip, go to the Inspector Panel, and scroll to the Image Blurring & Smoothing section.
Step 7 Add sound effects.
You can download a camera shutter sound clip, and add it to the playhead. Make sure the sound clip lines up with the freeze frame clip.
2. Add Logo/Signature
Whether you are a vlogger, running a YouTube channel, or trying to establish your own brand, you can add logos, watermarks or signatures to your video.
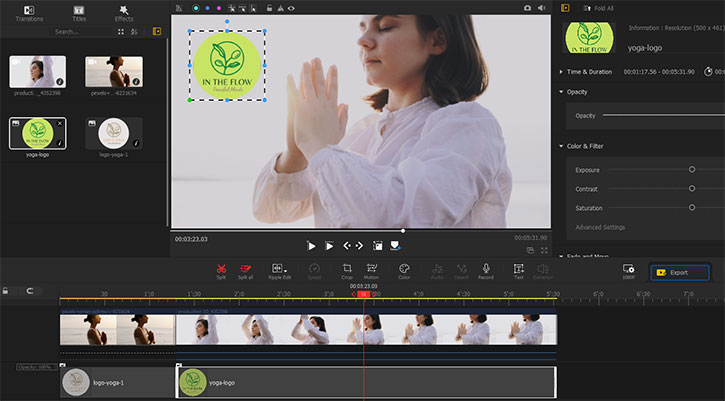
It is easy to add logos as an overlay image, and fine-tune it with blend mode and chroma key, when needed.
Step 1 Import the picture of the logo (usually a PNG file) into VideoProc Vlogger media library.
Step 2 Drag it to the overlay track, so that the logo appears on top of the video.
For signature on a picture with a pure background, you can use Chroma Key to remove the background:
Step 1 Click on the picture of the signature.
Step 2 In the Inspector Panel, scroll to the Chroma Key section.
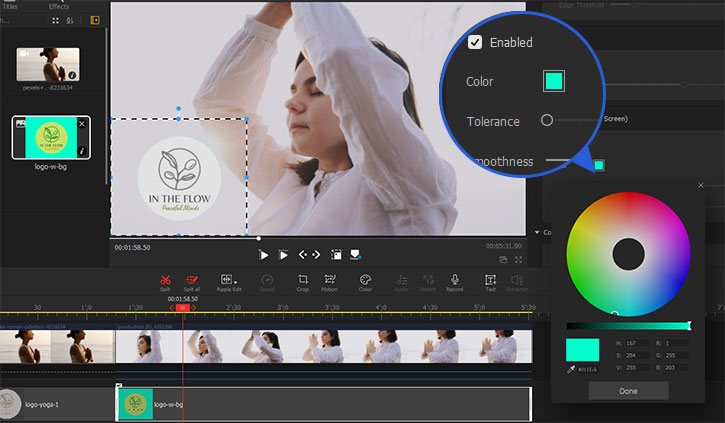
Step 3 Use the eye dropper to pick the background color, and click the Enable box.
Adjust the tolerance and smoothness parameters.
 Video Editing Tips
Use Blend Mode
If you prefer more interesting effects, with the logo's color interacting with the base video, you can play around with the blend mode, and find a suitable one for your logo.
For instance, if your logo is white, you can adjust its opacity, and select Screen Mode to create watermark-styled effects.
Learn More: How to Use Blend Mode in VideoProc Vlogger >>
3. Add Speech Bubbles
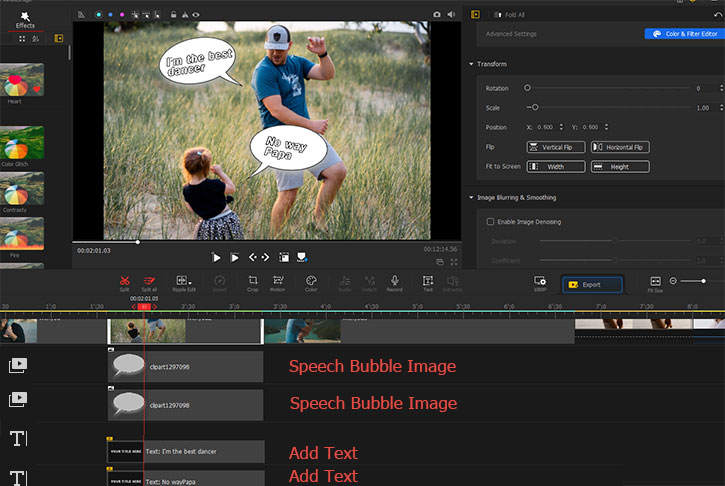
Step 1 Find a speech bubble png file, and add it as a picture overlay.
Step 2 Click the Text icon on the toolbar, and type in the dialogue you want to add.
You can adjust the fonts, size, color and other parameters of the text in the Inspector Panel.
Free Download VideoProc Vlogger to explore creative possibilities with image overlay:
- > Using Chroma Key (Green Screen)
- > Create Split Screen Video (Collages)
- > Create Picture in Picture Video
- > Add Text Overlay
For more guides of VideoProc Vlogger, please visit this page >
If you have any question, please email us or visit

