Create Picture in Picture Video in VideoProc Vlogger
Picture in Picture video effect (PiP) is commonly used when you are editing game videos, reaction videos, video chats, interviews and so on.
VideoProc Vlogger allows you to create Picture in Picture video easily and flexibly. The final video will be a smaller video frame staying on top of the main video.
Free download VideoProc Vlogger to get started.
Watch video tutorial on how to create PiP effects in VideoProc Vlogger, or read text instructions below.
Create Picture in Picture Video
Step 1 Decide the export size you want the video to be, and create a new project accordingly.
For instance, if you want a horizontal 1920x1080 video, select 1920x1080 (16:9) when you create the project. If you want a square video, select 1080x1080 or any other resolution with an aspect ratio of 1:1.
Step 2 Import video clips to the Media Library by clicking the + icon, or simply drag and drop the videos to the library. You need at least two video clips.
Step 3 Drag and drop the main video to the main video track on the timeline, and drag another video to the overlay track.
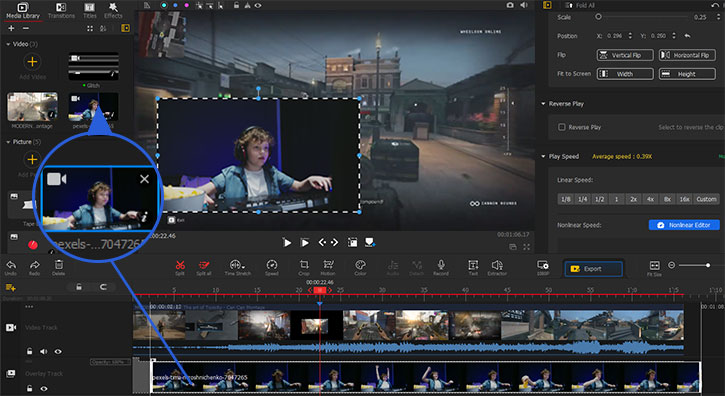
Step 4 Adjust the size of the overlay video.
To adjust the size, you need to select the video on the overlay track, and click on it in the preview window. When the frame appears, drag the corner of the frame to resize the overlay video.
You can also click on the Show Layout Rectangle icon, which is the second one from the right under the preview window.
Step 5 Move the overlay video to any position on top of the main video.
In the preview window, you can click on the overlay video, and drag it to top left, top right, bottom left, bottom right or any other position you prefer.
Change the Shape of the PiP Video
You can change the shape of the smaller video on top of the main video.
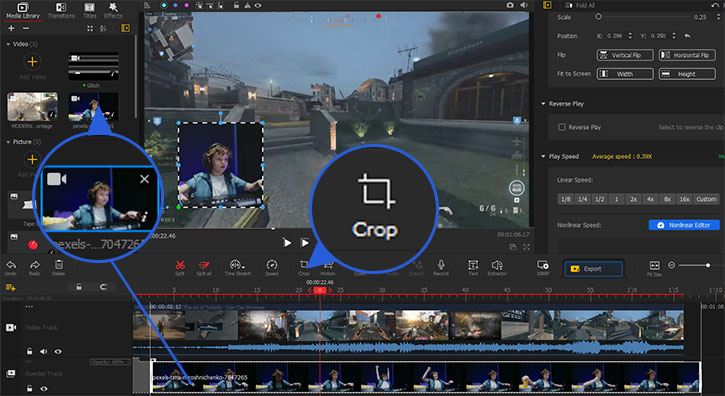
Step 1 Click on the overlay video, and hit the Crop icon from the tools bar.
Step 2 Select a different aspect ratio, so that you can change the shape of the video.
Step 3 You can also drag the frame in the cropping editor. Click Apply Crop to change the shape.
Add Animation Effects
Optionally, you can add animation effects when the overlay video appears and disappears.
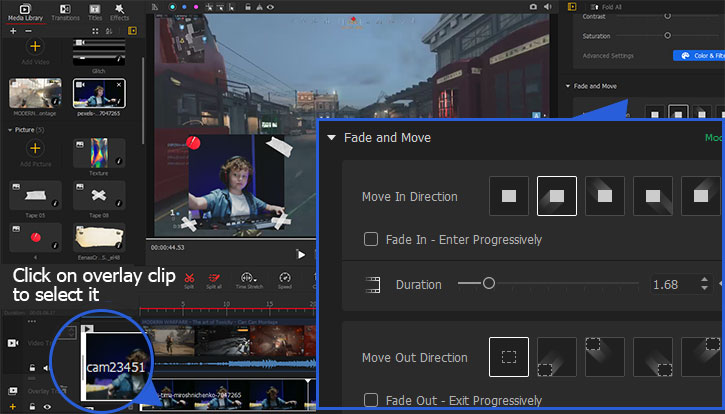
Step 1 Click on the video clip in the overlay track, and scroll in the Inspector Panel.
Step 2 In the Fade and Move section, you can add fade in and fade out effects.
Step 3 Click the square icons to add Slide-in effects of various directions for the overlay video.
Manage Compositing Settings for PiP Video
You can change the transparency and blend mode for PiP videos.
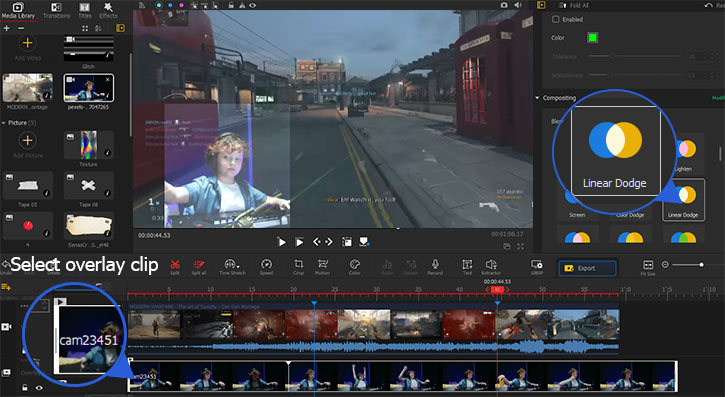
Step 1 Click on the overlay video clip, and scroll to the Compositing section in the Inspector Panel.
Step 2 Drag the slider of the Opacity to change the transparency degree, 1.00 stands for non-transparent.
Step 3 Click any blend mode to check whether you like the effects, or Click Normal to revert to the original no-blending mode.
Remove Background of PiP Video with Green Screen
You can use the Chroma Key feature to remove the green screen, so that the overlay video will have a transparent background.
Step 1 Move the playhead to the overlay video clip, so that you can see it appear in the Preview Window.
Step 2 Click on the overlay video in Preview Window.
Step 3 Go to the Inspector section, and scrolling down to the Chroma Key section.
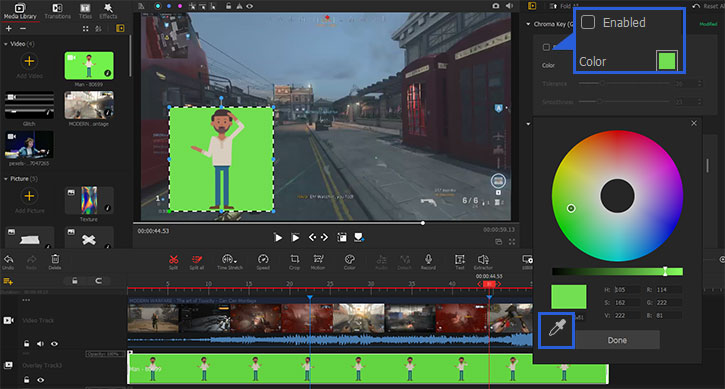
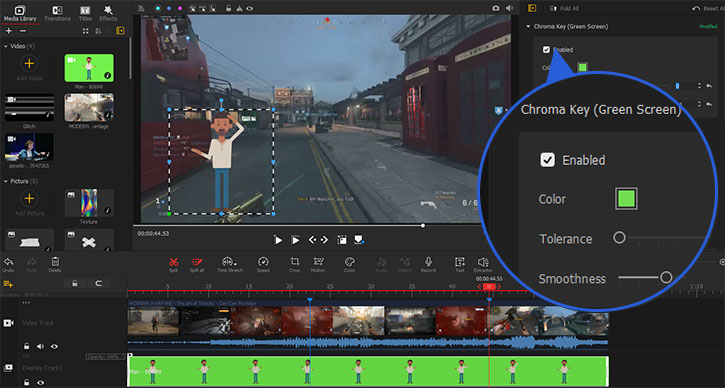
Step 4 Tick the Enabled box, and the green screen background will be removed.
 Editing Tips
You can adjust the values in Tolerance and Smoothness to fine-tune the removal of the green color.
Free download VideoProc Vlogger to create a Picture in Picture video easily, no editing skills required.
- > Add Transitions in VideoProc Vlogger
- > Speed Ramp in VideoProc Vlogger
- > Using Motion Editor in VideoProc Vlogger
- > Using Chroma Key (Green Screen)
- > Compositing with Blend Mode
- > Create Split Screen Video
For more guides of VideoProc Vlogger, please visit this page >
If you have any question, please email us or visit

