Summary: This post covers everything you want to know about hi-res images, including how image resolution is measured, what high-resolution images are, and the size of high-resolution photos… Moreover, it shares how to make your image high resolution using the Super Resolution feature offered by VideoProc Converter AI, one of the best AI-powered video/image enhancement tools.
In the visually-driven world of today, high-resolution images have become a cornerstone of digital media, playing an essential role in everything from professional photography and graphic design to day-to-day social media use. But what exactly defines a high-resolution image, and why is it so critical to our digital experiences? Understanding the nuances of image resolution is key to anyone looking to create, share, or enjoy content with the highest possible quality.
How Is the High Resolution Image Measured
There are two main ways that image resolution is measured:
1. Pixel Dimension
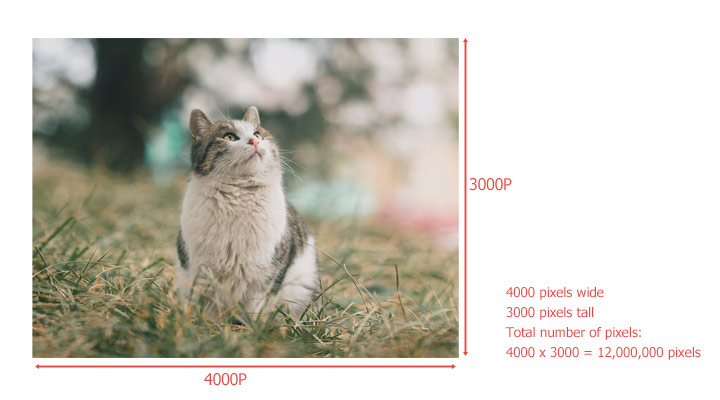
Pixel dimension refers to the total number of pixels that make up the width and height of a digital image. This is often called the image's resolution in pixels. For example, if an image has a resolution of 4000 x 3000, it means the image is 4000 pixels wide and 3000 pixels tall. When you multiply the width and height (4000 pixels by 3000 pixels), you get a total of 12,000,000 pixels, which is typically expressed as 12 MP (megapixels).

2. Pixel Density
Pixel density refers to how tightly the pixels are packed together within each inch of the image. It's measured by PPI (pixels per inch) or DPI (dots per inch). For instance, 300 DPI means that the image has 300 pixels per inch and 96 DPI means 96 pixels per inch. The higher pixel density, the more the pixels are packed into each inch of the image or printed material. This increased pixel density results in a smoother and more detailed image because there are more individual pixels contributing to the overall visual information.
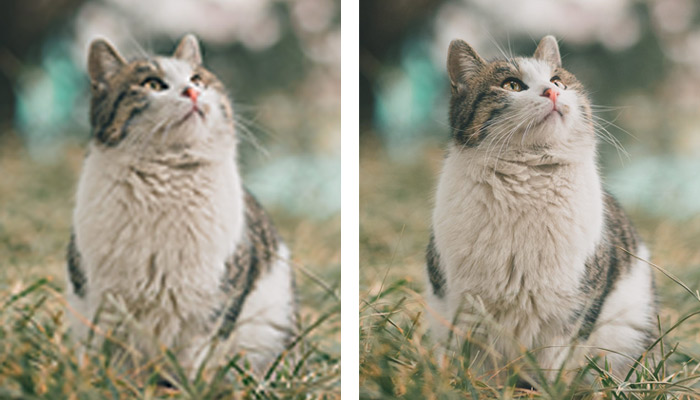
Look at these two images.

- The left image is 120x142 pixels, with a resolution of 72 DPI;
- The right image is 4000x4730 pixels, with a resolution of 300 DPI.
The actual pixel dimension of the left image is noticeably smaller than the right one. If we enlarge it to match the dimensions of the right image, it becomes blurred.
Tips:
To better understand why low- and high-resolution images may look so different, we can imagine an image as a puzzle where each piece represents a pixel. The total number of pieces in the puzzle doesn't change, whether you're viewing it on a small or large screen. What does change is how closely those pieces are arranged, known as pixel density. If the puzzle has only a few pieces (low density) and you put it on a big screen, the pieces become spaced out, resulting in a less-detailed and choppy appearance. The image loses its clarity because the same number of pieces is now spread over a larger area, making it look less sharp.
What Are High-Resolution Images
A 300 DPI (or PPI) image is often considered high-resolution image. It's ideal for creating top-quality printed materials, like brand representations and important documents. You can increase the DPI of an image easily.
Resolution can be assessed by file size in MB – more pixels and higher resolution result in larger files. So, what is high resolution photo size? While there are no strict boundaries, a general guideline is that images under 100 KB are often categorized as low resolution.
In fields such as graphic design, social media, and marketing, the total number of pixels in an image is usually more important than how densely those pixels are packed together. So what are the pixels for a high resolution photo? Images that have a pixel resolution of 20 MP or more are generally considered to be high-resolution.
What Is the Correct Resolution for Your Image
The correct resolution for your image depends on how the image is going to be used. Here are some common guidelines:
- Web and digital displays: 72 DPI
- Standard printing: 300 DPI
- High-quality printing: 300-600 DPI
- Billboards and large format prints: around 100 DPI
Why You Need High-Resolution Images
Whether we're enjoying photography, browsing a website, or getting lost in the latest video game, high-resolution images enhance our experience. With their dense pixel count, everything we look at feels more vivid and lifelike. This detail is critical when it comes to printing. A high number of pixels guarantees that the printed result looks crisp, without any of those pesky jagged lines or blurs that can occur when images are enlarged. However, the benefits of high-resolution images don't stop there. For example:
1. Zooming and Cropping: High resolution allows for greater flexibility in zooming in on specific areas of an image without losing quality. It's like having a magnifying glass that never blurs.
2. Large Format Outputs: For large-scale outputs like banners and posters, high-resolution images matter. They ensure your visual message is delivered with impact and clarity, no matter the size at which it's displayed.
3. Digital Displays: With the advent of HD 1080p and UHD 4K screens, high-resolution images are needed to take full advantage of these displays' capabilities, ensuring that images appear crisp and detailed.
4. Professional Quality: On the battlefield of brand perception, high-resolution images are your elite troops. Crisp product shots and polished ad campaigns are crucial in conveying a message of professionalism that resonates with consumers and distinguishes premium content.
5. E-commerce and Online Sales: High-resolution images allow potential buyers to see products in detail, which can contribute to increased sales conversions.
How Do You Check If an Image Is High Resolution
Checking the resolution of your image to figure out if it is high resolution is easy. Here's how:
On Windows
Right click the image, select properties > Details, and you can find the resolution information under the Images section.
On Mac
Right click the image, hit open with, and choose preview.
In the Preview app, click tools > show inspector. Now you can find the DPI and dimension information of your image.
How to Get High-Resolution Images
Getting a high-resolution image can be achieved through various methods, depending on whether you are creating an image, taking a photograph, or acquiring an image from existing sources. Here's how you can obtain high-resolution images in different scenarios:
1. Take Photographs
- Use cameras that offer a good megapixel count. Most DSLRs in the market can satisfy your needs.
- Capture images in RAW format to keep all data captured by the camera sensor.
- Manage your camera's ISO settings with precision to minimize noise and keep image clarity.
2. Create Digital Artwork
Use graphic design software (like Adobe Photoshop, Illustrator, or similar programs) and set your canvas to a high resolution. As said, a common resolution for printing is 300DPI. When creating vector graphics, resolution is less of an issue since vector images can be scaled without loss of quality.
3. Upscale the Image
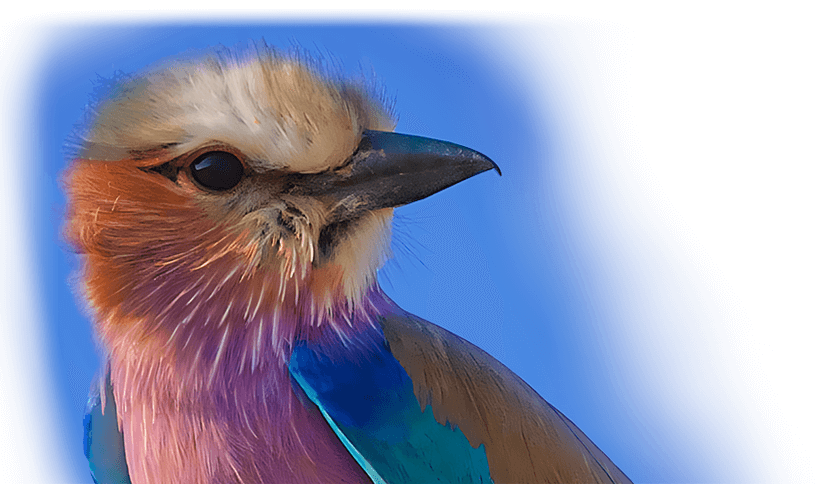
Got low-res photos? Upscaling them up to high-res using VideoProc Converter AI, which is one of the best AI-powered image upscaling programs, is a great idea. Trained by a vast number of data sets, it can smartly recognize patterns in your videos and then guess and create new details that fit naturally into new pixels in the higher-resolution images. Notably, it can increase the resolution of an image by 2x, 3x, 4x, up to 10K (16 megapixel) while retaining the original details without introducing artifacts.
Check some of its highlight features:
- Upscale videos and images and by 2X, 3X, 4X to reach up to 4K/8K resolution
- 4 AI upscale models trained for optimizing different types of images to perfection
- All-in-one AI solution: FPS converter, denoise, deshake, upscale image, and more
- Support JPEG, PNG, WebP, PBM, XBM, PGM, PPM, XPM, and more image formats
- Batch processing supported. One click to go. GPU-accelerated speed
Step 1. Import the Low-Res Image(s)
Download, install, and run VideoProc Converter AI. Click Image AI to access the image upscaling feature.

Step 2. Choose the Upscale Model
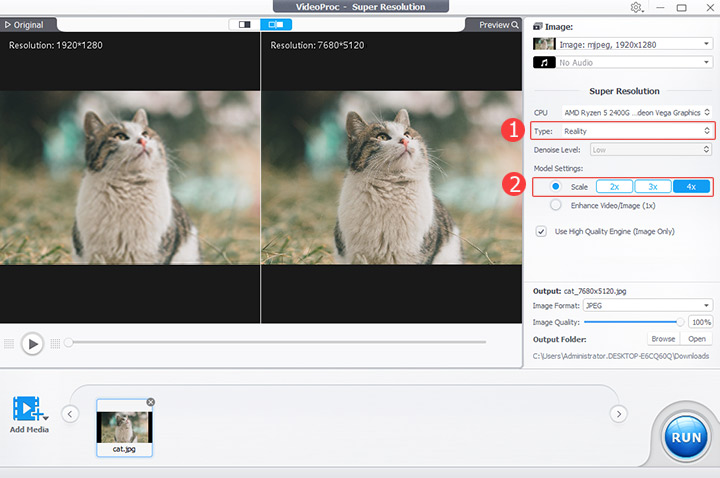
Drag your image(s) to the program from the computer. Choose the image type for locating the AI model that works best for upscaling your image. For images with lot of details, opt for the Gen Detail v3. Real Smooth v3 is also a popular choice for most images.
Step 3. Increase the Resolution
Choose 2X, 3X, or 4X upscaling as needed. For instance, if you start with a 1000x1000 image and apply 4X upscaling, you'll get a 4000 x 4000 image, 16 MP. Perfect for high-quality prints and sharing on large displays.

Step 4. Output the High-Resolution Image
Choose JPEG or PNG as the target image format. Keep the Image Quality at 100% and hit RUN to generate the high-resolution image.
4. Scan or Print Images
When scanning a document or photo, set your scanner to a high DPI setting (at least 300 DPI for print quality). Asides, clean the scanner glass and the original image to avoid dust and smudges, which can affect the scan's quality.
5. Stock Images and Digital Downloads
Purchase or download images from reputable stock photography websites where high-resolution images are available. Ensure you select the highest resolution available when downloading or purchasing the image.


