WAV (Waveform Audio File Format) is a lossless audio file format which can provide you with a perfect sound quality. Even when you save cassettes as WAV, you can hardly tell the difference between them.
If you want to share this lossless file onto YouTube, TikTok, or some other platforms which do not support audio sharing but video, converting WAV to MP4 is obviously a very quick solution. MP4 can be compatible with all platforms.
Anyway, in the following, you will get 3 different ways to help you convert the WAV files to MP4. Choose the one that you prefer and get started.
How to Convert WAV to MP4 on Windows 11/10
To do this job on Windows 11/10, we recommend you VideoProc Vlogger. VideoProc Vlogger is a free and powerful video editor with a bunch of amazing features. You must know that switching sound to video, there must be some images (or at least one). As long as you decide the WAV file and the image(s), VideoProc Vlogger can help you combine them into a new MP4 file in minutes.
Besides, VideoProc Vlogger also enables its users to add transitions and effects to the MP4 video, making it stylish. You can also add texts to the MP4 video to make a lyric video. Or you can even edit the WAV file with some fancy sound effects with its built-in audio editor.
And more fun that you can get with this video editor. So why not give it a try now and follow the steps about how to make the job done?
Step 1. After you download VideoProc Vlogger on your Windows computer (Now it also supports Mac computers), install it.
Step 2. After the installation finishes, run it. It will first ask you to create a project.
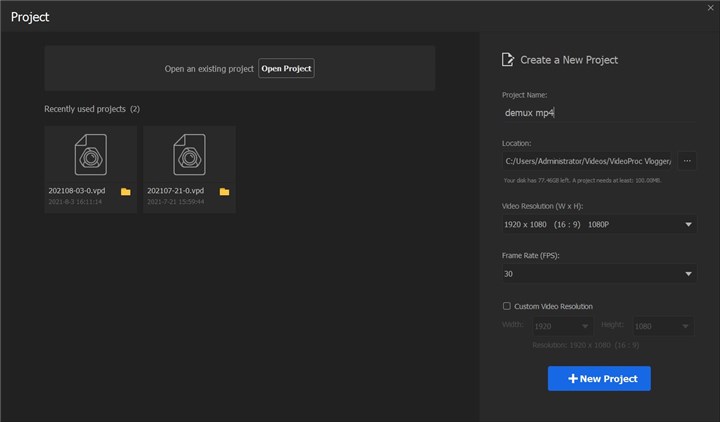
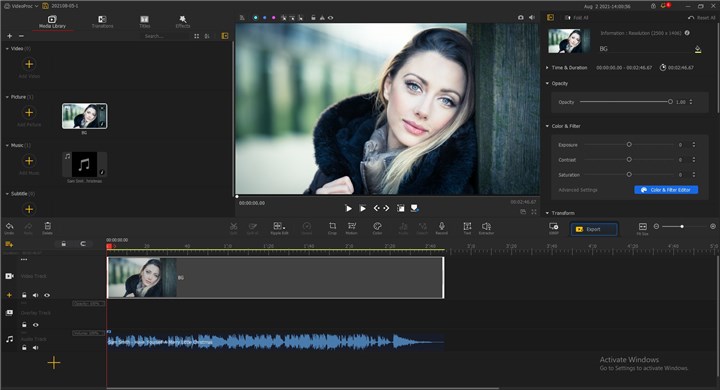
Step 3. Then in the main interface, click the + button to import the WAV file and an image (The image is necessary, or you cannot make the WAV into MP4; you can import as many images as you want).
Step 4. Next drag the image(s) into the Video Track in the timeline below, and move the WAV file into the Audio Track. Then you need to pull the image to cover the length of the WAV file.
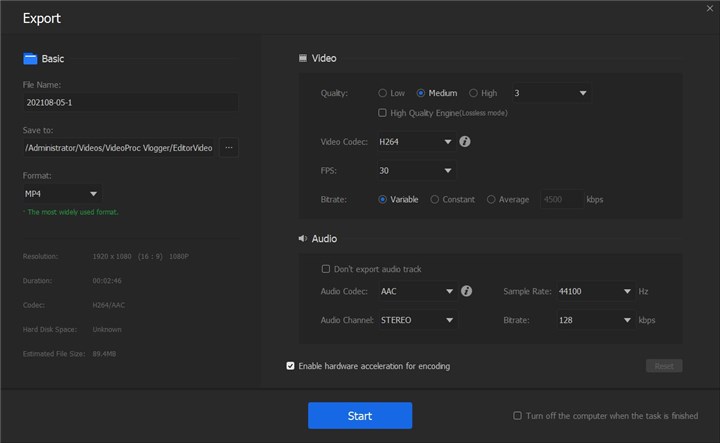
Step 5. Lastly, you can just click on the Export button, which is near the right corner of the preview window. Then you will see the export window. There you can name the MP4 file and choose the destination folder to save this file. Most importantly, switch the Format option to MP4, if it is not. Then click on the Start button and wait for VideoProc Vlogger finishes the rest of jobs.
How to Convert WAV to MP4 on Mac
On Mac, you can use its built-in video editor - iMovie to convert WAV to MP4. Just like VideoProc Vlogger, you also need to get an image or more before you start with the real job.
Step 1. Open iMovie on your Mac computer and create a new project.
Step 2. Click on the My Media option and import both WAV file and image(s) into iMovie.
Step 3. Next, drag the imported WAV file and image(s) to different tracks in the timeline.
Step 4. Drag the right side of the image(s) to cover the length of the WAV file.
Step 5. Lastly, click on the Share button, choose the File option to export this video file, and change the format to MP4.
How to Convert WAV to MP4 Online
Unlike VideoProc Vlogger and iMovie above, online WAV to MP4 conversion tools will not require you download any file and install it first. You can simply open the online tool in your browser, and then start the work.
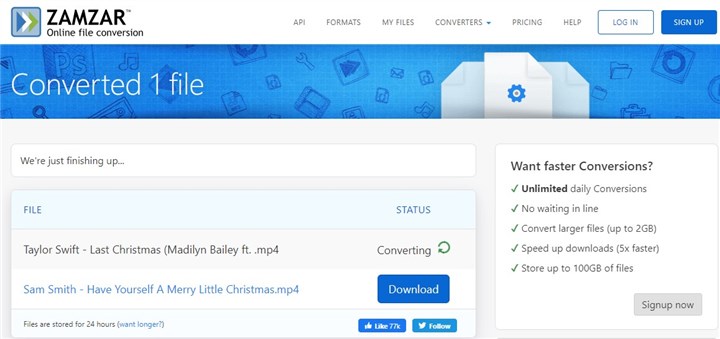
The online tool that we recommend is Zamzar WAV to MP4 converter. Zamzar has no limit for how many times every user can convert. Each file can be up to 2 GB in size. That can cover most needs for users. And you have no need to wait in line for uploading and conversion. This happens for some online tools because they have enough bandwidth for the user needs.
Anyway, if Zamzar is what you are looking for, here are the steps of how to use it to convert WAV to MP4.
Step 1. Open Zamzar WAV to MP4 converter in your browser.
Step 2. Click on the Add Files button to import the WAV file, and then choose the Convert Now button. Zamzar will first upload the file and then start converting.
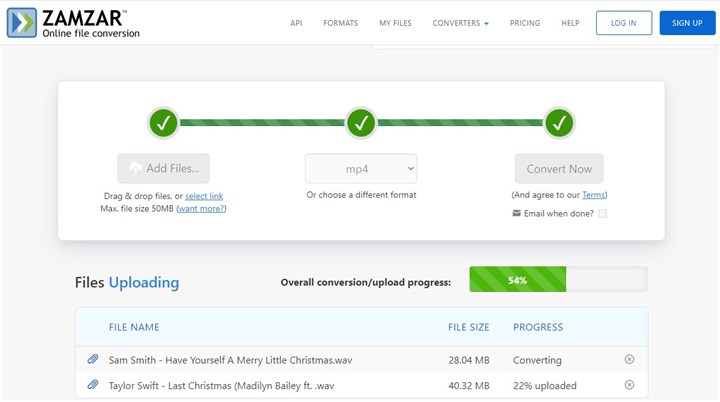
Step 3. After the conversion finishes, you can click on the Download button to save the converted MP4 file.
The Bottom Line
You may have notice that the major difference between the desktop application way and the online tool method is that the desktop applications require you prepare an image or more first to make this job done, but the online tool - Zamzar does not. Zamzar will automatically help you with that. It will save you some effort and time.
Surely if you want some customized pictures for the converted MP4 file, obviously VideoProc Vlogger and iMovie are the better way to go.


