Slow Down & Create Slow-Motion Video
Slow-motion is one of the magic video effects that bring general video to a new level. Some phones can directly shot slow-motion videos. It doesn't matter if you shot a normal speed video. VideoProc Vlogger lets you slow down the speed and create a cool slow-motion effect in an easiest way. For a smooth slow-motion playback in post-production, you are suggested to film video at a higher frame rate, e.g. 50fps, 60fps, or even higher.
Let's download and install VideoProc Vlogger to create slow-motion effect for your video.
Watch video tutorial on how to slow down clips in VideoProc Vlogger, or read text instructions below.
Step 1 Create project and import video
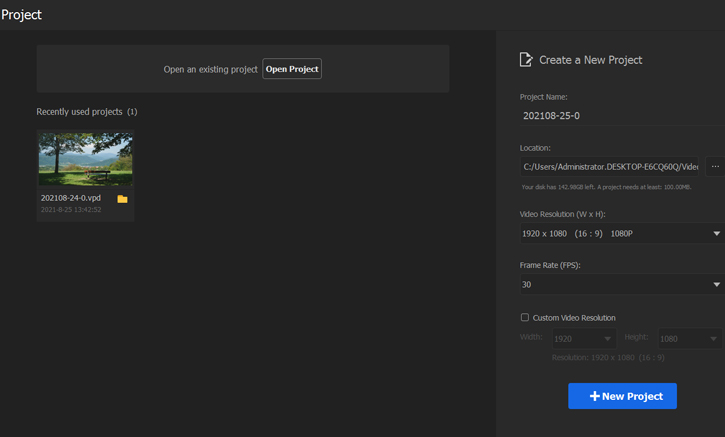
Install and run VideoProc Vlogger > create a project in the pop-up Project panel > Drag and drop video to Media Library. Drag down to Video Track in Timeline.
Step 2Split out the original video
If you want to slow down a whole video, please skip this step and continue step 3.
Let's select the target video in Timeline > click the Play icon in the Preview panel. After that, the red playhead will move in Timeline to preview the video > hit the Stop icon in Timeline to locate the start point where you want to slow down. Tap Split in Toolbar. Then, split the end point where you want to slow down in the same way. Now you split the segment out.

Step 3 Adjust speed
VideoProc Vlogger offers you 3 methods to slow down a video. You can select one as your needs.
Method 1: Slow down with Time Stretch Tool
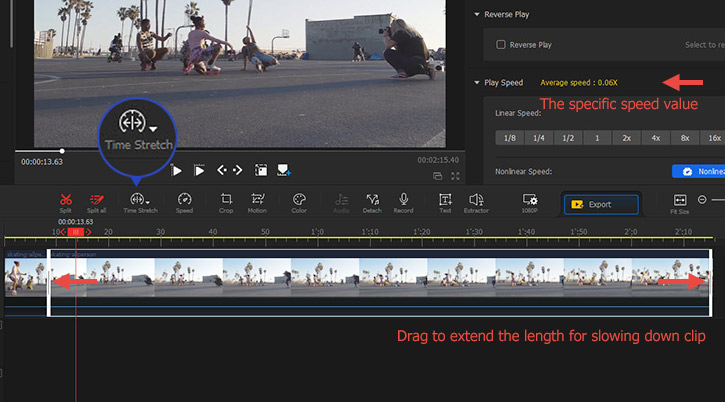
Select the video segment in the first place. Click on the Ripple Edit button to locate the Time Stretch option and click on this. Drag the ends of this video segment to increase its length for slowing down the clip.
 Editing Tips
1. You can decrease the speed to 1/72x or slower (or increase the video speed to 72x or faster).
2. Time Stretch tool is helpful when you want to adjust a video clip to fit a known duration, but you have no idea about the specific new speed value you should use. For instance, you want to insert a clip to fill the gap between two clips and you don’t want to adjust the duration of the gap, you can use the Time Stretch Tool to shorten or expand the video segment to the desired duration.
Method 2: Apply Slow-down in Linear Speed panel
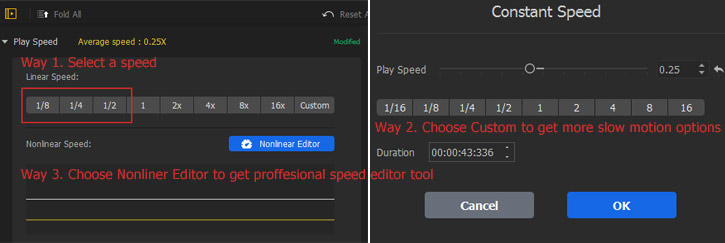
Select the segment in Timeline. Find Play Speed menu in Inspector Panel which is at the upper right of main UI. You can choose 1/8, 1/4, 1/2 average speed in Linear Speed; select Custom to adjust speed in Constant speed window which allows to select 1/16 average speed, or drag the slider bar to slow down to 0.031 times.
 Editing Tips
1. VideoProc Vlogger will automatically speed up the video, if you input expected Duration.
2. Select 1 in linear speed to cancel all operations; Click Play to preview speed up effect.
Method 3: Adjust speed in Nonlinear Speed Editor
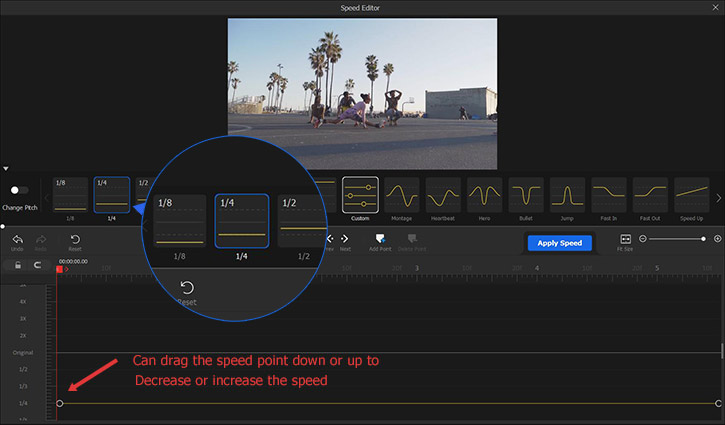
First of all, select video segment, click Speed in Toolbar to enter Speed Editor.
To make slow motion, you can choose from 1/8, 1/4, 1/2 average speed presets; or click Customize to drag the keyframe points for slowing down to 1/31 times. Then click Apply Speed. If you want tomake gradual deceleration effect, you are suggested to check speed ramping guide.
 Editing Tips
1. VideoProc Vlogger does not change the sound speed by default while adjust video speed. If you'd like to adjust the speed of audio and video simultaneously, please hit Change Pitch and turn it into blue.
2. Select Normal to recover original video speed; click undo to cancel previous operation.
3. Click Play to preview slow-down effect.
Step 4Continue to do other editing or export video.
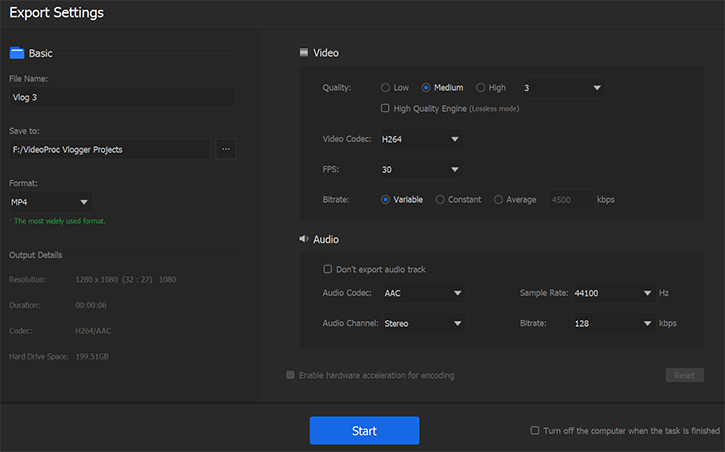
You can mute original sound and add music and do other editing. After all done, just click Export in theToolbar of VideoProc Vlogger to export your video.
Now free download and install VideoProc Vlogger to make a slow-motion video.
Para más guías de VideoProc Vlogger, visite esta página >
Si tienes preguntas, envíenos un correo electrónico o visite

