Using Audio Analyzer in VideoProc Vlogger
To highlight a moment, get smooth transitions, or create a tone in your video, editing according to the music, sound effects, or dialogues is necessary. But it takes much time identifying and marking the musical beats, sound onsets, and silences.
In VideoProc Vlogger, the preset audio analyzer that comes with 3 analysis options can take over the tiresome task and give you a marked audio waveform in a few seconds.
Let's download, install, and run VideoProc Vlogger. Follow the steps below to analyze audio for a variety of purposes.
Watch video to get to know the Audio Analyzer in VideoProc Vlogger, or read text instructions below.
What Is Audio Analyzer in VideoProc Vlogger
The audio analyzer in VideoProc Vlogger is developed to detect onsets, beats, and silences in an audio file, all of which are vital indicators for editing to the beat of music.
When you want to sync frames to the beat of the music while making music videos, dance videos, outfit change videos, slideshows, and so forth, you can switch scenes, add transitions and texts, or apply effects when the background music swaps to another beat or musical meter. With the markers generated by VideoProc Vlogger, the tedious task can be done within a few clicks.
In the following parts, we'll introduce 3 options of audio analysis in VideoProc Vlogger and show you how to use them efficiently.
3 Audio Analysis Options in VideoProc Vlogger
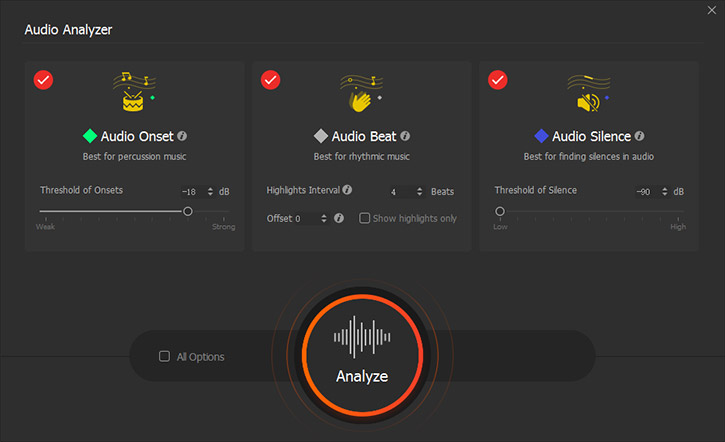
VideoProc Vlogger has preset 3 options to analyze audio files – Audio Onset, Audio Beat, and Audio Silence. They are designed for different scenarios and source audios, and offer you both handy presets and customizable options.
1. Audio Onset
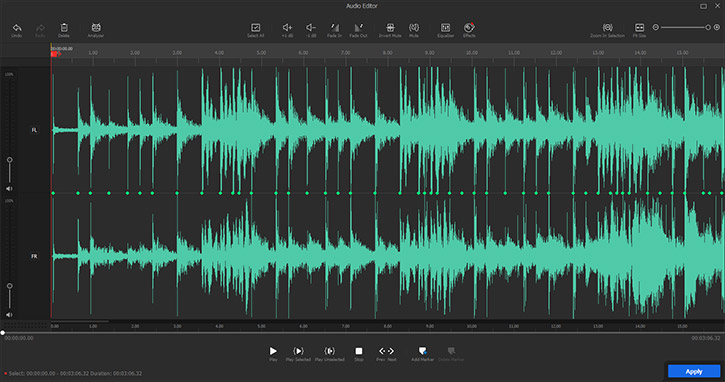
Audio Onset is used for detecting the beginning of a musical note or a discrete sound event in audio signals. The detection results are indicated by irregular green points.
 Feature
It is suited to analyze music with loud percussions like clapping, drums, cymbals, xylophones, etc., or sound effects like gunshots, fireworks, crashes, bombs, timer beeps, etc. With this mode, you can quickly get markers to edit in sync with the background sound.
Video Tutorial on Audio Onset Analyzer
2. Audio Beat
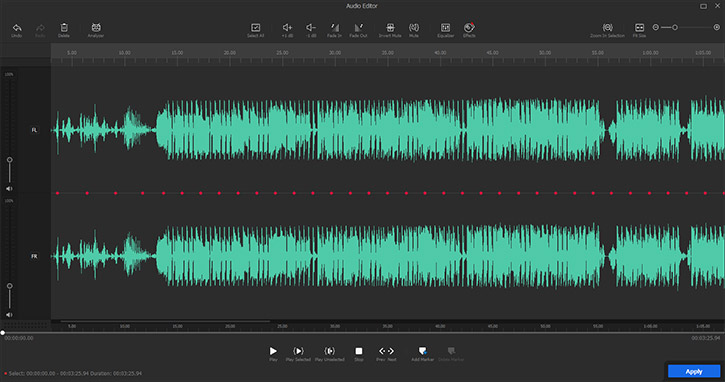
Audio Beat is used for detecting the music beats. After analyzing its BPM accurately, it shows every beat in the music with gray points and highlights predicted strong beats with red points at regular intervals so that you could understand the rhythm better.
 Feature
It is suitable for rhythmic music including pop, rock, hip-hop, jazz, electronic, reggae, folk music... Even without much musical knowledge or editing skills, you can quickly sync your vlog, music video, or dance video to the background music.
Video Tutorial on Music Beat Analyzer
3. Audio Silence
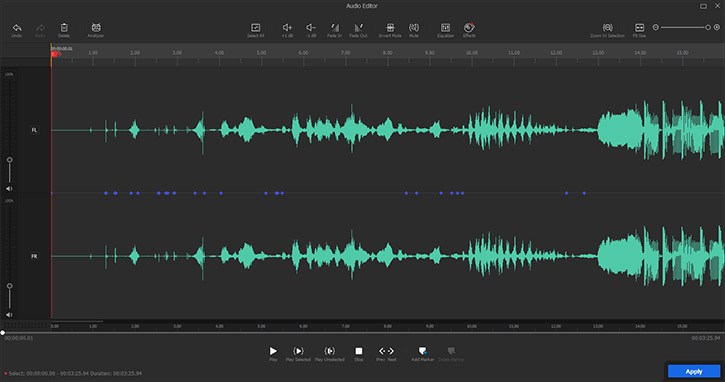
Audio Silence is used for detecting silent sections in an audio file and labeling them with blue points in pairs, one for the beginning of the silence and the other for the end.
 Feature
With this mode, you can quickly figure out all silent moments, then split the audio, delete silences or edit the video frame accordingly.
Video Tutorial on Audio Silence Analyzer
How to Use Audio Analyzer in VideoProc Vlogger
Step 0Create a new project in VideoProc Vlogger
Lanuch VideoProc Vlogger. When a project panel pops up, complete the general settings to create a new project.
Step 1Load audio to VideoProc Vlogger
After creating a new project in VideoProc Vlogger, you can add an audio file (.mp3, .aac, .m4r, .ogg, etc.) and a video from your computer to the media library, and then drag them to the timeline.

Step 2Open the audio analyzer
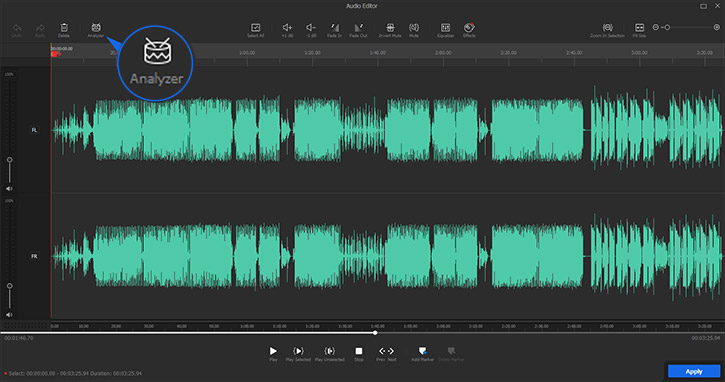
Click to select the audio track. Hit the Audio option under the preview window to open the audio editor panel.

Move to the left side of the top audio editing toolbar, and click Analyzer to open the analysis panel.
Step 3Choose an audio analysis mode
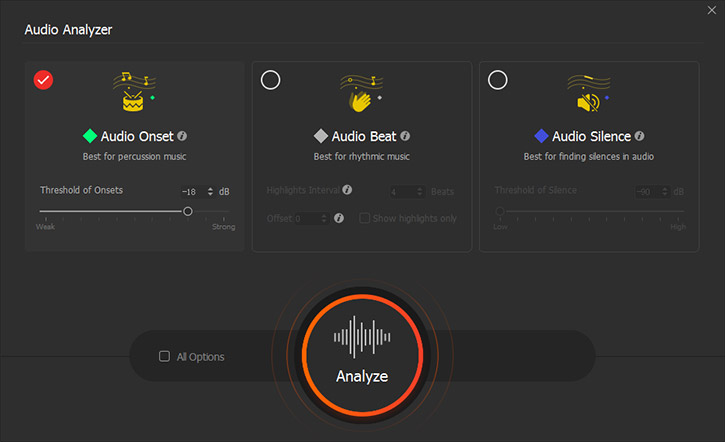
Option 1: Audio Onset
If you want to analyze music with obvious percussion or abrupt sound effects, select Audio Onset.
In the Threshold of Onsets option, you can set the value in dB, under which the onset will not be detected.
If the percussion in the audio is strong, increasing the threshold should analyze and mark peaks of the audio waveform precisely. If the percussion is quite weak, you need to decrease the threshold to make sure it can be detected, meanwhile more detections might appear in the result.
Option 2: Audio Beat
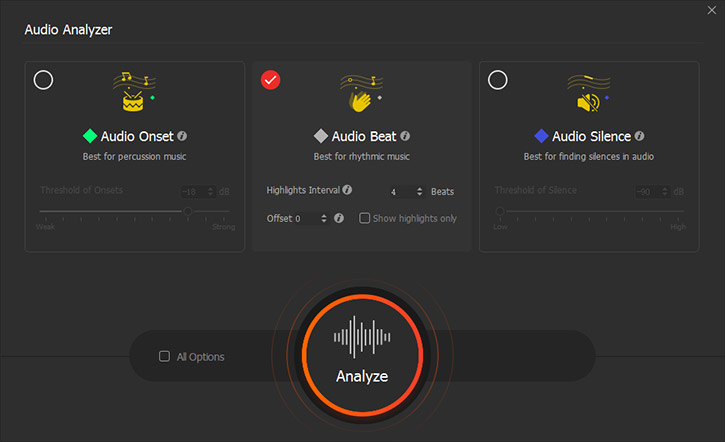
If you want to analyze rhythmic music e.g. calm, upbeat, or electronic songs, select Audio Beat.
In the Highlights Interval option, you can set the value of beats to decide the interval between every two highlights.
In the detection results, red points represent highlights and gray points represent general beats. If the highlights are located on undesired beats, you can change the Offset to move them forward.
Option 3: Audio Silence
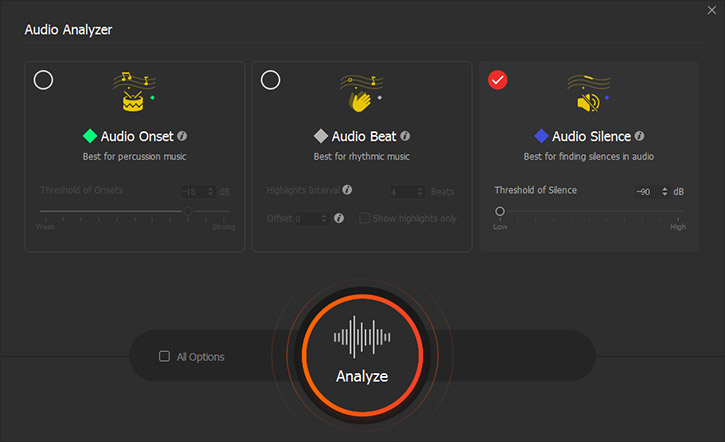
If you want to find silences in the audio file, select Audio Silence.
By default, sounds under -90dB will be treated as silence. You can customize the threshold to detect audio at varied volume levels.
 Editing Tips
Check the box before the All Points option, and you can use all of the analysis modes at a time. Also, you can combine two modes by ticking any two of these options.
Step 4Add markers
When the audio analysis is done, many points show up to give you hints where the onset of a sound, the beat in a measure of music, or the silent moment is.
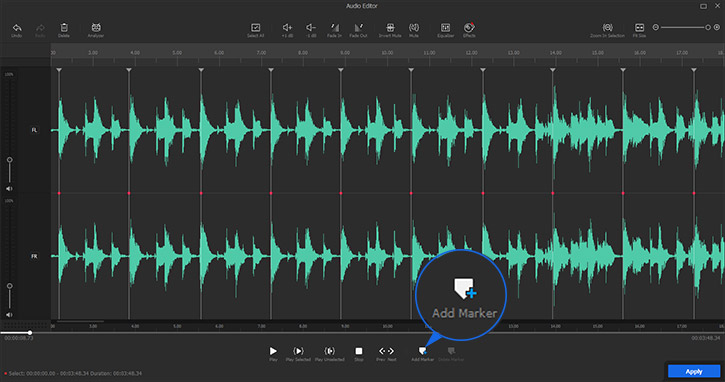
Press and hold the mouse to decide a range to add markers which will turn green then. Click the Add Maker option at the bottom. And you can double click on the waveform to add a marker manually if any beat is missing in the results.
Finally, hit the Apply button to get back to the main interface, and you can sync the video to the beat of the music efficiently with the help of these markers.
Now free download and install VideoProc Vlogger to analyze the audio for editing video to the music/sound with ease.
- > Introduction to Audio Editor
- > Detach Audio from Video
- > Mute Audio
- > Reduce Background Noise of Video & Audio
- > Record Voiceover and Change Voice
- > Adjust Audio Speed without Changing Pitch
- > Add Filters to Audio
- > Using Audio Equalizer in VideoProc Vlogger
- > Volume Fade In and Out
Para más guías de VideoProc Vlogger, visite esta página >
Si tienes preguntas, envíenos un correo electrónico o visite

