Unlocking the full potential of your gaming experiences has never been easier. In this article, we'll show you how to record with GeForce Experience ShadowPlay to capture your most thrilling in-game moments. Whether you're a streamer looking to share your skills or a gamer simply wanting to relive your victories, our comprehensive guide will walk you through the steps to record with ease. Get ready to take your gameplay recording to the next level.
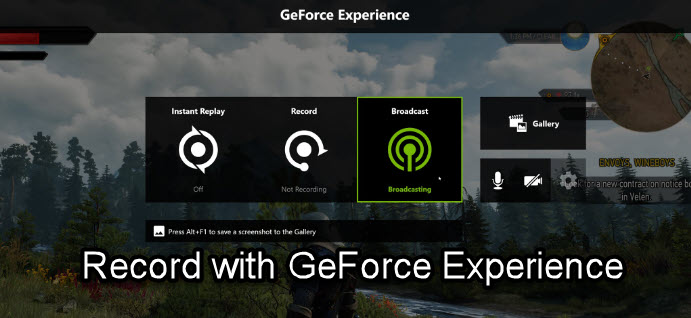
What is NVIDIA GeForce Experience
GeForce Experience is a free software application developed by NVIDIA that serves as a companion application for the GeForce graphics card. It helps to automatically detect games, optimize game settings according to your hardware configuration, and keep the drivers up to date.
Plus, this application also has handy features to record games, go live broadcast, instant replay, or take screenshots of your desktop. You can also tweak settings to enable game overlay, such as real-time FPS. The recording and capturing features are also known as NVIDIA ShadowPlay, which is a component of the NVIDIA GeForce Experience.
How to Record with GeForce Experience (ShadowPlay)
It is easy to record with GeForce Experience, provided that you have pre-configured everything to your liking. Otherwise, you may encounter with GeForce Experience won't record errors.
How to check if my computer already has NVIDIA Geforce Experience installed or not?
You can search for GeForce Experience in Windows Start, or press Alt+Z to call out the Geforce Experience overlay. If nothing happens, follow the steps below to install and record.
Step 1. Download and install the GeForce Experience app to your computer.

Make sure to tick the box before "End User License Agreement" and "NVIDIA Privacy Policy".
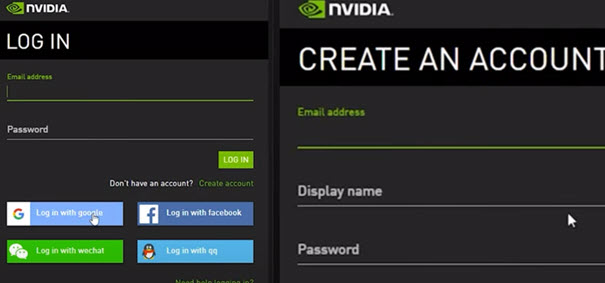
Step 2. Log in with Google or Facebook, or create an account with your email address to log in.
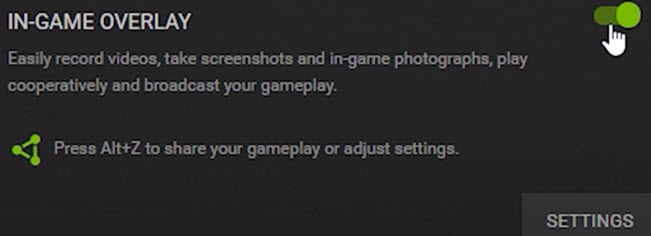
Step 3. Check your computer specifications, and see whether it fulfills the in-game overlay requirement of NVIDIA GeForce Experience.
Make sure to toggle on the In-Game Overlay option.
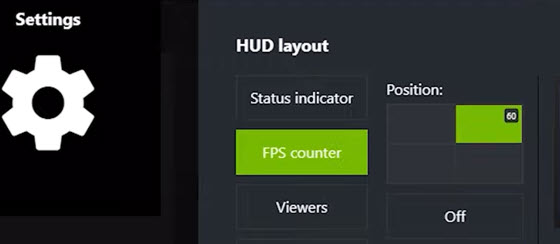
Step 4. Manage HUD layout settings.
If you want to display the FPS counter, status indicator, viewers, or comments, you can go to Settings > HUD layout to toggle them on.
Some Gamers may prefer to display the FPS counter in real-time when recording the game, which can be a nice indicator to check whether there are frame-drop issues.
Step 5. Manage the setting in NVIDIA GeForce Experience.
Go to Settings and scroll down to find the Recordings section.
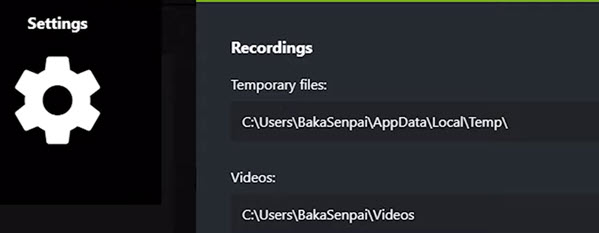
Here you can set the path for Temporary files and Videos.
In most cases, you won't want to set them to the system folder, as the recordings will soon become a large data hog.
Step 6. (Very Important). Toggle on the Desktop capture ability.
Go to Settings > Privacy control, and toggle on Desktop capture.
Otherwise, you won't be able to record your screen with NVIDIA Geforce Experience.

If you haven't toggle it on, you may be prompted with an alter saying that you need to use a supported game. After enabling the Desktop capture option in the Privacy control, you will be able to record the desktop.
Step 7. Initiate the recording panel by pressing Alt+Z.
Tips: You can configure quality settings for the recording. Click the Record icon, and hit Settings.
In the Video capture panel, you can set recording FPS, resolution, quality (low, medium, high), Instant Replay length (from 0.25 to 20 minutes), and bitrate.
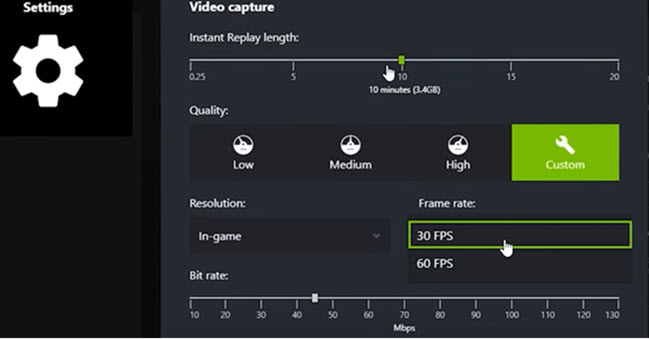
Note: NIVIDIA GeForce Experience supports recording up to 60FPS videos. Higher FPS will result in smoother visual experience, especially when you further edit the gameplay into highlighted slow-motion. To bypass the 60FPS limits, you can use AI-powered Frame Interpolation tool.
Step 8. Start recording in GeForce Experience.
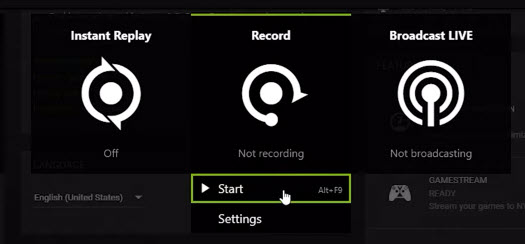
Click the Record icon and hit Start. The shortcut key is Alt+F9.
You will notice an NVIDIA alert saying "the Recording has started" at the top right corner. If you don't see this, make a test recording before you start to record your content. Otherwise, you may find yourself wasting time and effort but recording nothing.
Step 9.Stop the recording and share it.
- To share: Press Alt+Z to call out that menu again, click on Record, and hit the Share button.
- To stop and save: Alt+F9. If you press Alt+F9 again, it will start a new round of recording.
Where do NVIDIA GeForce (ShadowPlay) recordings go?
Press Alt+Z > click Gallery > Open File location.
Learn how to change the recording directory in step 5 above.
NVIDIA GeForce Experience Shortcuts:
General:
The stroke button` Activate the push-to-talk option.
Alt+Z: Open or close the NIVIDA GeForce overlay.
Alt+F12: Toggle the real-time FPS counter as an overlay.
Capture & Record:
Alt+F1: Save a screenshot to the Gallery.
Alt+F9: Start to recording the screen, and stop and save when pressing again.
Alt+F10: Save the last 5 minutes recorded.
Broadcast:
Alt+F8: Toggle broadcasting on/off.
Alt+F7: Pause or resume the broadcasting.
Alt+F6: Enable or disable camera while broadcasting.
Alt+F5: Toggle custom overlay while broadcasting.
You can also customize the shortcuts to your liking. Simply click the Gear icon to open up the preference menu, click Keyboard shortcuts, and set the keys that you find convenient and easy to remember.
How to Record with GeForce Experience Alternative
Besides using NVIDIA GeForce Experience, you can also opt for its alternative that supports 4K recording on Mac and 1080p on Windows, with higher FPS, picture-in-picture (recording both facecam/webcam and screen), and paint tool features.
Meet VideoProc Converter AI, the one-stop video enhancer and processing software to record, convert, edit, download videos. It also incorporates AI-powered features to interpolate (from 60FPS to 120/240/480FPS), upscale with super resolution, and de-shake videos.
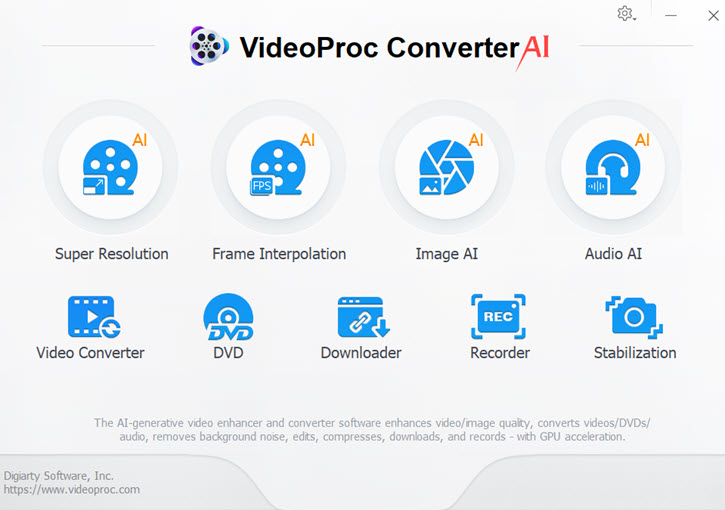
Step 1. Download and install VideoProc Converter AI.
Step 2. Go to the Recorder module from the main screen.
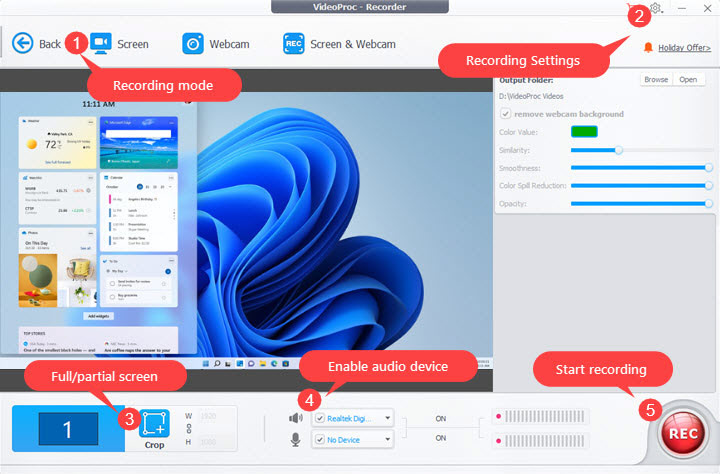
Step 3. Click Screen and hit Rec to start recording.
Tips:
- If you only want to record a partial of the screen, after clicking Screen, hit the Crop button. Then drag your mouse to select the desired area, and hit the green tick ✓
- To record the system sound only, enable the system sound and disable the microphone icon.
- To record the microphone sound only, do the opposite.
- The system sound will include any sounds playing on your computer, such as gaming sound, media playback, system alerts, streaming videos, etc. The microphone sound will record your talking and the sound of the room.
- You can record system sound and the microphone simultaneously.
More Settings
- Go to settings > Recorder to tweak more settings.
- You can press Ctrl+Alt+Shift+T to call out the paint tool, and start the drawing and use the markers when recording. You can change the shortcut key in Settings > Recorder.
- To increase FPS, learn how to increase video frame rate with AI Frame Interpolation in VideoProc Converter AI.

VideoProc Converter AI – Best Recorder and Video Processing Tool
- Record desktop whole screen or selected area with sound
- High-quality recordings in various formats: MP4, MKV, FLV, etc.
- Record streaming videos in 4K/8K, full screen, external screen
- Annotation tools: add texts, shapes, lines, and draw on recordings
- Edit after recording: cut, merge, rotate, crop, convert, compress
![]() Excellent
Excellent ![]()

