Summary: Have you ever been in a situation when you needed to record internal audio on Windows 10 but didn't know how? Read this post to learn 5 easy ways to record audio coming from your computer.
When you search for the best audio recording software for Windows 10, you're immediately confronted with a plethora of options. Each claims they can help you record audio on Windows 10 without hassles. However, the problem is most of them do not allow you to record internal audio on your Windows 10 system. So what if you want to record the audio originating from your computer, such as the music streaming through your browser, the voices of fellow participants in a Zoom meeting, and online lessons? Don't worry, because that's exactly the topic we're diving into today. We're gonna share with you 5 of the best solutions to record internal audio on Windows 10.
| Methods | Features Overview | Difficulty Level | Expert Ratings |
|---|---|---|---|
Record system sounds, microphone, screen; Compress, convert, and download videos & audio |
Effortless |
||
Record voice. Trim unwanted parts (No extra tools to edit audio) |
Moderate |
|
|
Record multiple audio devices. Advanced audio editing tools |
Challenging |
|
|
Basic audio editing tools |
Slightly Complex |
|
|
Record sound from computer or microphone. Simple yet powerful video & audio editing tools |
User-Friendly |
|
Record Internal Audio on Windows 10 via VideoProc Converter AI
If you want to record computer audio on Windows 10 without plugins or complex setups, VideoProc Converter AI is your pick. This self-explained yet powerful audio recording program allows you to effortlessly capture audio originating from internal sources, external devices, or both – all with a single click. Screen recording is also allowed. This means you can record the screen, webcam, or both with or without the audio. It grants you the ability to adjust volume levels for various audio inputs or outputs, ensuring an optimal audio experience. And the capabilities don't stop there – you can also convert the recorded audio files to various popular formats such as MP3, AC3, OGG, FLAC, with customized bitrate, sample rate, channel numbers, and more. In a nutshell, this internal audio recording solution is an absolute must-try.

VideoProc Converter AI – Record Internal Audio with Ease
- Top-notch sound and picture quality
- Record whatever you see or hear: live streams, voiceovers, etc
- Export recordings in popular formats like GIF, MP4, and M4A
- Convert recordings to any desired video or audio format
- More features: download streaming media, compress file size…
![]()
![]()
Here's how you can record internal audio on Windows 10 using VideoProc Converter AI:
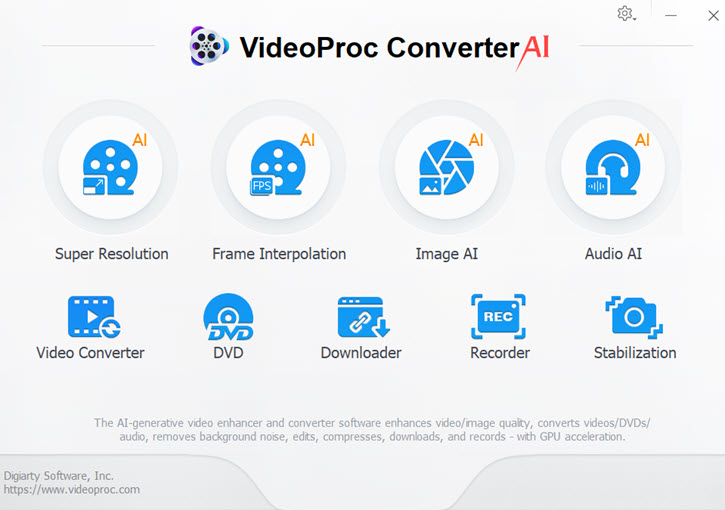
Step 1. Open VideoProc Converter AI and choose Recorder from the main interface.
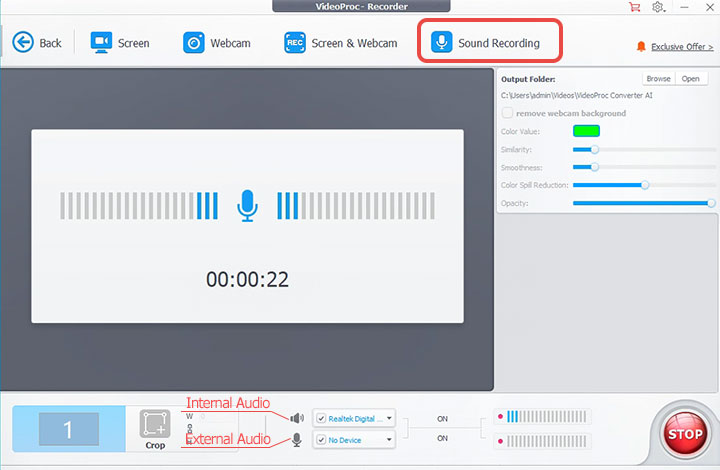
Step 2. Select Audio Recorder and navigate to the audio device settings. To record internal audio from your Windows 10 such as the music playing on YouTube or Vevo, enable the speaker icon and choose the system audio device.
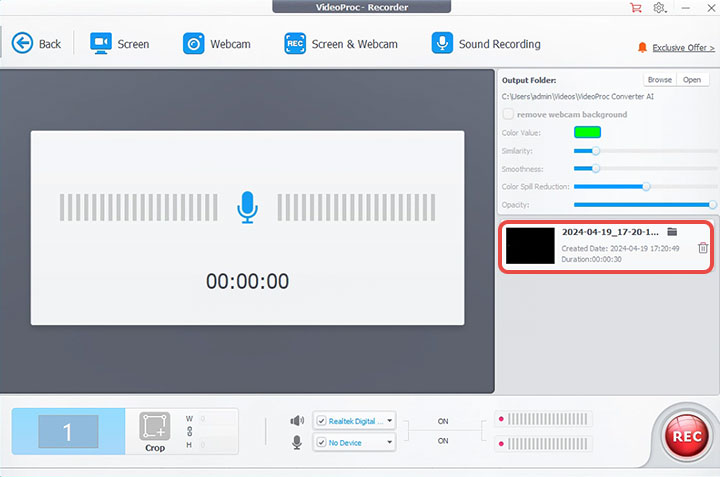
Step 3. Play the audio you wish to record. Click REC to initiate the recording and click Stop to end it. VideoProc Converter AI saves your recording as an M4A file which can be accessed by clicking the file folder icon.
Tips:
VideoProc Converter AI saves the audio recording in M4A. If you want to convert M4A to MP3 or any other audio format, simply click the back icon, select + Music, and drag and drop the recorded audio file into the program. After that, choose Music, select the desired audio format, and click RUN to export it.
Record Internal Audio on Windows 10 via Voice Recorder
Voice Recorder, a free audio recording program developed by Microsoft, comes pre-installed on Windows 10 for your convenience. While its name might suggest a focus solely on capturing microphone voices, there's more to it than meets the eye. In fact, if you prefer to delve into complex setups, you can also employ it to capture the sounds coming from your computer. However, there is a minor downside: it lacks some common audio editing tools like equalization and the ability to remove unwanted portions from the middle of a recording. As a result, you might find yourself needing to turn to additional audio editing software to fine-tune your recordings.
Step 1. Click the search icon located in the bottom left corner of Windows 10.
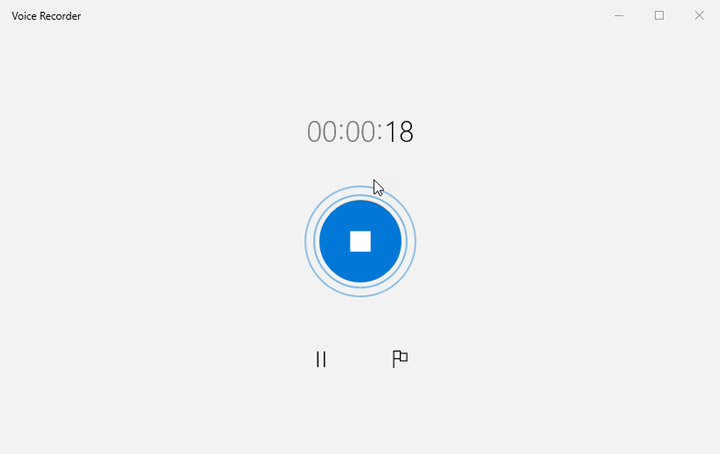
Step 2. Type voice recorder into the search bar. Right-click the Voice Recorder application from the search results to launch it.
Step 3. Go to the bottom right corner of the computer. Click the speaker icon and choose Recording devices. From there, right-click Stereo Mix and choose Enabled. Hit OK to confirm enabling Stereo Mix.
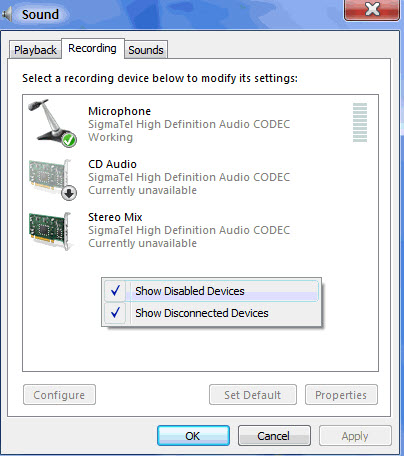
Step 4. Play the audio on Windows 10. Head back to the Voice Recorder application. Hit the Record button to start recording internal audio on Windows 10.
Record Internal Audio on Windows 10 via Audacity
Audacity is an open-source and free program that is capable of recording and editing audio on Windows 10 as well as other prevalent operating systems like macOS and Linux. What truly makes it shine is its support for multiple audio inputs, allowing you to capture sounds from offline programs, browsers, microphones, and even mini keyboards connected through USB ports, all simultaneously. It's important to note, however, that Audacity may not be the most beginner-friendly option. The interface, though feature-rich, can be overwhelming for newcomers, potentially causing confusion and uncertainty.
Step 1. Visit the official Audacity website, download its latest version, and install it on your Windows 10 computer. Launch the program.
Step 2. There're two ways to record internal audio from Windows 10 using Audacity.
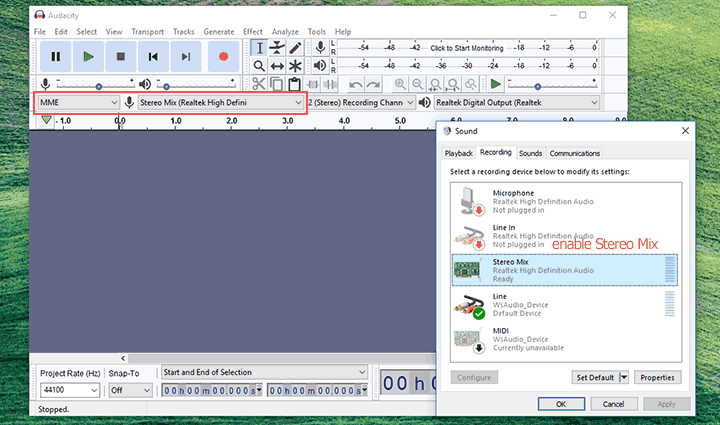
Option 1. Right-click the audio icon in the bottom right corner of your Windows 10 screen, choose Audio Device, and then click Recording devices. Enable the Stereo Mix feature. In Audacity, select MME as the host, and pick Stereo Mix or What U Hear from the Recording device menu.
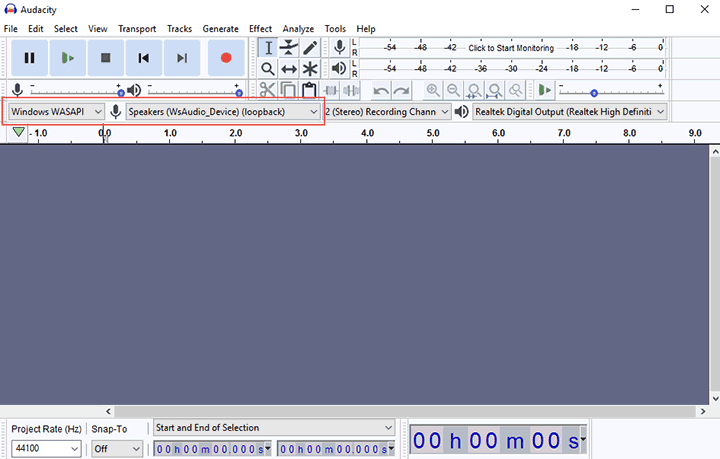
Option 2. Opt for "Windows WASAPI" as the host. Select the loopback input that corresponds to the playback device you'll be using. In my case, I chose "Speakers (Realtek High Definition Audio) (loopback)." This method often results in better sound quality.
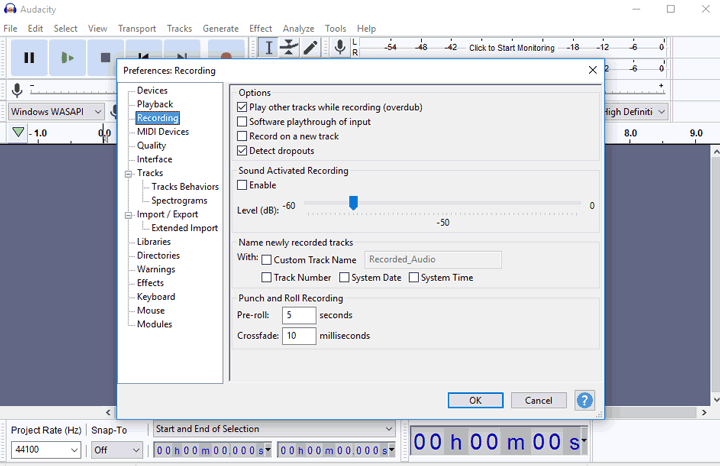
Step 3. Adjust the microphone and speaker volumes using the sliders. You can also hit Edit > Preferences and then make adjustments to the sample rate, bitrate, and other audio encoding properties.
Step 4. Click the red Record button to start capturing internal audio on Windows 10. Click the small square icon to stop recording.
Step 5. You can shape your recordings with a few audio editing tools, such as removing unwanted segments, reducing noise, adjusting balance, and more. To preview your edits in real time, click the green playback icon.
Step 6. When you're satisfied with your recording, navigate to File > Export, and opt for Export as MP3 to save your recordings in MP3 format.
Record Internal Audio on Windows 10 via Ocenaudio
Ocenaudio lets you record internal audio on Windows 10 as well as provides you with fundamental customization options for adjusting audio sample rates, and buffer sizes, and choosing recording devices. Before saving your recording as an audio file, you can make simple edits like cut, delete, reverse, and fade in/out. However, as a basic program for single-track audio editing and recording, it doesn't offer advanced features like multi-track recording and vocal-music mixing.
Step 1. Go to the official site of Ocenaudio to get its latest version downloaded and installed on your Windows 10.
Step 2. Click the Start menu of Windows 10, select Settings, and then come over to the Sound section.
Step 3. Go to Related Settings and open Sound Control Panel. Hit Recordings, right-click Stereo Mix, and then select Enabled. Hit OK to proceed.
Step 4. Open Ocenaudio, click Edit which is located in the top menu bar, select Preference, and then click Sound.
Step 5. Go to the Record Device/Options section and select Stereo Mix (Realtek High Definition Audio) as the target device. Hit Close to exit the Sound settings panel.
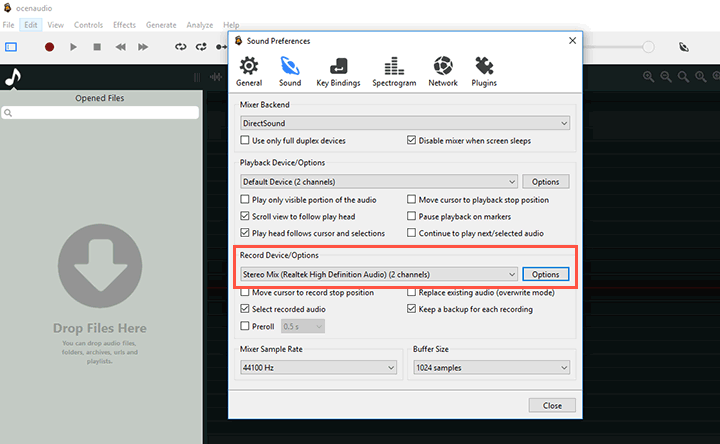
Step 6. Click the red round icon button. Enter the sample rate, channels, and resolution on the pop-up window. Hit OK. Ocenaudio starts to record internal audio on Windows 10.
Step 7. Click the red round icon again to stop the recording. Now you can edit your recording with the editing tools listed above the audio waveform.
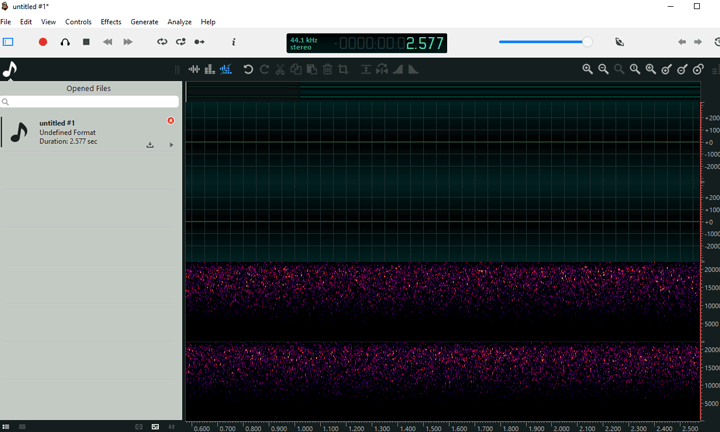
Step 8. Click File > Export and then choose the desired output format. Let's say you want to save your recordings in MP3 format, then you need to select MPEG > MPEG Audio Layer III (MP3). Once done, hit Export.
Record Internal Audio on Windows 10 via VideoProc Vlogger
Packed with an array of user-friendly video and audio editing features, along with a collection of striking effects and seamless transitions, VideoProc Vlogger is a great pick for both beginners and seasoned pros creating captivating content. It boasts a user-friendly audio recording tool that lets you capture whatever you hear from your Windows 10 system - be it the music playing on the web version of YouTube or the melodies from an offline program. Even better, you can record multiple audio clips, refine them, and mix them with sound effects, visuals, photos, and other auditory or visual components.
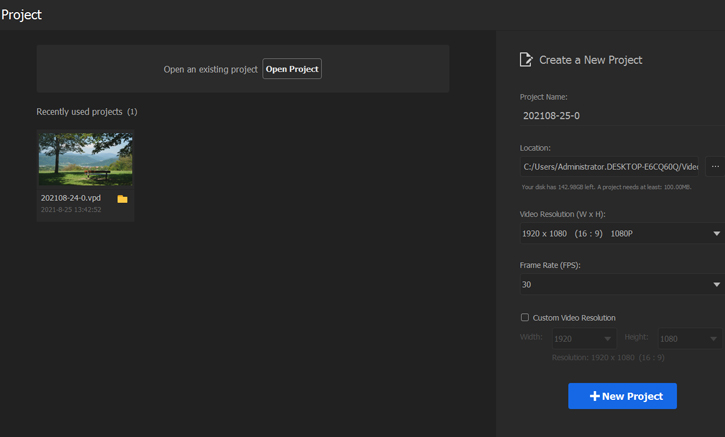
Step 1. Download, install, and launch VideoProc Vlogger. Click on New Project on the pop-up Project settings panel.
Step 2. Right-click the speaker icon located in the bottom right of the screen, select Recording devices, and then Right Click Stereo Mix, and then choose Enabled. Hit OK.
Step 3. Go to VideoProc Vlogger. Click the Record button to access the Audio Recorder. It displays vertical animated lines in the waveform wherever it detects any audio. Select Stereo Mix as the audio device. Click Start to start recording internal audio on Windows 10.
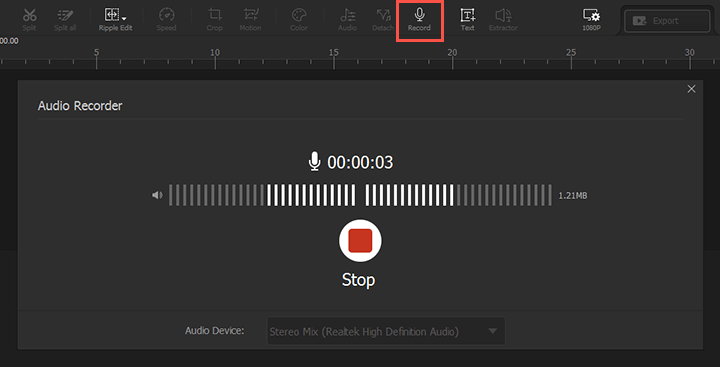
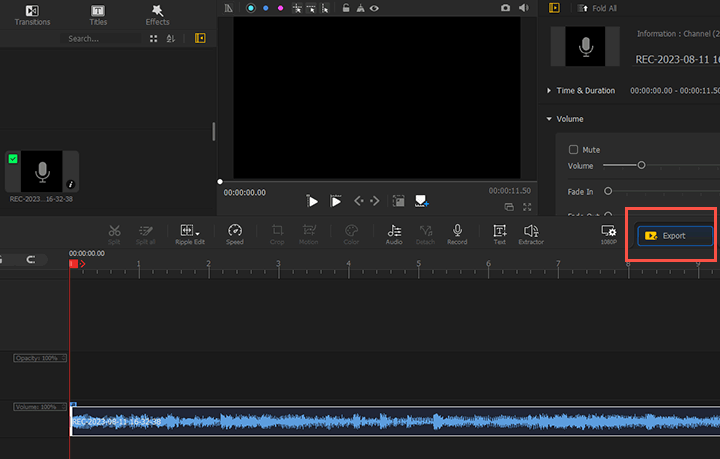
Step 4. Click Stop > Save, and hit Export. Select the target format. You can also customize other audio properties such as sample rate and bitrate. Hit Start to start saving your recordings as MP3, M4A, or FLAC.


 by
by  in Microsoft Store
 by
by  by
by 


