When you get here on this page, obviously, we know that you are looking for some method to rotate a YouTube video easily. However, the question is that there are two different groups of people or users, even though they all say they want to rotate a YouTube video. The first group of people would like to rotate the YouTube video that they are watching on the YouTube platform, while the other ones want the rotation of the video so that they can upload the file to the YouTube network.
No matter which group you are in, both of them want the YouTube video file to be viewed correctly. And no matter which group you are in, here on this post, we will give you the working methods to make it. Now let's check them out.
Method 1. How to Rotate A YouTube Video by a Plugin
Note: This one is for people who are watching a video on YouTube and want to rotate it.
If you are watching a YouTube video in Chrome, this one will work perfectly.
Step 1. First, you need to add a plugin named Rotate that Video Player to your Chrome browser. If you want to access it quickly later in the following steps, it is a better idea to pin it to your bookmarks bar.
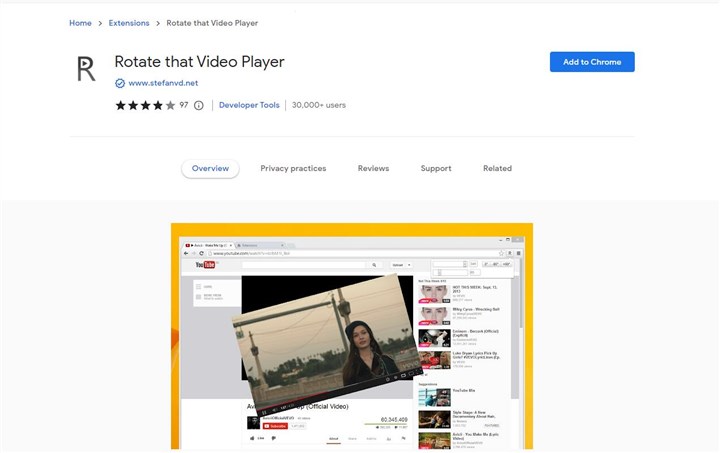
Step 2. Now you can go to YouTube and open the video that you will watch. Then click the R icon which is in your Chrome toolbar. And it will show you the Rotate That Video panel. Now simply click the -90 button to rotate the YouTube video 90 degrees clockwise, or the 90 button to rotate the YouTube video 90 degrees anticlockwise. You will find the correct orientation for the YouTube video quickly.
What about rotating a YouTube video on iPhone or Android?
For Android and iPhone users who are watching a YouTube video and want to rotate it for better viewing, you can simply use the auto-rotate feature from the device's quick settings.
Method 2. How to Rotate A YouTube Video by a Video Converter
Note: This one is for people who want to rotate a video file for uploading it to YouTube.
If when you film a video, or get a video from somewhere for YouTube, but it plays upside-down or sideways, what you need to do is find a tool to help you get it back to normal. And here what we choose and recommend is named VideoProc Converter AI.
As you may have guessed from its name, VideoProc Converter AI basically works as a media file format converter. With it, you can change any format of video and audio files into a new and different format, such as MKV to MP4, WAV to MP3, MP4 to MP3, etc.
However, there are also some basic video and audio editing features built in this media file conversion tool, including rotating for sure (with this feature, you can rotate videos by 90/180/270 degrees and even flip it in simple clicks), cutting and trimming, cropping, merging, adding effects, and more.
Here in the following words, we will mainly show you how to use it to rotate a video for YouTube sharing. And now let's check out the detailed steps.
Step 1. Download and install VideoProc Converter AI on your Windows or Mac Computer, if you do not have it yet.
Step 2. After you follow the instruction to install VideoProc Converter AI correctly on your computer, now please launch it. On its home page, you will see four options. Please choose the first one, Video.
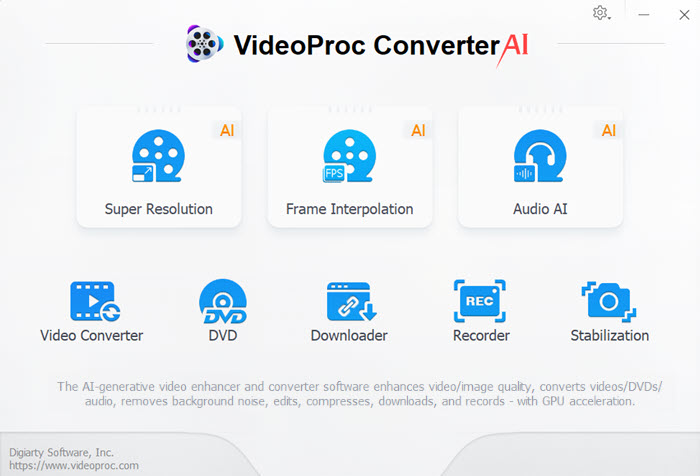
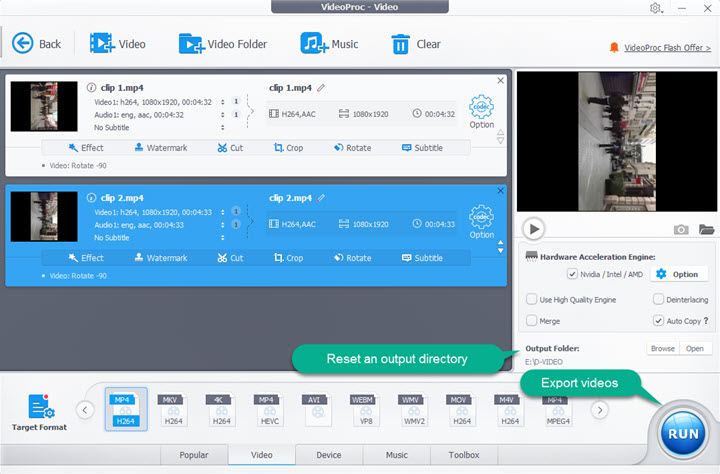
Step 3. On the new window, directly drag and drop your videos file into this software. Once the video clips are fully loaded, please move to its bottom line, and you will see the editing controls appearing.
First, you should choose an output video format for your videos. Simply click the Video tab and select either MP4@H.264 or another one which is supported by YouTube, then the tool will automatically configure this setting for you.
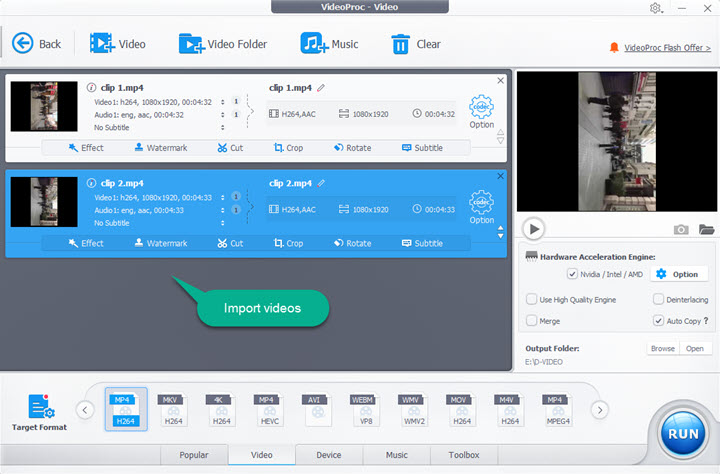
Step 4. Next, move to the Toolbox tab, and there you can find the Rotate feature. Click it and it will lead you to another new window where you can rotate your video file in the way you like.
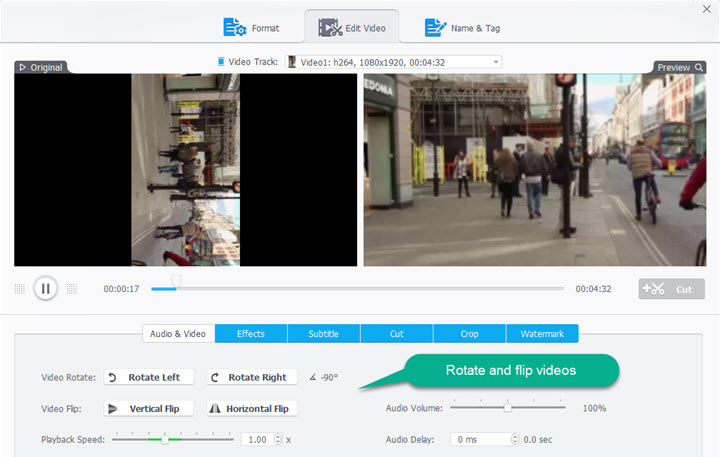
Step 5. After you find the right orientation for the video file, click the Done button and return to the last panel. At last, select an output directory and check the RUN button in the lower right corner to start processing your videos. Once the processing is finished, you can find your videos stored in your chosen location.
In Conclusion
By these two methods, you can totally fix the issue of rotating a YouTube video, either for watching it on YouTube correctly or for uploading it to YouTube in the right orientation. But please choose the one based on your needs, because each of them works for different situations.


