There are mainly two different ways to make a video file smaller, the lossless and the lossy. If you prefer the lossless one, what you can do with your video clip is making it shorter by cutting off some unwanted moments, like its head and tail parts. Another method which we can try is removing the audio file, if you have no need for it in some occasions. Even though the audio track often takes up much less storage than the video track, giving it up may precisely help the video size meet your requirement.
Then the lossy way means changing the video file parameters, like its codec, fps, resolution, bit rate, etc. The logic is that the video file size consists of these numbers. A trick about this way is that if we change these parameter numbers to a reasonable level, we can make the video quality as same as the original visually. You will tell no difference.
And in the following content, we will focus on how to apply this lossy method for making a video file smaller, with two unique tools being shared.
How to Make Video Files Smaller on Windows
VideoProc Converter AI is a powerful video and audio transcoder. Even though users mostly run it for media format altering, it can do more. With it, you can reset a video file codec, fps, resolution, bitrate, and even its audio track settings. Besides, with its supporting hardware acceleration technology, these work will just cost you a little time. So why not free download it now and follow the steps below about how to use it for decreasing a video file size.
Step 1. Open it on your computer after the installation finishes, and then choose the Video tab.
Step 2. Click the +Video button to import your video clip. The first option to lower its size is to choose a codec which encodes your video file more efficiently than the original one. For example, most video files are encoded by H.264, and we can change it to H.265, since H.265 will reduce the size roughly by 50% or more.
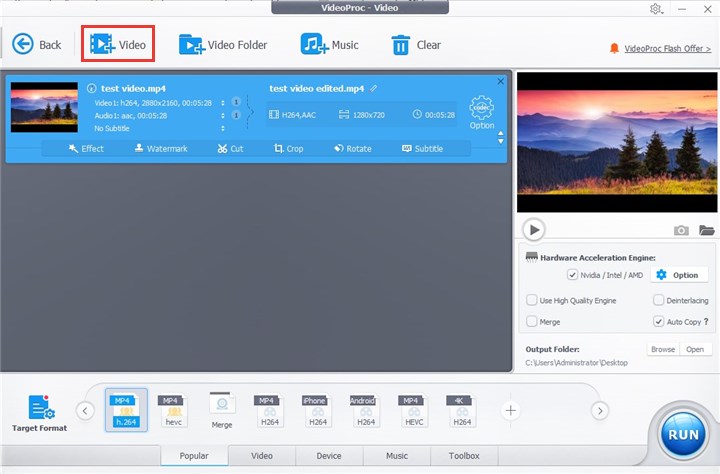
Go to Target Format and find it. Here my original file was MP4 H.264, and I chose MP4 H.265. Then click the Done button back to the previous page.
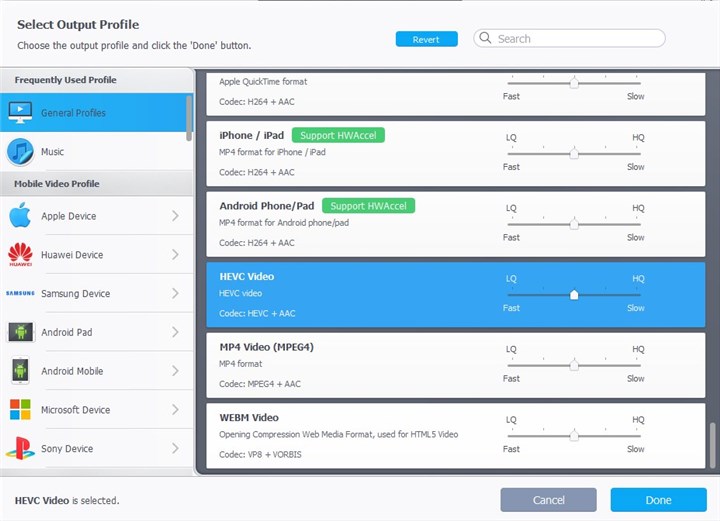
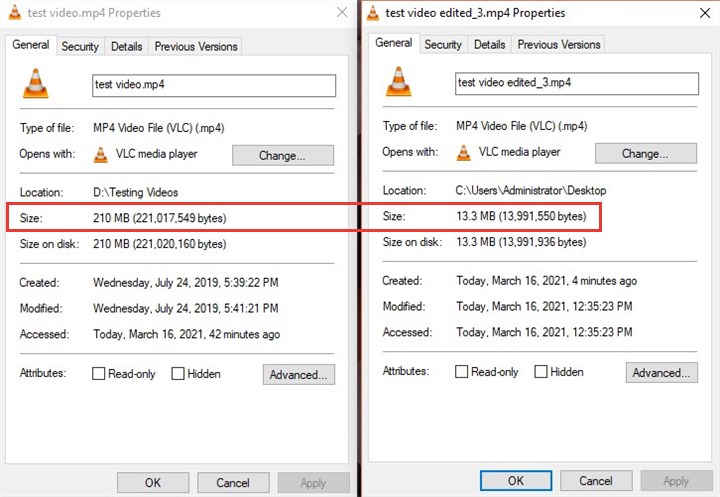
After I applied only this operation on the video file, its size was reduced to 30.2MB from 210 MB. That is really impressive, but we can do more to make the results better.
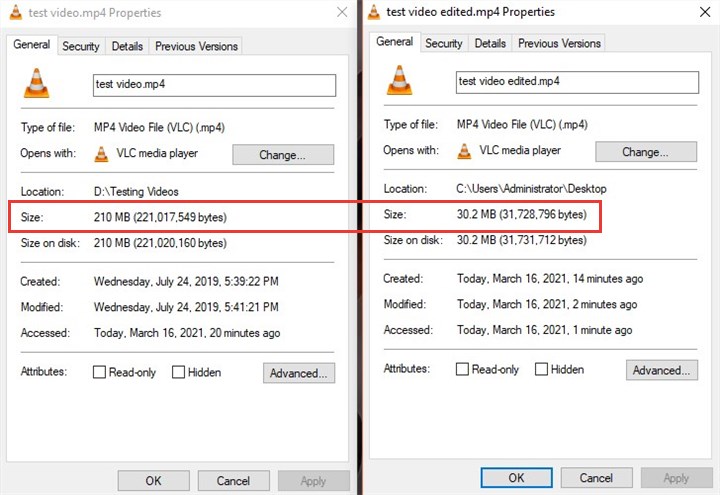
Step 3. Now click the Option menu.
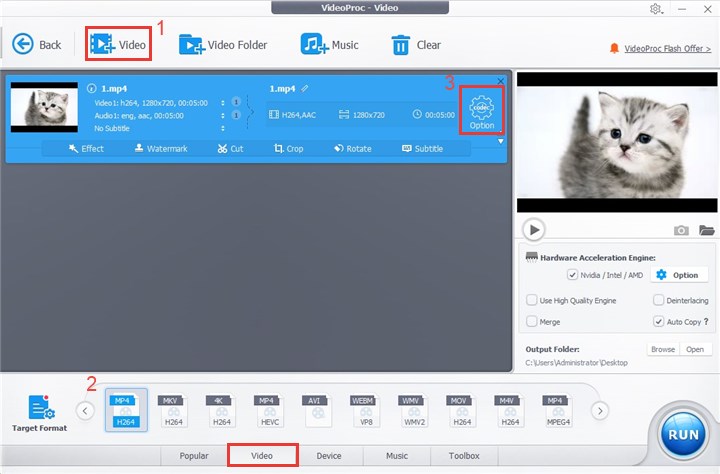
Step 4. In the new page, there are a bunch of settings that we can deal with under the Format column, such as fps, resolution, bitrate, and audio track. I changed the fps to 24 from 29.97, resolution to 720P (accordingly, the aspect ratio should be 3:2) from 1080P, bitrate to 1000kbps from 1200kbps, and audio bitrate to 96kbps from 123kbps. Then click the Done button back to the main window, and choose the RUN button to start processing as how we set.
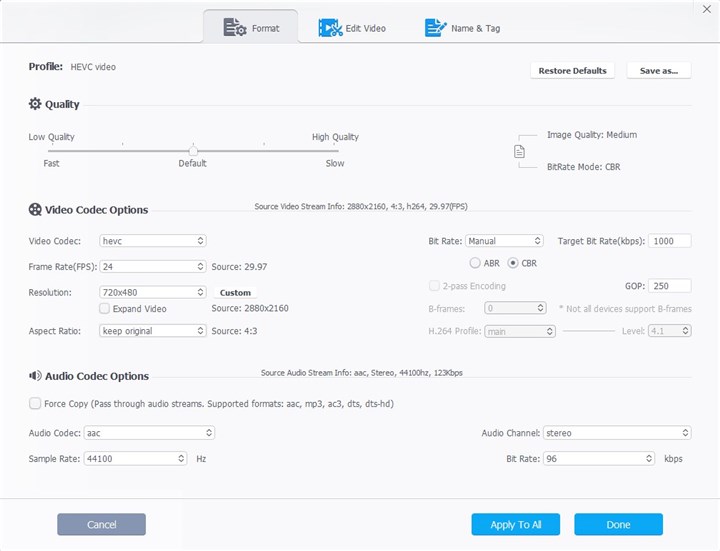
Now let's see how is the result of the video file size after processing. The video file size goes down to 13.3 MB from 210 MB. VideoProc Converter AI makes it smaller more than 90%.
How about the image quality after processing? Since I set the number quite close to the original ones, I am pretty OK with it. If you want it better, just adjust the number closer to the original one.
How to Make Video Files Smaller on Mac
1. iMovie
iMovie is the built-in video editing app on the Mac. Compared to VideoProc Converter AI, iMovie may not provide you with so many settings for the video file, but it can still assist you to decrease the video file size.
Step 1. Create a project and move your video clip into the timeline in iMovie.
Step 2. Click the Export button, which is in the right upper corner of the software. Choose File, and then you will set the exporting details, which can help us shape the video file size.
Step 3. In the exporting setting, there are 3 options which we can deal with for making the video file smaller. They are Resolution, Quality, and Compress. Here we still export the original video in 720P, even though iMovie also provides you with 540P (the other two options are 1080P and 4K). Quality offers Low, Medium, High, Best, and Custom. It actually is about bitrate. We chose Custom and set it to 2 Mbps, the lowest one. This improves the original bitrate from 1200kbps. Obviously, this is not what we want. However, iMovie does not provide bitrate number lower than 2 Mbps. We can do nothing about it. Then the Compress feature is set to Fast (the other one is Better Quality).

And as you can see from the screenshot, the estimate video file size would be 92.6 MB (the original size is 210 MB). It is also far smaller than the original video clip, however, not as good as how VideoProc Converter AI was doing the job.
2. QuickTime Player
Even though only working as media player, QuickTime Player can also be a great helper for video file size decreasing. However, compared to iMovie and VideoProc Converter AI, QuickTime provides you fewer options.
Here are the detailed steps,
Step 1. Open this application on your Mac computer, find the File, choose Open File to import the video clip.
Step 2. After importing finishes, then find Export still under the File menu. You will see the resolution options, 480P, 720P, and 1080P. Choose one which is lower than the original resolution. And your video file size would be become smaller.

How to Make Video Files Smaller Online
If you feel no interests into the desktop applications, online tools may be what you want. Normally, they are very simple. You import the video file, choose how large you want your video file will be, and then wait for its processing.
Here we recommend FreeConvert Video Compressor. The most important factor that we choose it is its supporting 1G file size processing for free. Most other similar tools out there are only with 500 MB or less for free.
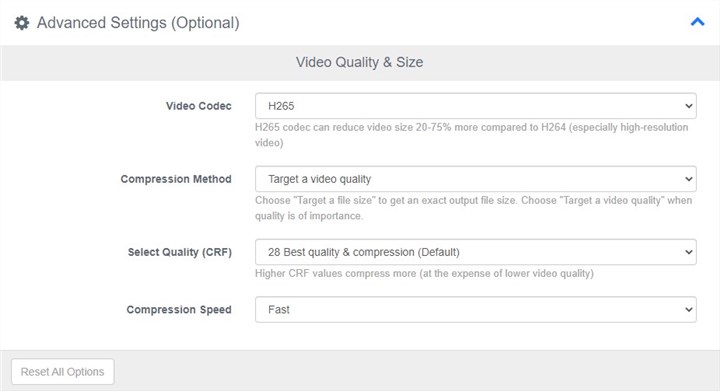
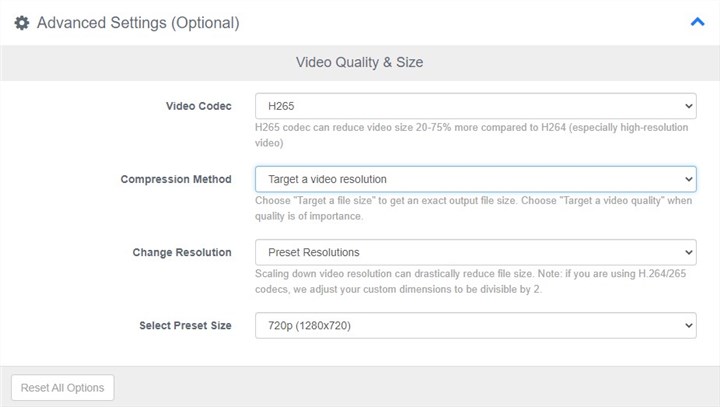
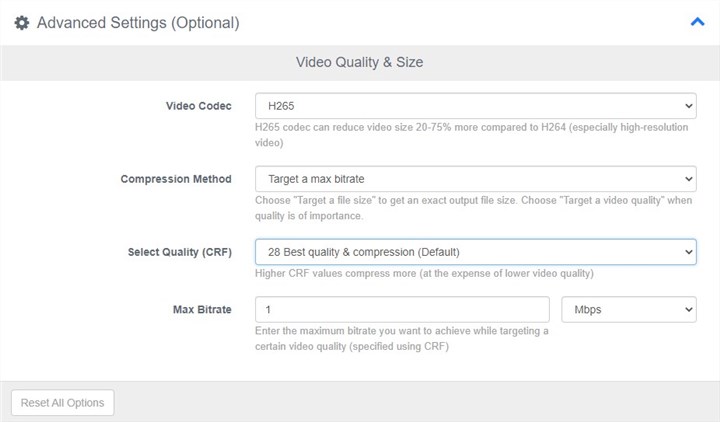
In FreeConvert Video Compressor, before you import your video file, the first thing is to choose a codec, H.264 or H.265. Only two options are available. So normally H.265 is recommended. Then what you need to do is choose a compression method. It provides 5 ways to make a video file smaller. They are,
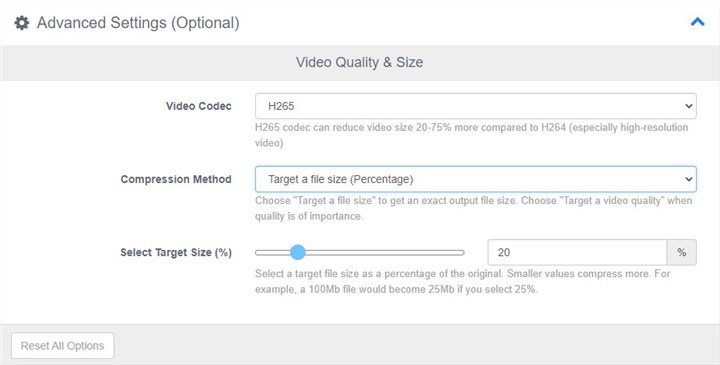
1. Target a file size (Percentage), which means you can only drag the slider below to decide how large the video file would be. For example, choosing 20% for 1 GB video file means turning it into 200 MB in size.
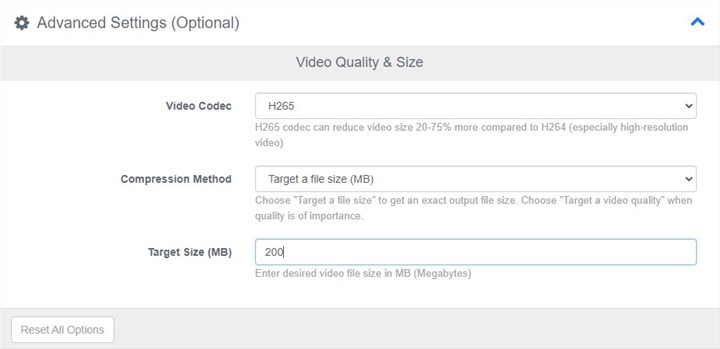
2. Target a file size (MB). Directly input the number which you prefer for your video size.
3. Target a video quality. If you have need for the video quality when making it smaller, this one works. There are two options to choose, CRF (higher CRF number, bigger compression rate, smaller file size, more quality loss, vice versa.) and Compression Speed (higher compression speed, smaller file size, vice versa.).
4. Target a video resolution. This is an option to change video file size by adjusting the resolution number.
5. Target a max bitrate. It is similar to the third one. However, the difference is that there you can choose the bitrate number.
After you finish choosing a suitable compression method, now you can import you video file. Then choose a video format and click the Compress Now button to start processing.
The Bottom Line
Like we have told you in the beginning, if we do not change the setting numbers dramatically, it will be very hard to tell the image quality difference between the edited video file and the original one. So keep this in your mind, try to start with the setting numbers close to the original, and find the one which help you make the video file size meet your needs.


