Creating an explainer video can be a game-changer for your business, turning complex ideas into engaging, easy-to-digest visual stories that captivate your audience. Whether you're a startup aiming to showcase your innovative product or a seasoned company looking to explain new features, an explainer video is your ticket to clearer communication and increased engagement. But how to make an explainer video? In this guide, we'll walk you through the step-by-step process of creating an explainer video that not only informs but also delights your viewers, driving home your message with impact and clarity. Read on!
How to Make an Explainer Video
- Step 1. Select the Video Type
- Step 2. Write a Script
- Step 3. Record and Edit the Audio
- Step 4. Create and Collect Visual Assets
- Step 5. Edit Media and Add Music/Effects
- Step 6. Test and Review
- Step 7. Publish and Share
- FAQs
How to Make an Explainer Video
Step 1. Select the Video Type
The first crucial step when creating an explainer video is to choose the type of video that best aligns with your product, service, and target audience. Here are the main types of explainer videos to consider:
- Animation: Excellent for conveying abstract ideas or intricate topics, as animated videos could easily break down complex processes into simple, understandable visuals.
- Whiteboard: Cost-effective and simple. This format features a hand or animated character drawing on a white background to emphasize key points narrated in the voiceover. It's a straightforward yet impactful style.
- Live-Action: Shot with real people, this approach is ideal for showcasing tangible products or services that benefit from a personal touch, fostering a deeper connection with the audience.
- Screencast: Great for software demonstrations and digital tutorials, screencast videos capture screen activity to guide viewers through specific processes or features.
Additionally, consider the overall tone of your video:
- Educational: Focuses on teaching the audience about a product, service, or process through clear and informative content.
- Promotional: Aims to persuade viewers by showcasing the advantages of a product or service, effectively leading them towards making a purchase.
- Entertaining/Informative: Blends humor and straightforward presentation to deliver information in an engaging and relatable manner, ensuring the content is both enjoyable and easy to understand.
By selecting the appropriate type and style, you'll streamline the production process and ensure your explainer video effectively communicates your message to your audience.

Step 2. Write a Script
Creating a compelling script is essential for a successful explainer video. It forms the backbone of your video, guiding the narrative and ensuring your message is clear and engaging. When writing a script for your explainer video, make sure to cover the following questions:
- What is your product or service?
- Who is the intended audience?
- What problem does your product or service address?
- How does it provide a solution?
- What steps should a viewer take to get started?
Explainer videos typically range from 1-2 minutes, so keep your script concise and to the point. Besides, consider how the script will translate into visuals. Think about how each line will be visually represented, and make sure to highlight these elements in your script. This will make the subsequent storyboard phase smoother and ensure a cohesive and effective final product.
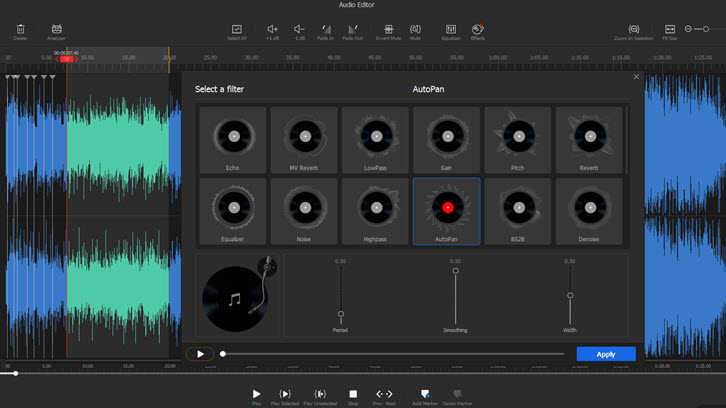
Step 3. Record and Edit the Audio
Now that your script is ready, it's time to bring it to life with audio. High-quality audio is crucial for a professional and engaging explainer video.
First, choose the right voice to represent your product/service. The voiceover should match your brand's personality and convey the message with the appropriate tone and emotion. The key is in how the script is delivered, reflecting the right attitude for your product or service.
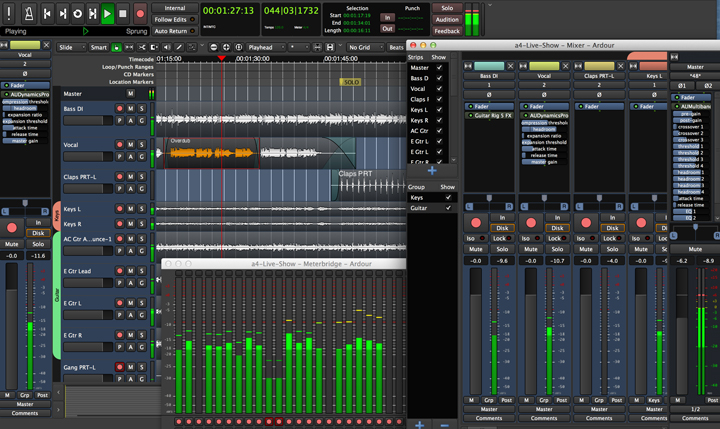
Once you have selected your voice talent, set up a suitable recording environment. A quiet space, a high-quality microphone, and reliable recording software are essential for capturing clear audio, such as Audacity, Adobe Audition, and OBS Studio.
During the recording session, maintain a smooth flow. If you stumbles over a line, simply pause, take a breath, and restart the sentence. This helps maintain the natural rhythm of the narration. After recording, move on to editing the audio. Use your software to remove any mistakes, pauses, and background noise. Clean up the audio by eliminating breaths and reducing any clicks or pops to ensure a smooth and professional sound. Well-edited audio enhances the overall quality of your explainer video, making it more engaging and effective in delivering your message.
If you find it challenging to record the audio yourself, consider hiring a professional voiceover artist. Platforms like Fiverr and Voices.com offer access to a wide range of voiceover talent, allowing you to choose the best fit for your project.
Step 4. Create and Collect Visual Assets
To bring your explainer video to life, you'll need to gather a variety of visual assets. These might include animated logos, illustrations, still images, live-action footage, infographics, and more.
This step varies depending on the type of video you're creating. For animated explainer videos, you need to gather or design graphics, icons, and other visual elements, and look for resources like graphic libraries or stock media sites to find the necessary elements. Websites like Freepik, Envato Elements, and Shutterstock offer a wide range of graphics and icons that can enhance your video.
If you're working on a live-action video, ensure your recording environment is well-lit and free from background noise. Use a good quality camera and microphone to capture clear visuals and sound.
For screencast videos, use screen recording software like Camtasia, OBS Studio, or VideoProc Converter AI to capture your on-screen actions smoothly. Ensure your screen is clutter-free and focus on highlighting the key features or processes you want to demonstrate.
For whiteboard videos, set up your whiteboard in a well-lit area and use markers that are easily visible on camera. Plan your illustrations to ensure they convey your points as you draw.
Gathering the right visual assets and ensuring they align with your script will create a cohesive and engaging explainer video that effectively communicates your message.

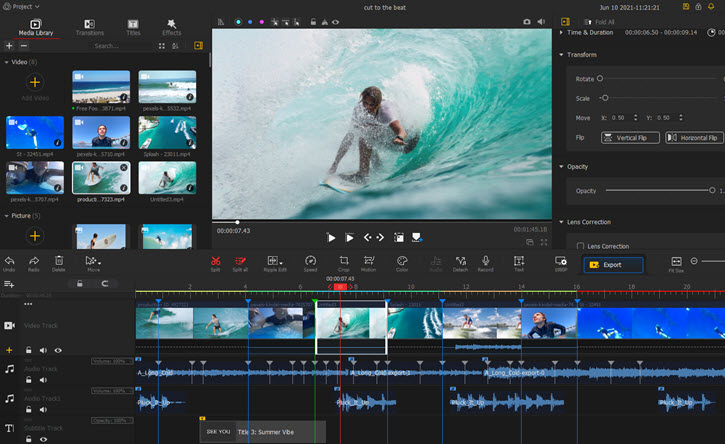
Step 5. Edit Media and Add Music/Effects
With all your visual and audio assets ready, the next step is to edit and arrange them into a cohesive explainer video with video editing software. Below, we will demonstrate using VideoProc Vlogger, the best free video editing software for explainer videos. Download the software and follow the steps below to make an explainer video:

1. Import Your Assets:
Import all your assets into VideoProc Vlogger.
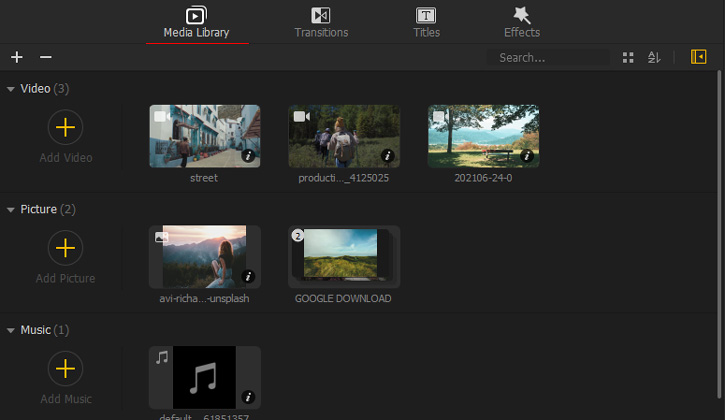
2. Create a Rough Cut:
Place the voiceover audio on the audio track and align it with the script. This will serve as the backbone of your video, guiding the placement of all visual elements. Then add your visual assets (animations, images, video clips) in sequence according to your script. This rough cut doesn't need to be perfect; focus on getting the right clips in the right order.
3. Refine the Edit:
Trim and fine-tune each clip to match the timing of the audio. Ensure that each visual element appears in sync with the corresponding part of the narration. Adjust the duration of each clip so that it complements the pacing of the script. Avoid long pauses or rushed sections to maintain viewer engagement.
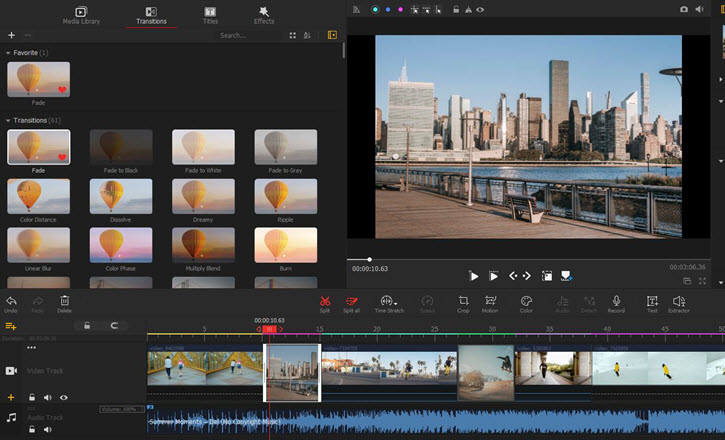
4. Add Transitions and Effects:
Use transitions like fades, wipes, and cuts to create smooth changes between scenes. Avoid overusing flashy transitions that could distract from the message. And incorporate visual effects to enhance the video. This could include motion graphics, text overlays, or other visual enhancements that support your narrative.
5. Include Text and Graphics:
Add any necessary text overlays, such as titles, subtitles, or captions. These can help reinforce key points and ensure the message is clear, especially for viewers watching without sound. Add any infographics or data visualizations as needed, but ensure they are easy to read and support the spoken content.
6. Sound Design:
Integrate background music that complements the tone of your video without overpowering the narration. And add sound effects to emphasize important actions or points in the video. These should enhance the viewing experience without being distracting. Make sure the sound volume you use is balanced with the voiceover.
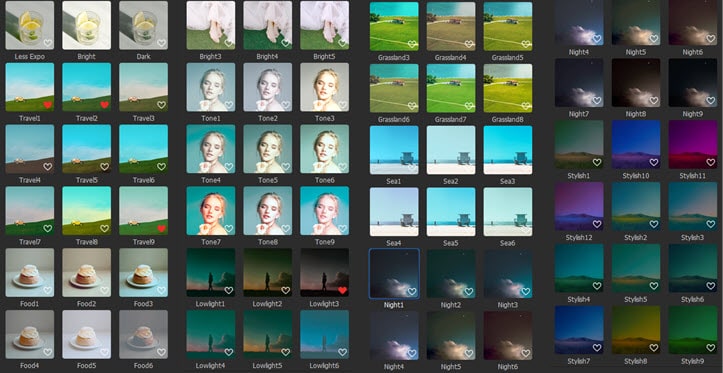
7. Color Correction and Grading:
Adjust the colors in your video to ensure a consistent and professional look. Apply color grading if needed to create a specific mood or tone that matches your brand and message.
8. Review and Adjust:
Replay your video to spot any inconsistencies or areas that need improvement, and pay attention to the flow, pacing, and clarity of the message. Make necessary adjustments to ensure everything looks and sounds as intended.
9. Export the Final Video:
Once you're satisfied with your edit, export the video in the appropriate format for your intended platform. Common formats include MP4, MOV, and AVI.
By following these steps, you'll create a polished and professional explainer video that effectively communicates your message and engages your audience.
Step 6. Test and Review
Before publishing, test your video on different devices and platforms to ensure it plays correctly and looks good everywhere. And gather feedback from a few trusted friends to identify any final tweaks that might improve the video.
Step 7. Publish and Share
Once ready, you can publish your video. Choose the desired platform, upload the video, and ensure it's optimized for SEO with relevant keywords in the title, description, and tags for better searchability. Once published, share your video on relevant social media platforms such as Facebook, Twitter, LinkedIn, Instagram, and TikTok. Include it in your email newsletters and embed it on your website, especially on key pages like product pages or blog posts.
FAQs
1. What is an Explainer Video?
An explainer video is a short, engaging video that explains a concept, product, or service in a simple and compelling way. It typically uses clear and concise language, along with visuals such as animations, illustrations, or live-action footage, to convey information effectively. Explainer videos are commonly used by businesses to introduce their products or services, demonstrate how they work, or address common questions or concerns. They can be used on websites, social media, email campaigns, presentations, and more to engage and educate audiences.
2. Which Software is Used for Explainer Videos?
Several software options are commonly used for creating explainer videos, each offering unique features and capabilities. Some popular choices include DaVinci Resolve, Adobe Premiere Pro, VideoProc Vlogger, Final Cut Pro, iMovie, etc. Choosing which software to use depends on various factors such as the type of explainer video you want to create, your budget, and your level of expertise in video editing and animation. For those seeking a free solution to make an explainer video, try VideoProc Vlogger, the best free video editing software for all creators.