Introduction to Shortcuts
VideoProc Vlogger provides 29 keyboard shortcuts to make it easier for you to do everything from creating a new project to export the finished movie. Most shortcuts are universal. If you are familiar with the shortcuts of Microsoft applications, then you don't need to take any extra time or effort to memorize the shortcuts of VideoProc Vlogger. Get ready for the next level of efficiency by using these productivity keyboard shortcuts when editing!
Let's download and run VideoProc Vlogger. And get to know the main features of VideoProc Vlogger shortcuts with the following introduction.
Watch video tutorial to learn how to speed up the edits with the shortcuts.
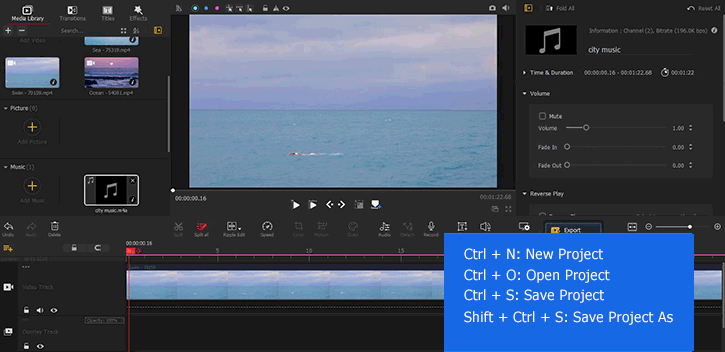
Ctrl + N: New Project
If you want to create another new project while editing, press Ctrl + N when on the main interface.
By doing so, you'll open the Create a New Project panel. Herein, you can complete the general settings (such as file name and resolution). When you are satisfied with all the settings, hit + New Project. This will open up the Save Project panel.
Suppose you need to create a new project but you are also satisfied with the project you are working with, then press Save; Suppose you need to create a new project and you don't like the project you are working with due to the wrong resolution or whatever, then press Don't Save; Press Cancel if you don't want to create a new project.
Ctrl + O: Open Project
If you want to open an existing VideoProc Vlogger project while editing, press Ctrl + O when on the main interface.
This will open the Windows Explore panel. Herein, you can double-click the previously saved VideoProc Vlogger project file to re-access it.
Ctrl + S: Save Project
If you wish to save an unfinished project for editing later on or preventing an accidental data loss, press Ctrl + S when on the main interface.
VideoProc Vlogger will generate a project file that saves all your editing decisions, references to the source files, and other data. In this way, when you open the project file, everything you see would be the same as the last time you exit the program. To check the project file, navigate to the Project Folder.
Shift + Ctrl + S: Save Project As
If you wish to save a copy of the working project, press Shift + Ctrl + S when on the main interface.
This will open the Save Project As panel. Herein, enter the project name and press the ellipsis button to assign the project directory. Press Save.
Shift + E: Archive Project
If you want to archive the project for making edits on another computer, press Shift + E.
By archiving a project, VideoProc Vlogger will save your editing decisions, source media files, and other data that are used in the project into one folder. Thus, when you move to another device or delete/adjust the location of the source file, you won't have any problem to open the last saved project as long as there is the archive file.
Shift + C: Close Project
If you want to close a project and exit the program, press Shift + C when on the main interface.
Alt + Ctrl + R: Export
If you are satisfied with the edits and ready for delivery, press Alt + Ctrl + R when on the main interface.
This will lead you to the Export panel. Herein, complete the settings on the Basic, Video, and Audio panel. Press Start to export a finished project as a video or audio clip.

Alt+ Ctrl + V: Export Video
If you are satisfied with the edits and ready for exporting a video-only file, press Alt + Ctrl +V when on the main interface.
This will lead you to the Export panel. Herein, complete the settings on the Basic and the Video panel. Press Start to export the video.
Alt+ Ctrl + A: Export Audio
If you are satisfied with the edits and ready for exporting an audio-only file, press Alt + Ctrl +A when on the main interface.
This will lead you to the Export panel. Herein, complete the settings on the Basic and the Audio panel. Press Start to export audio.
Ctrl + I: Import Video
If you want to add pictures, videos, and audio file(s) to VideoProc Vlogger, press Ctrl + I when on the main interface.
This will open up the Windows Explore panel. Herein, double-click the wanted original file(s) for fast importing to VideoProc Vlogger.
F2: Settings
If you want to adjust the project folder, transition durations, photo durations, hardware acceleration settings, and other general settings for getting the most out of VideoProc Vlogger, press F2 when on the main interface.
This will lead you to the Setting panel. Herein, you can apply the needed adjustments.
Ctrl + U: Check for Updates
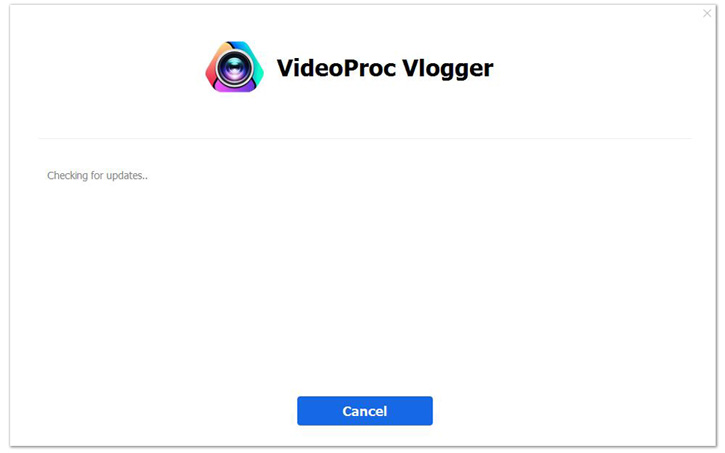
If you want to update VideoProc Vlogger, press Ctrl + U when on the main interface.
VideoProc Vlogger starts to check whether there is a new version is available for updating. If there is, you can press Update Now to update.
Alt + F4: Quit
If you wish to return to the main interface from a sub panel (such as the Speed Editor, Crop, Motion, Color, Audio to Text, and the Resolution panel), press Alt + 4.
If you wish to quit the program, press Alt + 4 when on the main interface.
Ctrl + Z: Undo
If you need to undo the last action, press Ctrl + Z. You can repeatedly press Ctrl + Z if you need to retrace multiple steps.
VideoProc Vlogger lets you undo almost all of your edits applied to the media clip, including trim video, detach audio, adjust speed, add the motion effect, add subtitle tracks, and the adjustments on opacity, and more.
Ctrl + Y: Redo
If you need to redo an undo action, press Ctrl + Y. You can repeatedly press Ctrl + Y to redo multiple steps.
Ctrl + C: Copy
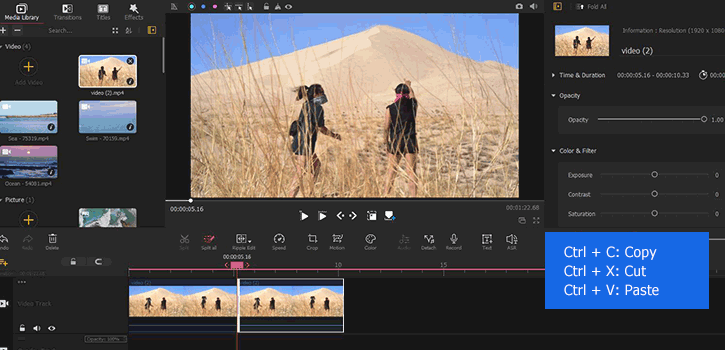
If you want to duplicate a certain video, audio, overlay, or subtitle clip, select the target clip on the timeline and press Ctrl + C.
Ctrl + X: Cut
If you want to cut a certain video, audio, overlay, or subtitle clip, select the target clip on the timeline and press Ctrl + X.
Ctrl + V: Paste
If you want to paste a clip to a new place in the timeline, select the target clip, press Ctrl + X, move the playhead to the new position on the timeline, and then press Ctrl + V.
If you want to duplicate a clip, select the target clip, press Ctrl + C, move the playhead to the position where you need the duplicated clip starts to appear, and then press Ctrl + V.
Delete: Del
If you want to delete a video, audio, overlay, or subtitle clip, select the target clip on Timeline, and press Del.
Shift + Del: Ripple Delete
If you want to remove some clips of a video on the Overlay Track without leaving gaps, choose the target clip, press Shirt + Del.
Ctrl + B: Split
If you need to split a clip on Video, Overlay, Audio, or Subtitle Track at a certain frame, select the target clip on the timeline, move the playhead to the position where you need to create the split, press Ctrl + B.
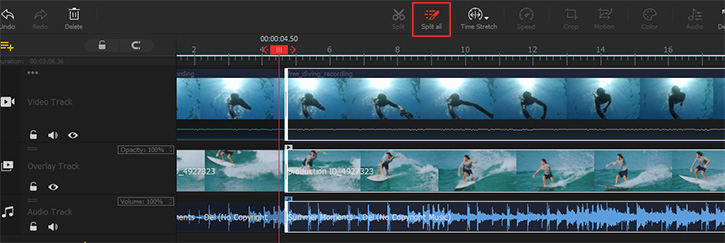
Alt + Ctrl + B: Split All
If you need to split media clips on all tracks at a certain spot on the timeline, move the playhead to the position where you create the split, press Alt + Ctrl + B.
Space: Play/Pause
If you need to preview the video on the main interface, move the playhead to the position where you need the preview to start, press Space.
If you need to stop or pause the preview, press the space key again.
←: Previous Frame →: Next Frame
If you need to go frame by frame when making precise edits, press → to move to the next frame and press ← to move to the previous frame.
F1: Help
If you need to access the VideoProc Vlogger Help, press H1 when on the main interface.
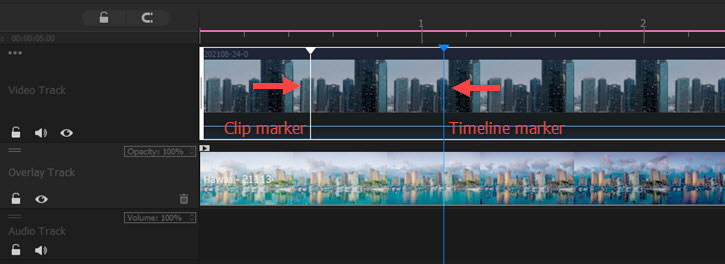
M: Add Marker in Clip
If you need to add a marker in a clip for signifying an important point within the clip, select the target clip, move the playhead to the position where you want to add a marker, and then press M.
Shift + M: Add Marker in Timeline
A timeline marker won't move along with the clip. Adding timeline markers can help you signify the important time in the current project, such as the music beats and title locations. To add a timeline marker, simply move the playhead to the target position on the time ruler and press Shift and M on your keyboard.
Ctrl + Mouse Scroll: Zoom in/out Timeline
When on the main editing interface, press the Ctrl key and then scroll up or down the mouse wheel to scale down or scale up the timeline view.
Now free download and install VideoProc Vlogger to edit videos quickly with shortcuts.
- > Using Timeline in VideoProc Vlogger
- > Introduction to Preference Settings
- > Introduction to Hardware Acceleration in VideoProc Vlogger
- > Import Media in VideoProc Vlogger
- > Preview Project in VideoProc Vlogger
- > Create a Video Quickly with VideoProc Vlogger in 5 Minutes
For more guides of VideoProc Vlogger, please visit this page >
If you have any question, please email us or visit

