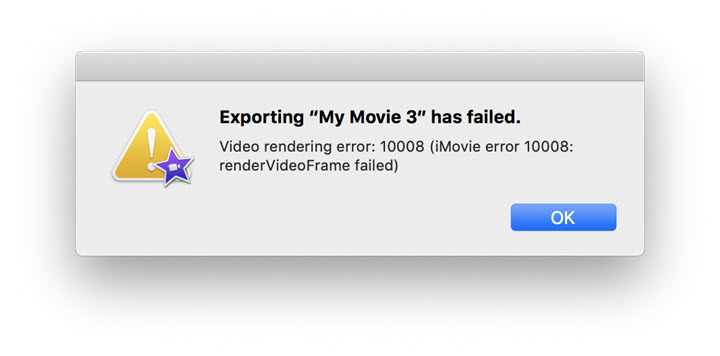
iMovie is the primary video editing software for Mac users because of its rich features and streamlined workflow. However, many users are frustrated by the error message, Video rendering error: 10008 (iMovie error 10008: renderVideoFrame failed) during exporting. After re-adjusting the output settings several times, the error remains unresolved yet.
In fact, the problem is caused by some media clips used in the timeline. This article is going to show you why iMovie error 10008 happens and how to fix it in detail. Check it out.
Causes of Video Rendering Error 10008 in iMovie
The occurrence of "Video rendering error: 10008" can be caused by different factors, some related to the media file, while some to iMovie and the system. Whichever you run into, here's a complete walkthrough of possible reasons for iMovie rendering error code 10008.
1. Videos in Various Formats
Videos from iPhones, Android phones, cameras, or some websites, are encoded with different formats and codecs. When you attempt to merge them into one MP4 or MOV file, the video editor needs to do massive transcoding work or process incompatible media files (say MKV and GIF), thus failing to render and saying "Video rendering error: 10008".
2. Imported Video Deleted or Its Location Changed
The editing project in iMovie has caches with which you can preview the entire work. But if you delete any video in the project from your Mac or move it to another folder, iMovie can't find the source file to finish the rendering work. So you need to keep the file in the same location where you import it to iMovie.
3. Corrupted Files Used in the Project
Another reason for iMovie rendering error 10008 is file corruption. Some video clips in the editing projects might be damaged during compressing or transferring. You didn't notice it previously because some media plays can correct playback errors and recover the corrupted video. But iMovie cannot handle corrupted files. It just gives up rendering and notifies you an error code 10008.
4. Insufficient Storage Space
If your Mac nearly runs out of its storage, iMovie will find no space to save the final video and its performance will be affected negatively. As a result, iMovie fails to render video frames.
How to Fix iMovie Video Rendering Error 10008
We wrapped up 5 methods to troubleshoot video rendering error 10008 in iMovie according to the possible reasons above. Check them out and find the best solution in your case right now.
1. Convert Videos to iMovie-Friendly Format
VideoProc Converter AI is a lightweight and fully-featured video processing software for Mac and PC. It gets videos ready for post editing by converting, transcoding, and fixing. When you encounter the "Video rendering error: 10008" message while exporting videos from iMovie, try to convert your source videos to a format friendly to editing in iMovie, e.g. MP4 and MOV.
As a top video converter for Mac, VideoProc Converter AI offers a full list of preset profiles for iMovie, Final Cut Pro, iTunes, Apple ProRes videos, and so forth. In addition, it empowers Mac users to customize frame rate, bitrate, resolution, metadata, audio sample rate, and others absent in iMovie settings.

VideoProc Converter AI - Best Video Converter for iMovie
- One-click solution to convert videos for Apple devices and software.
- Support high FPS, 4K/8K, HDR, 10-bit, HEVC, H.264, VP9, AV1 videos.
- Flexible custom settings for video format, quality, and file size.
- 47x real-time faster speed when processing videos in bulk.
- All in one: quick edits, compress, download, screen record.
![]() Excellent
Excellent ![]()
Download VideoProc Converter AI and convert videos for iMovie in 3 steps!
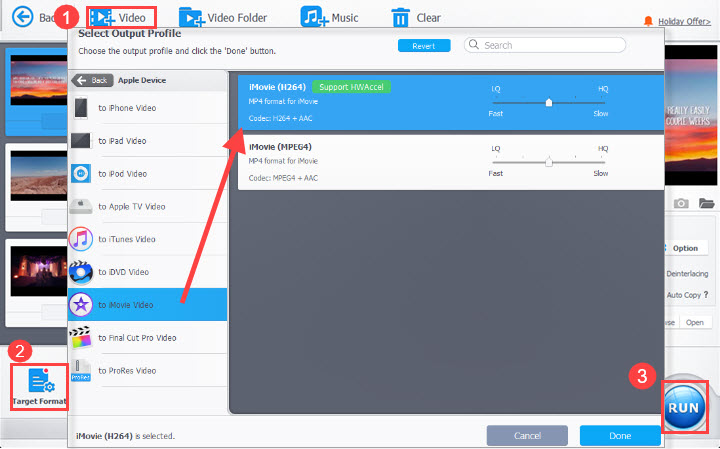
Step 1. . Launch VideoProc Converter AI on Mac. Click "Video" in the main interface, then drag and drop video files to it.
Step 2. Go to "Target Format" > "Apple Device" > "to iMovie Video" and choose iMovie (H.264). Click "Done".
Step 3. Choose the output destination and click "RUN" to start converting videos to the format friendly to iMovie rendering.
2. Recover Deleted Files and Sort Files Properly on Mac
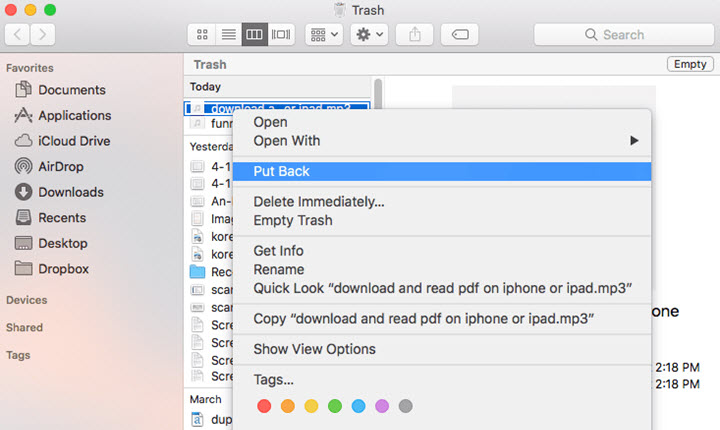
Find the recycle bin icon on your Dock or Desktop. Double-click on it, find the deleted file and restore it to the original file folder. If the Recycle Bin is missing, use the Go to Folder feature in the Finder Go application, search Trash, and then you can get the Trash Folder.
In case the path is changed again, you can create a folder to save all the media files that you need for editing in iMovie, then copy and paste the video content into a new project.
3. Repair Damaged Media Files
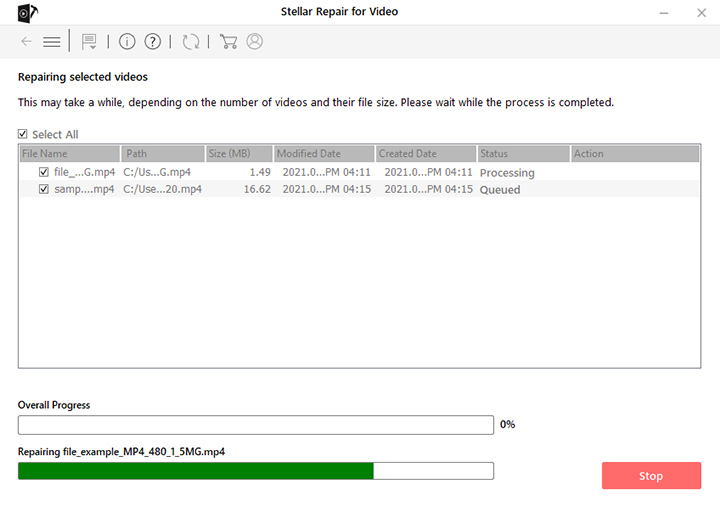
If you know which clip in the editing project is corrupted exactly, you can use video repairing software to fix it. For example, Wondershare Recoverit, EaseUS Data Recovery Wizard, and Stellar Video Repair Tool. After importing files to the software, they will scan and restore the data with their own technologies.
4. Remove Corrupted Frames
Video file repairing costs much time and energy, and sometimes it won't work if too much data is lost. Another workaround is to get rid of corrupted footage from your project. Browse the whole timeline in iMovie to figure out the frames with a black screen, then right-click on it to delete it from your video.
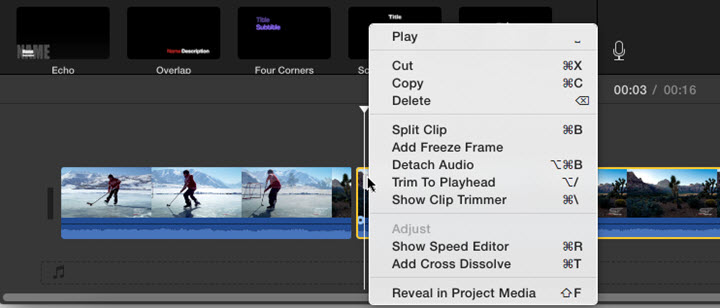
To keep the coherence of your content, you can replace it with some similar footage.
5. Update iMovie and Free up Storage
To update iMovie, you need to keep the macOS up to date. Open the Apple menu and click "System Preferences" > "Software Update". If the update is available, click "Update Now". If not, you are using the latest macOS and iMovie.
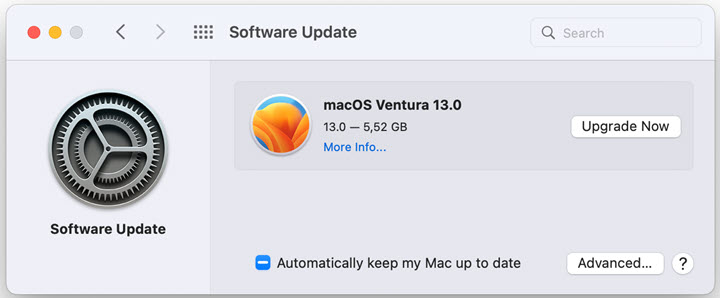
To free up space on the Mac hard drive, you can delete used apps and their leftovers, delete duplicate files, empty the trash bin, and clean up browser caches and downloads.


