Summary: Looking into how to fix Sony Vegas not rendering full video? This post explains why Sony Vegas only renders part of a video and shares 6 efficient yet easy solutions to fix the error.
Sony Vegas (Vegas Pro) is a fabulous video editing program that offers a vast number of creative features such as unlimited timeline tracks, scene detection, multi-region motion tracking and Automate audio mixes. However, every program has its problems, so Sony Vegas is no exception.
Many users have reported on the official Sony Vegas forums and Sony Vegas Reddit community that they frequently encounter issues like Sony Vegas Pro 15 not rendering whole video and Sony Vegas won't render. But don't worry, we've collected some useful solutions to fix Sony Vegas not rendering full video. Keep reading to know.
Solution 1. Disable Render Loop Region Only
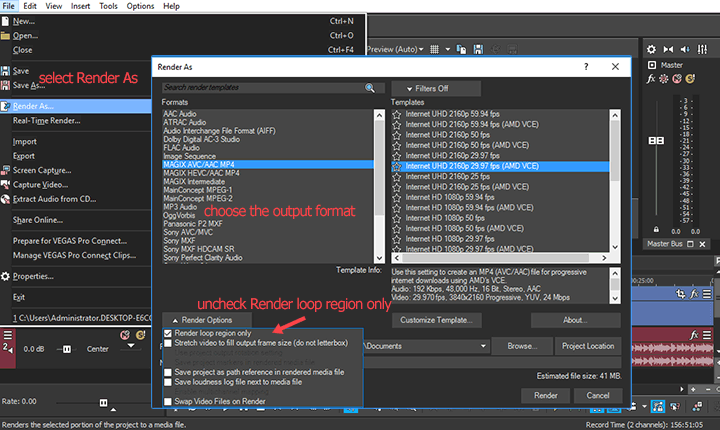
The Sony Vegas not rendering the whole video error can happen for several reasons, but in most cases, it's caused by you've selected Render Loop Region Only under the Render As window. The Loop Playback feature itself is great for improving editing efficiency. After marking a certain section by adding I/O points on the timeline and enabling the Loop Playback feature, you can play back the marked section repeatedly. However, the problem is Sony Vegs renders only the loop region by default, which often leads to Sony Vegas not rendering full video. To fix this error, simply follow the below steps:
Step 1. Hit File on the top menu bar and choose Render As.
Step 2. Select the target export format under the Format section.
Step 3. Hit Render Options and uncheck Render loop region only.
Solution 2. Save as a New Project
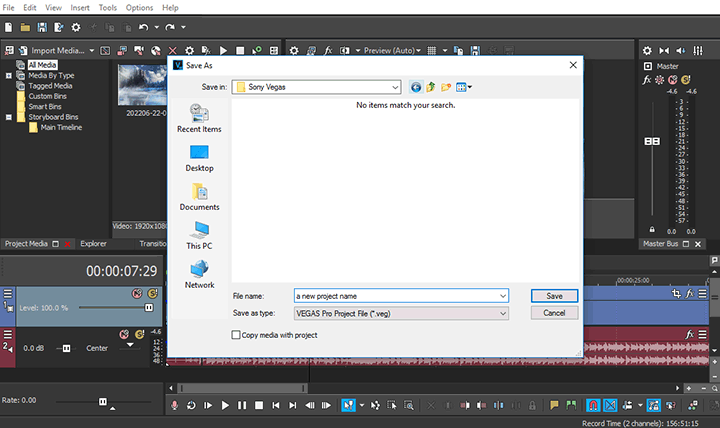
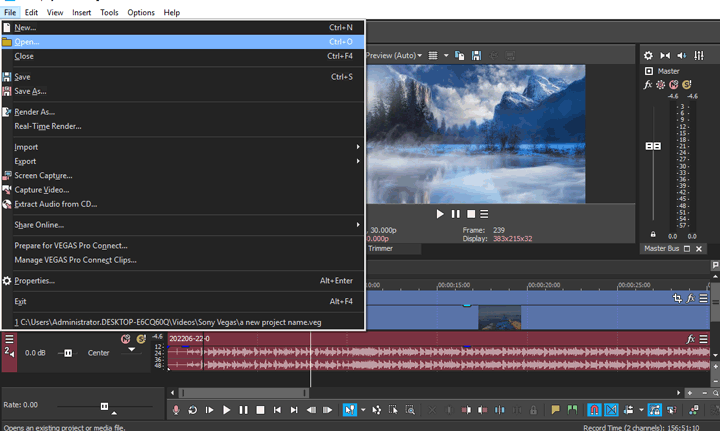
Some unknown glitches might also lead to Sony Vegas not rendering the whole video. If you have Render Loop Region Only turned off but Sony Vegas still renders only part of the video, then you may try to save the current project with a new name and then render the new version. Here's how:
Step 1. Go to the top menu bar to find File. Select it and choose Save As.
Step 2. Enter a new project name and hit Save.
Step 3. Hit File and choose Open. Find and select the project that is saved with the new name.
Step 4. Hit File > Render As, select the target output format, and hit Render.
Solution 3. Change File Permission
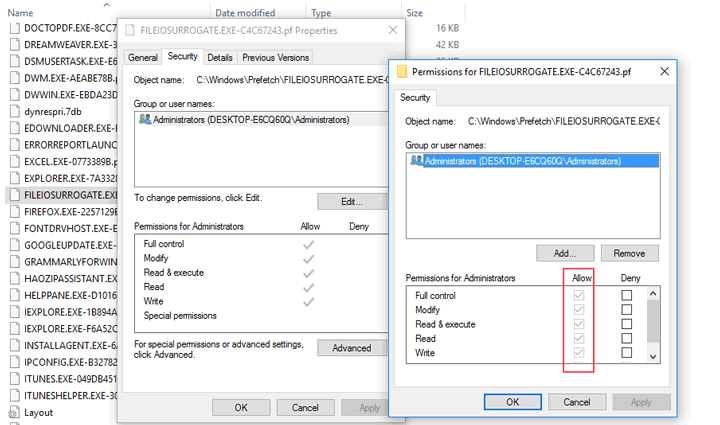
Some Windows users reported an error in the permissions the installer assigns to "fileiosurrogatee.exe" (an application that VEGAS relies on to read and write files) might also cause the Sony Vegas not rendering the whole video error.
Step 1. Go to c:/program files/VEGAS/18.0/x86.
Step 2. Go to fileiosurrogate.exe, right on it, and select properties.
Step 3. Come over to the security table, hit Edit, and assign full permissions to that file.
Solution 4. Convert the Source Video Files
Sony Vegas lets you add videos in different formats, resolutions, and frame rates to one project. However, editing them together requires massive transcoding work. If your computer is not powerful enough, you might encounter the error that Sony Vegas cannot render full video. Luckily, it's easy to convert the source video files if you're using VideoProc Converter AI. This simple yet full-featured video converter software allows you to convert multiples video to make them the same format, resolution, and frame rate within a simple click.
Step 1. Download and install VideoProc Converter AI on Windows or Mac. Launch it up.
Step 2. Hit Video and drag the source videos to this best video converter to the program.
Step 3. Select the desired format under the Target Format section. If necessary, hit the small tool icone, adjust the video properties such as frame rate and bitrate rate, and then hit Apply To All.
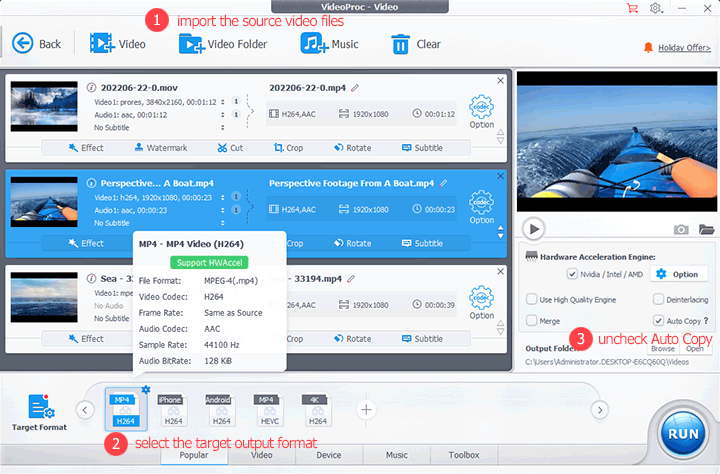
Step 4. Uncheck Auto Copy and hit Run. This best video converter starts to process your video files.
Solution 5. Restart the Computer
Massive amounts of logs and temporary caches are created when we edit the videos with Sony Vegas and operate other programs and the majority of them are stored in the RAM (Random Access Memory). When the RAM is insufficient in the space, it leads to Sony Vegas not rendering the whole video and many other sorts of errors. Restarting the computer can clear the RAM and hereby fix the error.
Step 1. Save the project on the computer.
Step 2. Restart the computer.
Step 3. Relaunch the project and re-render the project.
Solution 6. Render the Video Out into Separate Parts
If the error still exists after trying all these fixes, you can render the project as several parts, create a new project, bring these individual clips to the timeline, and then render them into one video.
Bottom Line
To summarize, this post has shown you 6 ways to fix Sony Vegas not rending whole video error. If you've tried trying solutions one by one but still get no luck to fix the error, you can just switch to an easier alternative Sony Vegas - VideoProc Vlogger. This amazing piece of video editing software is developed to maximize creativity and minimize efforts, so it's incredibly easy to use. It supports 999+ timeline tracks, packs a full range of editing tools, and offers a loads of cool yet easy-to-master features such as motion crop, time remap, music beat marker, and PiP, allowing you quickly make appealing content. Just try it and explore more!


