Quick Answer
Q: Is QuickTime screen recording stop button missing?
A: No, it's just hidden deeply. You can activate it via shortcuts or find it in the top right menu bar.
As many screen recorders in the market impose restrictions like recording time and quality, QuickTime Player, a built-in utility on Mac, becomes the primary option for many users. It can record the Mac screen with audio and allows defining the recording area flexibly. However, many users have reported to the Apple community that they can easily start screen recording in QuickTime but cannot find the end/pause button.
You may notice that the QuickTime screen recorder since macOS Catalina comes in a different appearance. Does it change the way of how to start and stop QuickTime screen recording?
In this post, we'll show you how to stop QuickTime screen recording on Mac covering macOS Mojave 10.14 to the latest one. At the end of the post, we also provide you with an alternative to QuickTime screen recorder with more handy recording settings and extra features. Just keep reading.
Method 1. Stop QuickTime Screen Recording with Shortcut
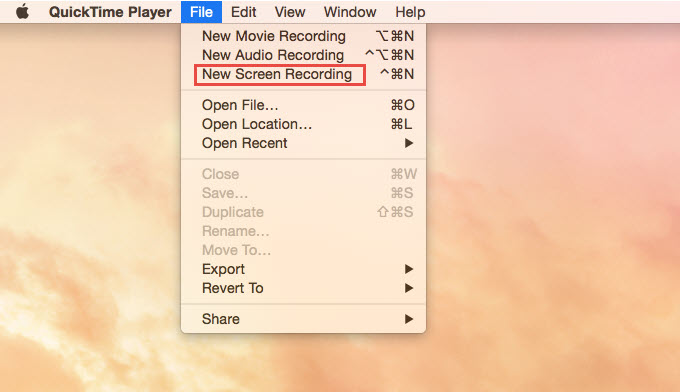
Step 1. Launch QuickTime Player on your Mac. Click "File" > "New Screen Recording". Click to select the full screen or choose a specific area. Then start recording.
Step 2. Then here are two types of shortcuts to stop screen recording in QuickTime.
- To pause recording directly: Press "Command" + "Control" + "Esc".
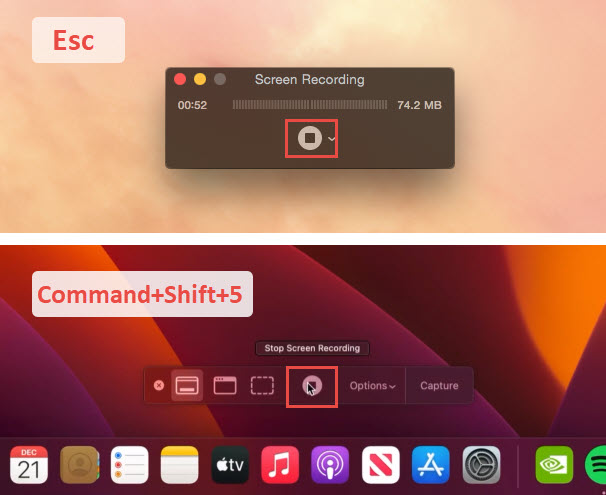
- To prompt the recording controls: Press "Esc" (High Sierra and Mojave) and click the stop button. Or press "Command" + "Shift" + "5" (Catalina and later) and click the stop button.
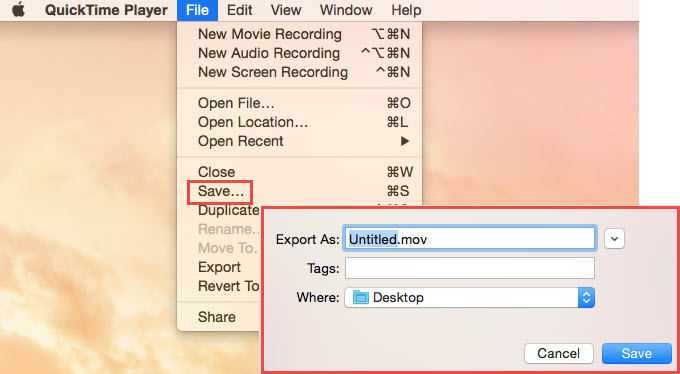
Step 3. After it stops, you need to go to "File" > "Save", input a file name, and save the screen recording to your Mac.
Method 2. Stop QuickTime Screen Recording via On-screen Button
Though Mac hides the recording panel with the pause button, you can find another one in the menu bar.
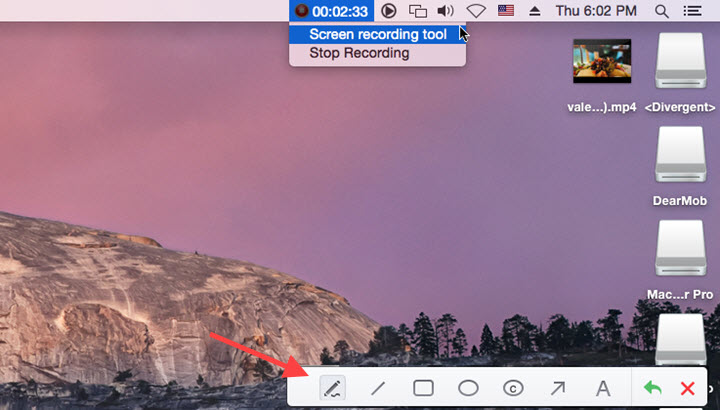
Whenever you want to stop QuickTime Player from screen recording, hover your mouse cursor on the stop button on the top right bar.
Then move to the top left menu bar. Click "File" > "Save" to enter the filename, choose an output folder, and save the screen recording.

Note: When you capture the full screen, QuickTime records how you move the cursor and end the recording. If you don't want that part in your video, trim it off in QuickTime Player.
Method 3. Stop QuickTime Screen Recording with Force Quit
The methods above are effective for typical scenarios where the QuickTime Player functions well on your Mac. Nevertheless, there are instances when the program freezes and does not respond to your commands. This is the primary cause for being unable to halt the recording on your Mac. In such a case, you have to force quit.
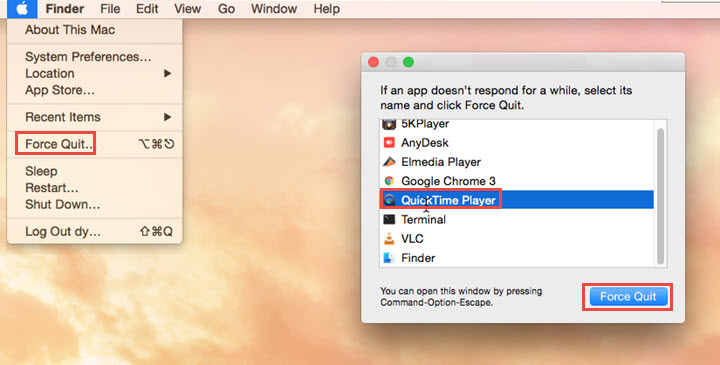
- Option 1: Open the Apple menu and choose "Force Quit". In the Force Quit Applications window, select "QuickTime Player" and click "Force Quit" to confirm.
- Option 2: Press the "Option" + "Command" + "Esc"" to open the Force Quit Applications window. Locate "QuickTime Player" in the list, highlight it, and then click "Force Quit" to stop the recording.
Note: While effective, this method does not allow you to save your recordings.
Method 4. Stop QuickTime Screen Recording with Activity Monitor
Similar to a Windows PC, Mac lets you oversee the running applications on your device using an activity monitor. By utilizing this tool, you can effortlessly stop the recording process. Simply open the activity monitor, choose QuickTime Player as the target, and end its application process.
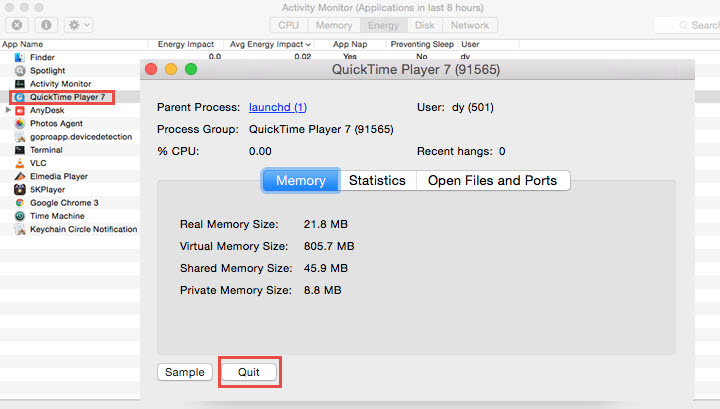
Step 1. Open "Finder" > "Applications" > "Utilities". Then launch "Activity Monitor".
Step 2. Choose QuickTime Player from the process list. Click on it and click "Quit" to end its ongoing screen recording activity.
However, like the previous method, you cannot save your recordings using this approach.
Method 5. Use QuickTime Screen Recorder Alternative
If you feel that QuickTime is not handy to record screen on Mac, you can try VideoProc Converter. It stands out as a formidable alternative to QuickTime Player, particularly for those seeking a more intuitive and feature-rich screen recording experience. Its user-friendly interface, combined with its extensive set of tools and options, makes it a versatile and powerful solution for a wide range of video-related tasks.
Specifically, VideoProc Converter can easily capture screen in 4K and HD 1080p on Mac. It provides multiple recording modes, audio options, and annotation tools for various recording needs. Besides, it can convert, edit, compress, and download videos in one stop. Its AI features like AI upscaling, stabilization, and frame interpolation for Mac version are around the corner! Now download VideoProc Converter and let it solve all your digital issues in one go.
How to Record Screen on Mac with VideoProc Converter
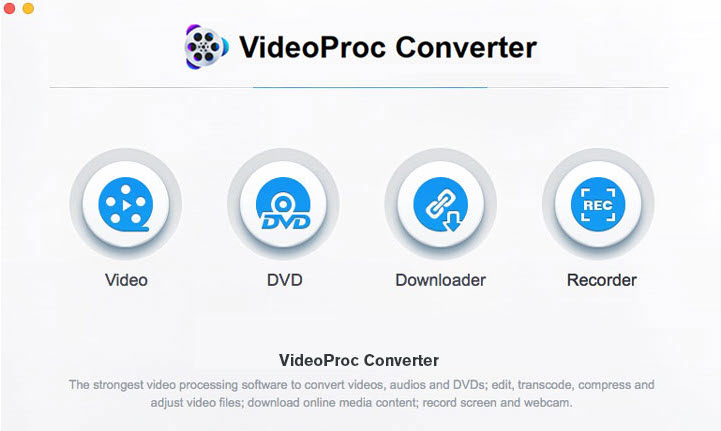
Step 1. Launch VideoProc Converter and choose "Recorder" on the main interface.
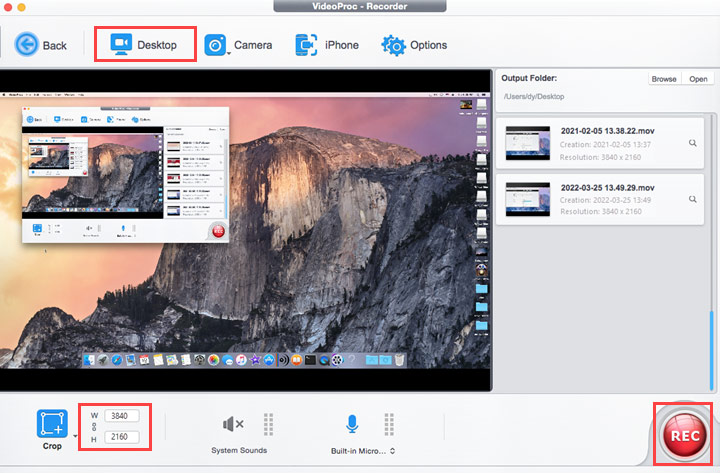
Step 2. Select the recording mode. "Desktop", "Camera", or "Screen & Camera". Then select the audio that you want to include in your recording. If you want it to record a part of your screen, click "Crop" to select the area. Hit the red "REC" icon to start recording.
Step 3. During the recording, you can highlight by shapes and arrows, and add text with its screen recording tool minimized in the menu bar. When the recording is done, click "Stop Recording".
