Adobe Premiere Pro earns its status as industry-standard video editing software, while for novice users, it's easy to get lost in all the powerful capabilities. So here, I will show you how to export Premiere Pro to MP4 in one of the most basic tutorials, so you can share your work with the world.
How to Export MP4 in Premiere Pro
Follow the steps below to export Premiere Pro to MP4.
- Active the Timeline panel and select the desired sequence to export.
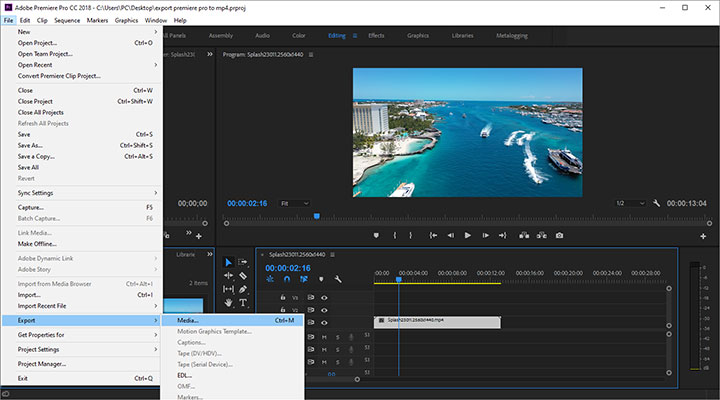
- Go to File > Export > Media from the top menu bar.
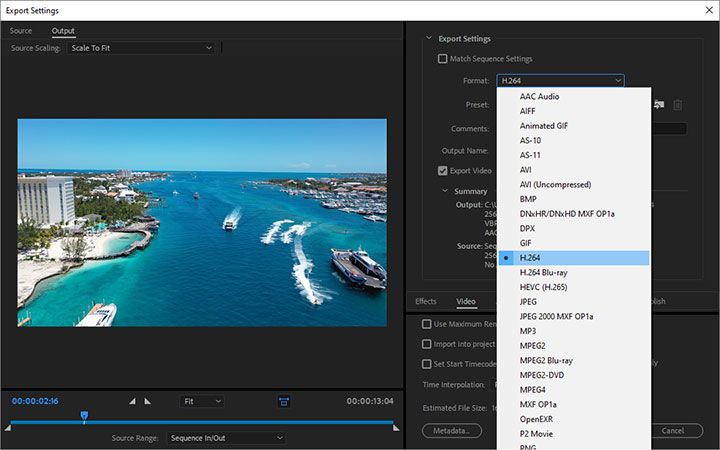
- Select H.264 from the drop-down list of Format.
- Set the file name and the save path by clicking the Output Name.
- Click Export to start saving Premiere Pro as MP4.
The following part is the step-by-step guide and detailed explanation. Before exporting, make sure to save your project in case any errors occur during the export process. The following steps also work for how to export a Premiere Pro project to MP4.
Step 1. Select the desired sequence.
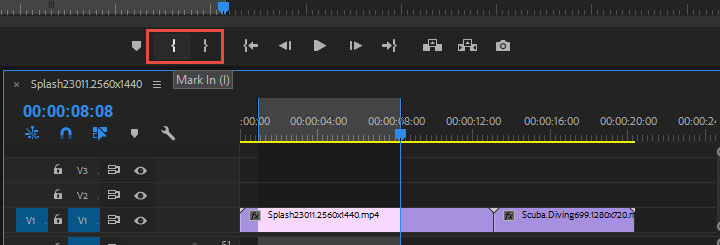
After saving your project in Premiere Pro, you need to click the Timeline panel to select it. If you want to export only a single clip from the sequence, use the Mark In and Mark Out buttons to set In and Out points.
Step 2. Launch the Export Settings panel.
Go to File > Export > Media from the top menu bar. That will bring up the Export Settings panel, from where you can change the preferred settings for your project. You can also use the Ctrl+M keyboard shortcut on Windows or Command+M on Mac.
Step 3. Set output format.
Click and expand the Format menu and choose H.264 from the drop-down list. Please make sure you select H.264 and not MPEG4 to export as an MP4.
For the Preset option, you can keep "Match Source - High bitrate" (default option) selected. If you want to export premiere pro for social media, you can also expand the box and use other presets for YouTube, Vimeo, or Facebook.
Please refer to this article to see the difference between MPEG4 and MP4.
Step 4. Set the file name and the save path.
Click the blue underlined filename to bring up the Save As dialog box. Use this to name your video and specify the export location.
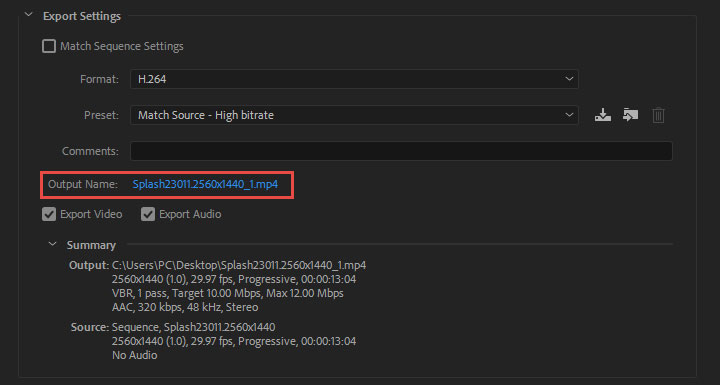
Step 5. Start the export process.
Click the Export button at the bottom of the window to export as MP4. You can also click Queue to add your project to the render queue of Adobe Media Encoder.

Bonus: Alternative Way to Export As MP4
VideoProc Converter AI is a reliable alternative way to export your video as MP4. If Premiere crashes during the export process, you can always export your video as an intermediary file format, then convert this intermediary file to MP4 with this reliable video transcoder.

VideoProc Converter AI - Video to MP4 Converter
- Compatible with Windows and macOS.
- Fast conversion speed with GPU Acceleration.
- Quality-oriented A/V file conversion for 420+ codecs and formats.
- Batch conversion supported.
- Available editing features like changing frame rate and size, VBR pass, etc.
- Built-in DVD converter, downloader, and screen recorder to work with Adobe PR.
Easy Steps to Convert Any Video to MP4 With VideoProc Converter AI
Follow the steps below to convert any video format to MP4 with VideoProc Converter AI.
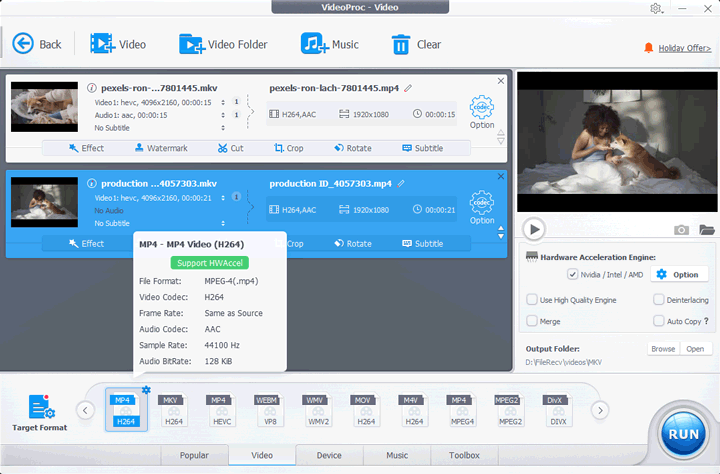
- Launch VideoProc Converter AI and choose Video from the welcome screen.
- Import the video to the program using the +Video button in the upper left corner.
- Choose H.264 MP4 as the output format.
- Use the Option menu to set frame rate, bitrate, aspect ratio, VBR pass, etc (optional).
- Click RUN to start converting.
FAQ
How to export Premiere Pro for YouTube?
To use the best export settings for YouTube in Premiere Pro, follow the steps below:
- Go to File > Export > Media to bring up the Export Settings panel.
- Select H.264 as the format from the Format drop-down list.
- Click Preset menu and choose YouTube 1080p Full HD.
- Set the Bitrate encoding to VBR, 2 pass.
- Choose AAC for Audio Format Settings.
- Check the Maximum Render Quality box.
- Click Export to export Premiere Pro for YouTube.
What's the best export settings for Premiere Pro?
See the table below for the best export settings in Premiere Pro (depending on compatibility, file size and quality).
| Best Export Settings for Premiere Pro | |
|---|---|
Format |
H.264 |
Preset |
Match Source - High Bitrate |
Basic Video Settings (Resolution & Frame Rate) |
Match Source |
Render at Maximum Depth |
✓ |
Profile |
High |
Level |
4.2 |
Bitrate Encoding |
VBR, 2 pass |
Audio Codec |
AAC |
Sample Rate |
48000 Hz |
Channels |
Stereo |
Audio Quality |
High |
Bitrate [kbps] |
320 |
Use Maximum Render Quality |
✓ |


