Have you ever wanted to record your screen in Windows 10? Perhaps you want to share an epic gaming moment with friends on Discord, create instructional videos that showcase your Windows 10 actions, or even record a bug that appears on your system for debugging purposes. Fortunately, recording your screen on a Windows 10 PC is an effortless task with Xbox Game Bar which is the built-in screen recorder of Windows 10. Thus, in this post, we'll guide you through step-by-step instructions on how to use Xbox Game Bar to record in Windows 10.
However, it's important to note that Xbox Game Bar has its limitations; it cannot record certain parts of the screen and doesn't capture everything happening on your Windows 10 system. Therefore, we will also share with you a more flexible and reliable way to record your screen on a Windows 10 PC. Keep reading to know.
Record Your Screen in Windows 10 Using Xbox Game Bar
If all you need is a basic and free screen recorder for Windows 10 PC, then you don't need to look anywhere else but the Windows 10 built-in screen recorder – Xbox Game Bar. With it, you can record not just your gaming moment on Xbox but also your activities on other games and applications. Even better, you can broadcast your recordings on popular streaming platforms directly. However, it does come with a few known drawbacks, making it not an ideal long-term screen recording solution.
- Few customization options for recording, such as changing the recording range
- Only let you record the application that was active at the start of the recording
- Unable to capture most programs that aren't downloaded from Microsoft Store
- Recording stops immediately when exiting the program
- The program uses a lot of CPU resources, which may slow down your PC
- Errors like Xbox Game Bar recording not working or available happen frequently
Steps to Record on Windows 10 Using Game Bar
Step 1. Click the Windows icon on the left bottom corner and hit Settings. Input Game in the search box and press Enter on the keyboard to look for the Game option.
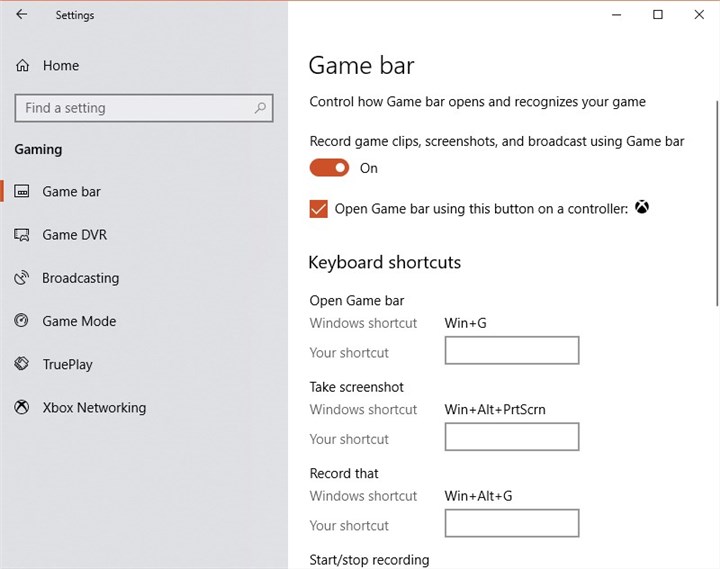
Step 2. Click on the Xbox Game Bar option. Toggle the option of "Enable Xbox Game Bar for things like recording ame clips, chatting with friends…".
Step 3. Open the gameplay, live streaming, or other things that you want to record on Windows 10.
Step 4. Press Windows and G on your keyboard simultaneously to open the recording bar.
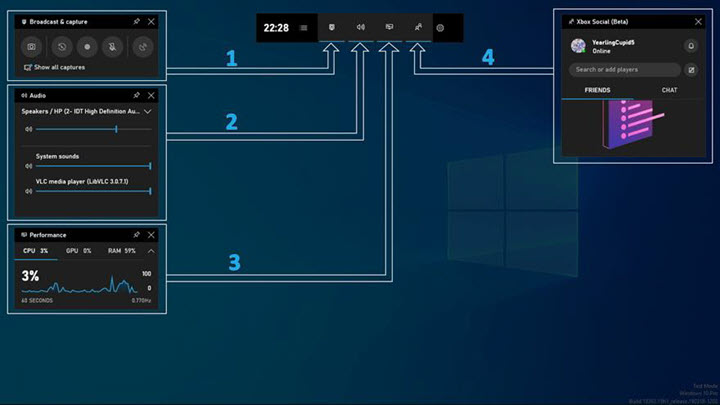
Step 5. Click the Capture icon to start screen recording on Windows 10. You can also hit the speaker icon to decide whether to screen record with sound or not.
Step 6. When you want to stop the screen recording on Windows 10, hit the stop icon on the recording bar.
Record Your Screen in Windows 10 Using VideoProc Converter AI
As said, issues like Xbox Game recording not working or available happen from time to time and Xbox game recording comes with lots of restrictions. If you want to enjoy a smooth recording experience or you want a more versatile Windows 10 screen recorder, VideoProc Converter AI is undoubtedly a superior and ideal solution. Let me list some of its highlight features and you'll know why it is the one.
- Record games and lives in 1080P/4K even at 60fps with system sound and/or your voice.
- Select from various recording modes, including screen, PiP, webcam, and green screen.
- Export your recordings in variety of formats like MP4, MOV, TS, FLV, and MKV.
- Real-time drawing tools, such as annotations, outlines, texts, and arrows.
- Additional features to edit, convert, and resize your desktop recordings.
Steps to Record on Windows 10 Using VideoProc Converter AI
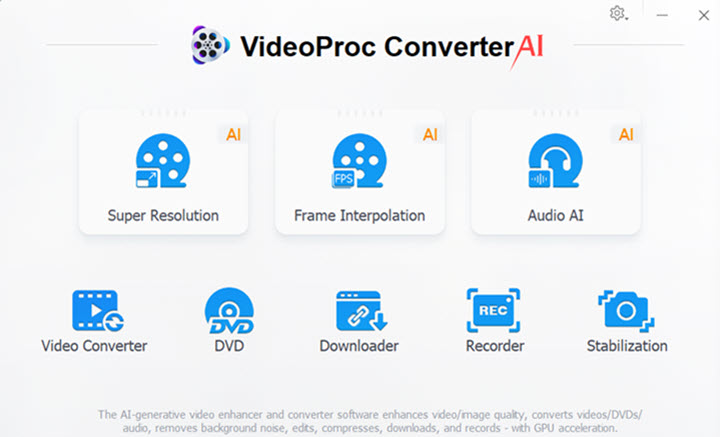
Step 1. Download and install this capable screen recorder for Windows 10. Launch it up. Click on Recorder.
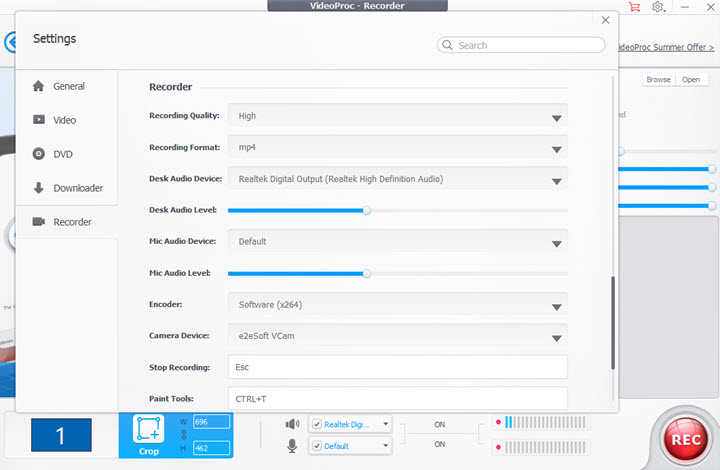
Step 2. (Optional) If you want to customize the recording settings, such as the video quality and the recording format, click on the gear icon located in the top-right corner, click Settings, and adjust your preferences accordingly. Hit the exit button to return to the recording panel.
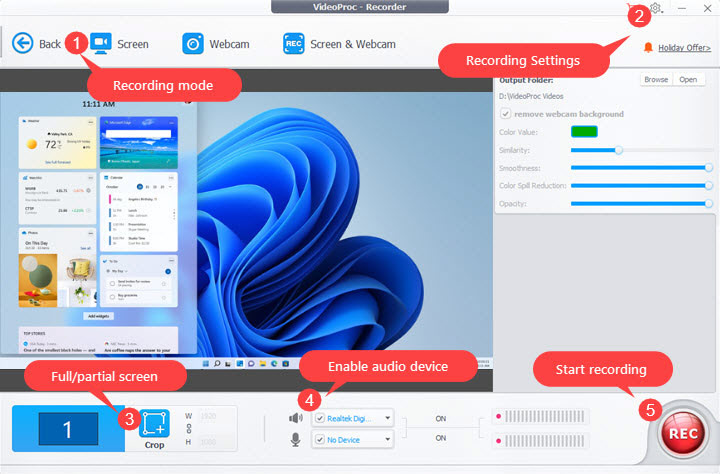
Step 3. Choose the audio device you want to record from and select a recording mode from the three available options:
- Screen to record the Windows 10 screen.
- Webcam to record yourself on a Windows 10 PC.
- Screen&Webcam to record both the Windows 10 screen and yourself simultaneously.
Tips:
When using the Screen or Screen & Webcam mode, the entire screen is recorded by default. To record a specific area, click on "Crop" and select the target recording area.
Step 4. Click the "Rec" button located in the lower-right corner to begin recording. You can also use shortcuts to quickly access or hide the drawing tools during the recording.
Step 5. Once you're done recording, click on the Stop button to end up screen recording on Windows 10.
FAQs
Does Windows 10 come with a screen recorder?
Yes, Windows 10 does come with a built-in screen recorder called "Game Bar". The Game Bar feature allows you to record gameplay and some other application window on your computer. However, it has some limitations, like not allowing you to record certain the area and can't record some programs like File Explore.
What is the simplest way to record screen in Windows 10?
The easiest way to record your screen in Windows 10 is by using VideoProc Converter AI. With it, you can customize a certain range of your screen to record, and choose whether you want to record your Windows 10 screen with or without webcam or microphone inputs. Customizing the recording format, quality, and other settings is also easy like a breeze. Even better, you have a lot of handy tools to edit, compress, and convert your recordings.

