Summary: In search of a simple way to record audio on Mac? Then you've come to the right place! Check out the post and learn how to record audio on Mac with the 6 best ways.
Whether you're a podcaster looking to capture high-quality interviews, a musician eager to lay down some tracks, or a student recording lectures for studying, learning how to record audio on Mac is an invaluable skill. The good news is that with the right audio recording software and just a little bit of setup, recording audio on a Mac is surprisingly easy. Here in this post, we have put together a complete tutorial explaining how to record audio on Mac using the best 6 ways! Read on!
Best Way to Record Audio on Mac
Overall best way to record audio on Mac, seamless, high-quality, and user-friendly
For a smooth and high-quality audio recording experience on Mac, VideoProc Converter AI is your best option. This audio recording software for Mac can easily capture high-quality audio from a variety of sources, including the internal sound of your MacBook and external sound from a microphone. It offers the features to adjust volume levels from both input and output devices and alter settings such as bitrate, channel numbers, and sample rate, allowing you to customize your audio recordings. Moreover, armed with a converting engine, this tool enables you to effortlessly convert your recording to popular formats such as MP3, AAC, FLAC, OGG, WMA, Vorbis, and more.

VideoProc Converter AI – Best Way to Record Audio on Mac
- Record audio on Mac with the best quality: live streams, video calls, voiceovers, etc.
- Record 4K screen on Mac smoothly with internal and microphone sound.
- Convert recordings to trendy formats: MP3, M4A, AAC, OGG, etc.
- Custom volume level and optimize audio recordings with speed-up, split, and more.
- All-in-one AI-generative media solution: AI upscale, record, compress, convert, edit, download, slo-mo, etc.
Excellent ![]()
![]()
How to Record Audio on Mac with VideoProc Converter AI
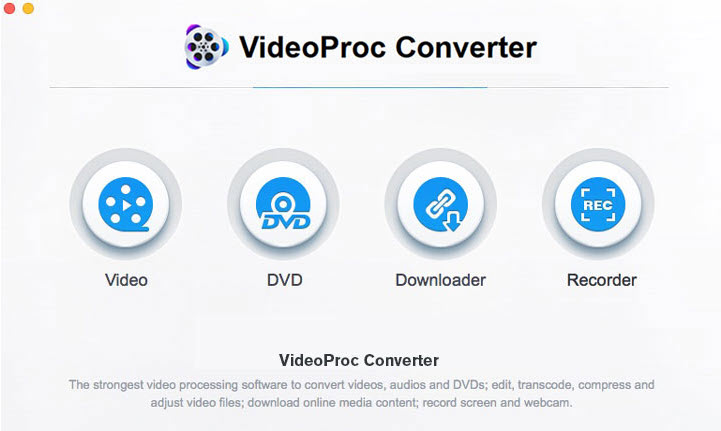
Step 1. Free download VideoProc Converter AI, run it, and go to the Recorder panel from the home page.
Step 2. In the top bar, choose 'Screen' as the recording mode. Then go to the audio device setting area, and select the target audio source:
- To record the internal audio on Mac, check the System Sounds icon.
- To record your voice, check the Built-in microphone icon. If necessary, you can specify the target microphone source.
- To record your voice and the system sounds on Mac simultaneously, simply check both icons.
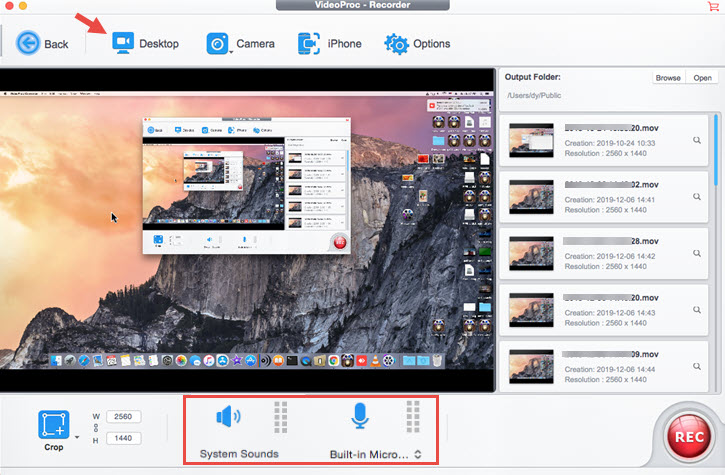
Step 3. Play the audio and start speaking with your mic, and click on Rec to start recording audio on Mac. Once finished, click Stop to stop the audio recording on Mac.
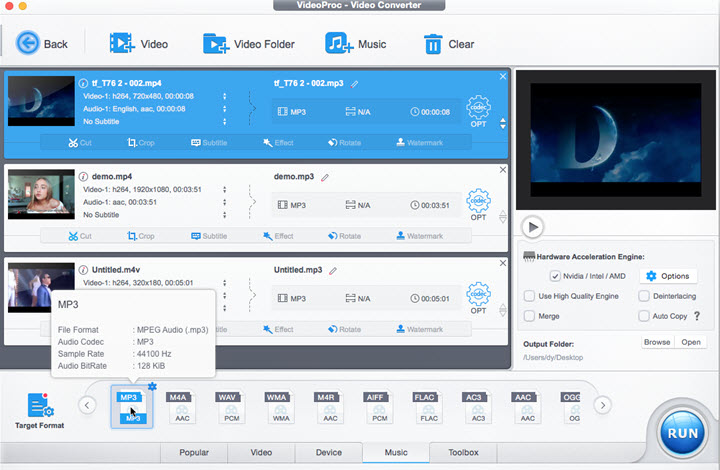
Step 4. Click the folder icon of the recorded file to open its file location. Now, hit the Back icon to return to the home page. Tap on the Video module, and drag and drop the recorded file into the program. Navigate to the bottom bar, select Music, choose MP3 or else as the output audio format, and click RUN to export.
How to Record Audio on Mac with Voice Memos
Best for recording voice on Mac without any third-party recording tools.
Macbook comes with a built-in voice recorder that can effortlessly record voice from your microphone on a Mac. Besides, you can perform basic editing to the recording within the app if needed. The recording is automatically saved to iCloud so you can access them from all your Apple devices. Note that Voice Memos only supports recording audio from your microphone, and cannot capture the system sound on your Macbook. See how to record audio on Mac using Voice Memos:
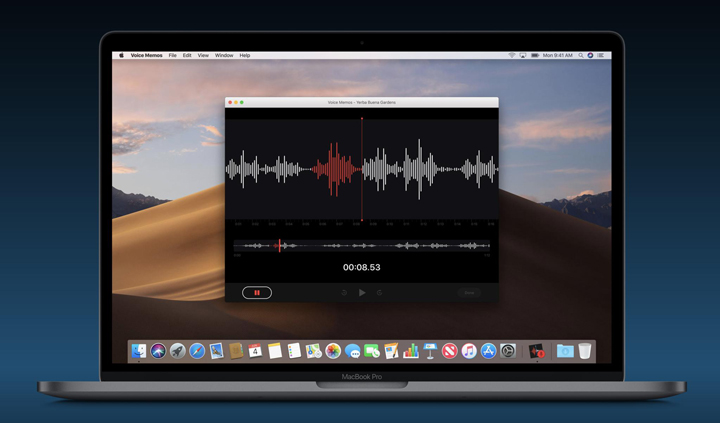
Step 1. Open the Voice Memos app on your Macbook.
Step 2. Hit the Red button to start voice recording on Mac.
Step 3. Hit the Pause button to pause your recording if needed and click Resume to continue.
Step 4. Once finished, click Done, and the recording will be saved on the left side with the name New Recording.
How to Record Audio on Mac with QuickTime Player
Best for recording external audio on Mac.
QuickTime Player, an extensible multimedia architecture bundled with macOS, offers more than just video playing and streaming capabilities. It's also a powerful audio recorder for your Mac. With a user-friendly interface and ease of use, the audio recorder on Mac allows you to capture audio from external sources for high-quality recordings. Note similar to Voice Memos, QuickTime Player lacks the ability to record internal system audio. Follow the steps below to record audio on Mac with QuickTime Player:
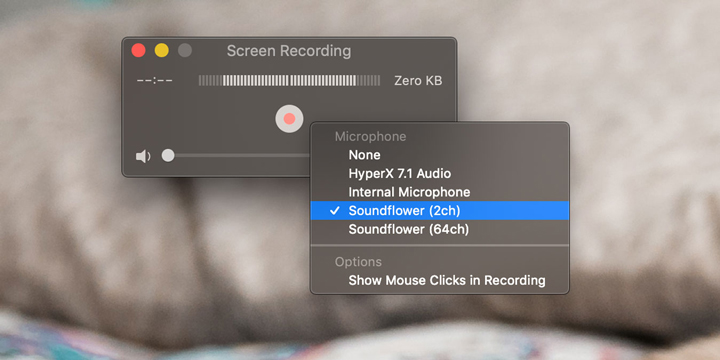
Step 1. Go to the QuickTime Player app on your Mac, and click File > New Audio Recording.
Step 2. Hit the arrow next to the Red record button, and select the desired mic and file quality.
Step 3. Hit the Rec button to record audio on Mac.
Step 4. When finished, click on Stop and save your audio recording on Mac.
How to Record Audio on Mac with Garage Band
Best for recording music audio on Mac
Garage Band is pre-installed with every Mac purchase and is one of the most user-friendly music audio recording software for Mac users. This voice recorder Mac is equipped with a user-friendly interface, an extensive sound library, and advanced features. Users can record at up to 24-bit quality and use its pre-made loops, MIDI keyboards, editing capabilities, and effects to craft professional-sounding songs. See below how to record audio on Mac with Garage Band:
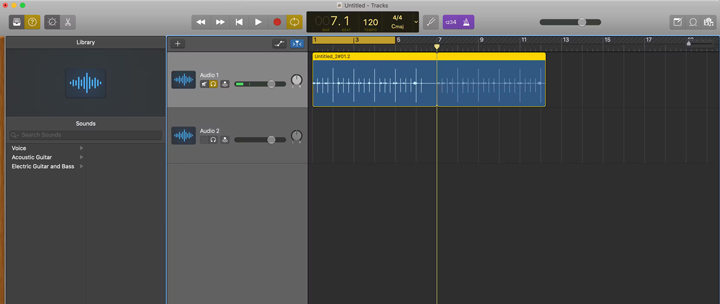
Step 1. Open the GarageBand app on your Mac, and choose Audio as the track type. In System Preferences > Sound > Input, select the preferred microphone.
Step 2. Within the app, create a New Music Project, name the new file, and click Create.
Step 3. Click the track header to choose the first track. Next, go to Track > Delete Track, and then Track > New Track. In the pop-up, select Real Instrument Track, and click Create. In the Track Info panel, opt for Vocals and ensure No effects are selected.
Step 4. Click Record to start recording audio on Mac using Garage Band and press Play to stop the recording.
Step 5. Go to File > Save to GarageBand to save the recorded audio file.
How to Record Audio on Mac with Audacity
Best open-source way to record audio on Mac
Audacity is a robust, feature-packed, and most importantly, free and open-source audio recording and editing software for Mac. The audio recording software Mac comes with a comprehensive set of features that are easily accessible through its user-friendly interface. Audacity supports various audio file formats and can even record multiple tracks simultaneously, making it an ideal option for those seeking a free audio recording solution on their Mac devices. See how to record audio on Mac with Audacity below:
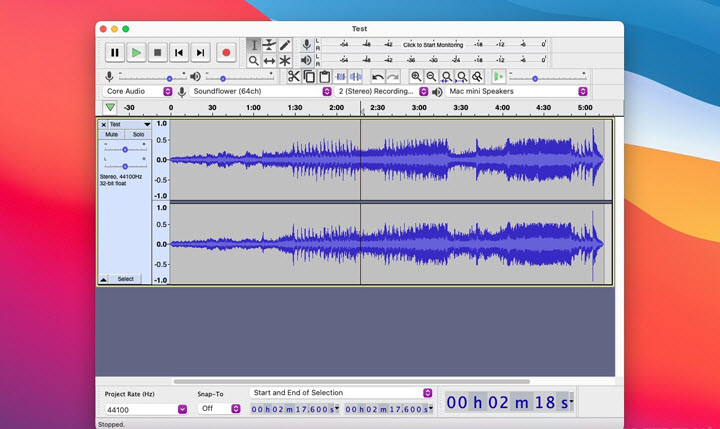
Step 1. Free download Audacity on your Mac, and run it on your computer. Open System Preferences from the Apple menu > Sound > Output, and set Soundflower as the audio source. And then in Audacity Preferences, choose Soundflower as the recording device.
Step 2. Once configured, click the Record to capture voice or system sound on your Mac.
Step 3. Once finished, press the button to stop recording.
How to Record Audio on Mac Online
Best way to record audio on Mac online
Those who are after a quick solution to record audio on Mac could check with Screen Capture. The online audio recorder for Mac offers seamless audio recording capabilities, allowing you to record audio on Mac via microphone and system sound online. Here is how to record audio on Mac online using Screen Capture:
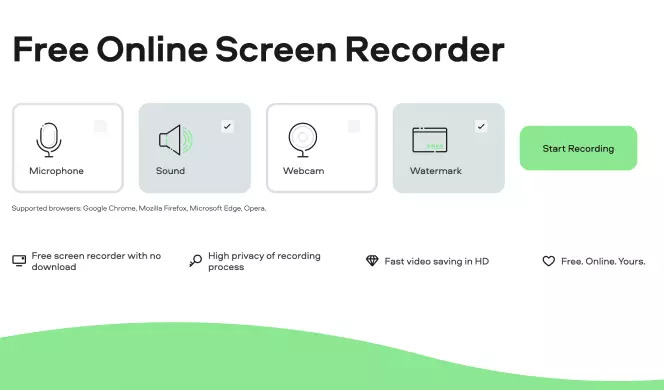
Step 1. Go to the Screen Capture website, and select microphone or computer sound as the output options.
Step 2. Click Start Recording to record audio on Mac online.
Step 3. Once finished, click Stop Recording to save the MP3 recording on your Mac.

