Why is my YouTube video blurry? Based on our tests and feedback from many users in related forums and Reddit, the "YouTube video blurry" problem occurs for various reasons:
- The source video is of low quality and is blurry.
- The source video is UHD, but YouTube is still processing the high-quality video.
- YouTube is using the AVC1 codec instead of the VP9 codec.
- Hardware acceleration toggled on in Chrome or other browsers causes the bad quality error.
- The video card driver on the viewer's side is outdated.
- It is a glitch caused by the discontinued Adobe Flash Player.
For problems from 1 to 3, they can be fixed by the uploader (the YouTuber of a specific channel); for problems from 4 to 6, they can be fixed by the viewer. Whether you are a content creator or a general audience of YouTube, you can find detailed solutions below.
1. The Source Video is Blurry or in Low Resolution
Low-definition videos can be clear when it's viewed on iPhone or other small screens. But when you switch to a larger display, it is another story. However, most of the time, we don't have the chance to re-shoot the video again, not to mention it's time-consuming to remaster the video into 1080p/4K in video editing software.
Also, for video recordings, it usually doesn't make sense to record in 1440p/2K/4K if you only have a 1080p display.
A much simpler and effortless method is to use AI tools to achieve a higher resolution and remove blurriness. After testing dozens of AI video upscaling tools, we will be using VideoProc Converter AI to fix YouTube videos of bad quality. It delivers decent quality, and outputs crispy clear imagery after the resolution boost.
In past years, AI video upscaling may not be the best choice. But with the advancement of AI algorithms, it's doing really great to keep the video natural and realistic and avoid artifacts.
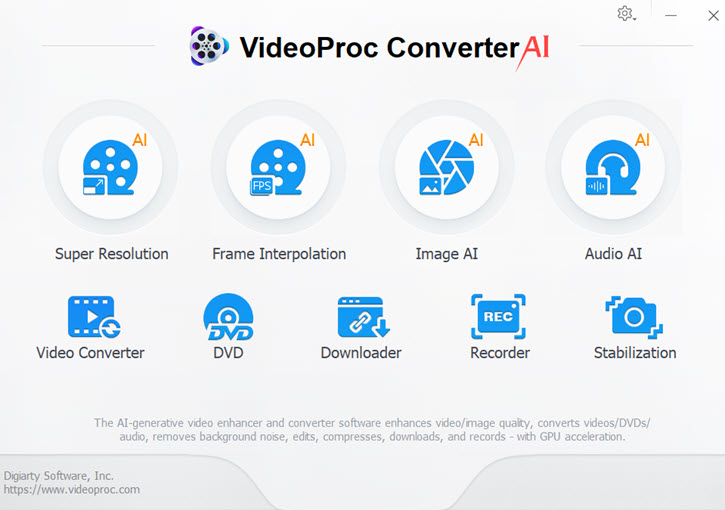
Step 1. Install VideoProc Converter AI, launch it, and click on the Super Resolution tool.

Note: The Windows version now supports AI-powered Super Resolution, Frame Interpolation, and Stabilization to enhance video and image quality. These AI features are not yet available in the Mac version but will be coming soon.
Step 2. Import your blurry video into the working panel.
If you have several videos, you can add them in batches. VideoProc Converter AI supports queuing tasks to process them in one go.

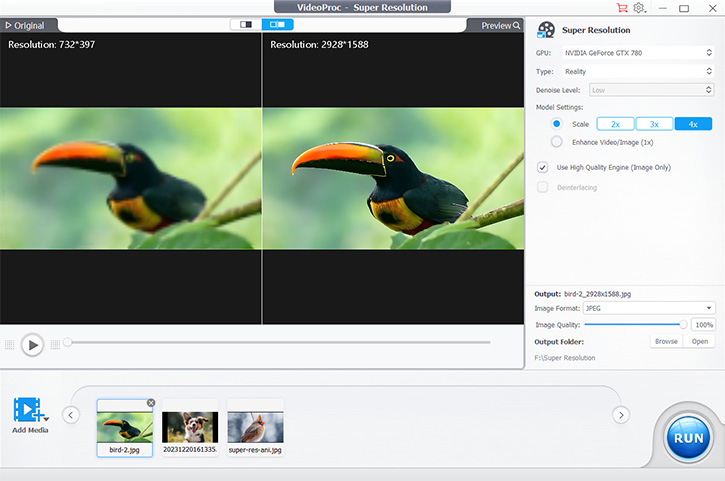
Step 3. Adjusting the Super Resolution parameters to fix blurry YouTube videos.
Depending on your source video resolution, you can set the Scale option at 2X, 3X or 4X to achieve the desired resolution.
For instance, if your resource video is 960x540, and you want to achieve a 3840x2160 (4K) definition, you can click on the 4X option. 2X will boost 960x540 to 1920x1080.
You can preview the difference in real-time. The right window displays the enhanced video, and it's much clearer and sharper than the original low-quality video. The difference will be more conspicuous after you export the video and view it on larger screens.
Note: Keep the type as Reality if your YouTube video is about real-world scenes. Switch to the Anime type if your video features flat 2D animations.
Step 4. Export the enhanced video.
Choose the High quality level, or the Highest one. Leave GOP at its default value, and select an output folder.
Now simply click Run to fix blurry YouTube videos.
Video Tutorial:
2. YouTube is Still Processing the High-Quality Video
According to the official support page of YouTube, it will first process your video into a low-resolution version, and deliver it to the viewers. Higher-resolution versions can take longer time to process, so do higher frame rate videos. For instance, a 4K@30FPS video can take up to 4 hours to finish the high-quality processing, and be available on the viewer's side.
As a content creator, we sure won't want our viewers to watch blurry YouTube videos, when they would be able to access the 1080p or 4K resolutions.
The simplest way to fix "YouTube video blurry" for this situation is to unlist or schedule the video upon upload. The idea is, that you will allow YouTube to fully process both the low quality and higher quality versions, and then make it available to the public.
Step 1. Click the Create > Upload button on the YouTube home page.
Step 2. Unlist or schedule your video.
Drag and drop your video. For the "Save or publish" option, choose the Unlisted or the Schedule option.
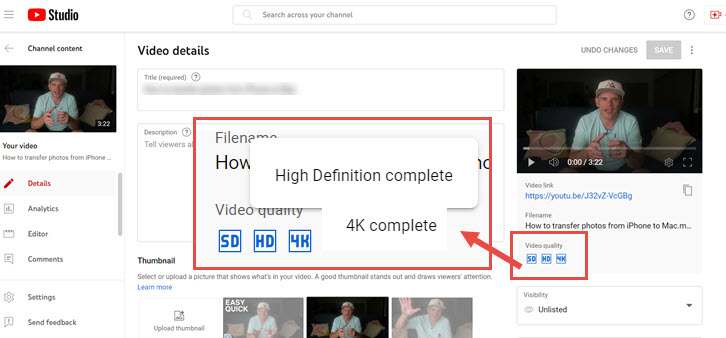
Step 3. Check if your video has finished processing in higher quality.
To do so, simply open the watch page of your video (note, it is still unlisted at this time). Then click the settings option in the player (the gear-shaped icon), and check Quality to see if the highest resolution of your source video is available now.

Step 4. Publish the video to the public.
When the high-resolution processing is done by YouTube, you can go back to the uploading page, and check the video status from Unlisted to Public.
For content creators who prefer the schedule option, make sure to publish the video 1-2 hours later at least.
To learn more about the best upload settings, including video codec, audio codec, bitrate, frame rate, and more, you can further read this tutorial on the best YouTube video upload settings.
3. Force YouTube to Use the VP9 Codec
Based on our test, this trick may not always work. It is more about a trial-and-error process. Still, we listed out the steps to force YouTube to use the VP9 codec, instead of using AVC1.
Step 1. Test uploading a short 4K video to your channel.
You can unlist it or set it as private to prevent your audience from seeing it.

Step 2. Check if this video triggers YouTube to use the VP9 codec.
To do so, go to the watch page of this video, right-click in the player and hit "Stats for nerds". You can check the information in the codec section.
4. Turn off Hardware Acceleration in Chrome or Other Browsers
If you are encountering this specific issue: "YouTube videos are blurry on full screen except when you scroll", turning off hardware acceleration in your browser will fix the issue. Here are detailed steps:
For Chrome
Step 1. Click the three-dot icon to open up Chrome settings.
Step 2. Hit System on the left bar.
Step 3. Toggle off the option "Use hardware acceleration when available".

For Firefox:
Step 1. Go to Menu > Settings > General, and navigate to the Performance section.
Step 2. Disable: Use recommended performance.
Step 3. Uncheck this option: Use hardware acceleration when available.
5. Update the Driver of the Video Card for UHD Playback
Go to the Control Panel and open the Device Manager window. If you don't see the Device Manager option in the Control Panel, you can type "Device Manager" in the search box at the top right corner of the Control Panel. Right-click on the graphic card(s) and choose Update driver.
If the Update Driver option won't start automatically, you can also manually update the driver. Below are links to download the latest driver from your manufacturer.
- Intel: https://www.intel.com/content/www/us/en/support/detect.html
- AMD: https://www.amd.com/en/support
- NVIDIA: https://www.nvidia.com/en-us/drivers/

Bonus Tips:
If you don't see the Control Panel on your desktop shortcut, you can press the Win button+R. It will call out the Run window. Then type in devmgmt.msc in the Run window. It will open up the Device Manager window directly.
6. Uninstall Adobe Flash Player
According to Adobe official announcement, after December 31, 2020, Adobe ceased its support for Flash Player and prevented Flash content from executing in Flash Player as of January 12, 2021.
However, users who do not stay informed about such tech news might not be aware of the discontinuation of Flash Player. Outdated Flash Player utilities can result in blurry YouTube video playback, as well as blurry issues with video streaming from other websites.
Removing Flash Player from your system will maintain the security of your system because Adobe will no longer release updates or security patches for Flash Player after the End of Life (EOL) date. Here are detailed steps:
Step 1. Press the Win button on your keyboard, or directly click the Windows Start icon on your computer.
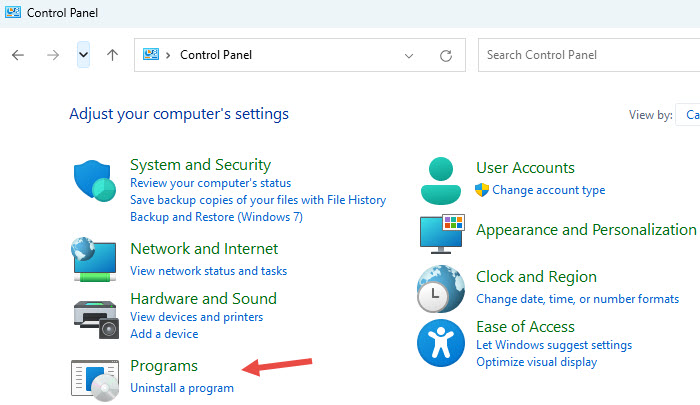
Step 2. Input Control Panel, and click open it.
Step 3. Hover to the Programs section, and click "Uninstall a program".

If you don't see this option, you can also input "Programs and Features" in the search box of the Control Panel.
Step 4. Uninstall programs that started with Adobe Flash Player in the newly opened window.
Once you are done, you can re-start Windows, and playback YouTube video again. Hopefully, this will resolve the YouTube video blurry issues.


